
Hi again this week Everyone!!! I'm back with another after party make using the new stamps and stencils from Tim Holtz and Stamper's Anonymous...this time a pair of very textured 6x6 inch chunky canvases made with the new Eccentric and Botanical Collage Stamp Sets and Mini Focus Layering Stencil as well as the cool Freight Elements Number Stencils. I made these for my daughter, and let her choose the colors, but realized that the colors matched my bedroom and now I don't want to give them to her. LOL!!! I guess I'll have to make another set. I totally love how these came out, and I wish I took better photos so you can really appreciate the textures and colors on these. This is a super long post with lots of pictures to understand the placement of the images on the sides of the canvas in case you want to create these for yourself. I hope you understand the directions with the photos. Enjoy!


Cut two pieces of Plain Collage Tissue Wrap to about 5x8 inches (one for each canvas). Place all four images from the Botanical Collage set into the platform and arrange them so they will fit well on the tissue. (I tried to arrange the butterflies and flowers together as they would go on the canvas for less cutting later, but I didn't do it correctly. I should have done both like the one you see on the left.) Stamp the images on the tissue wrap, remove and then stamp them again on the other sheet, using Black Soot Distress Archival from Ranger. Set these aside to dry a bit as the ink stays wet a little longer on the tissue, or you can use a heat tool.
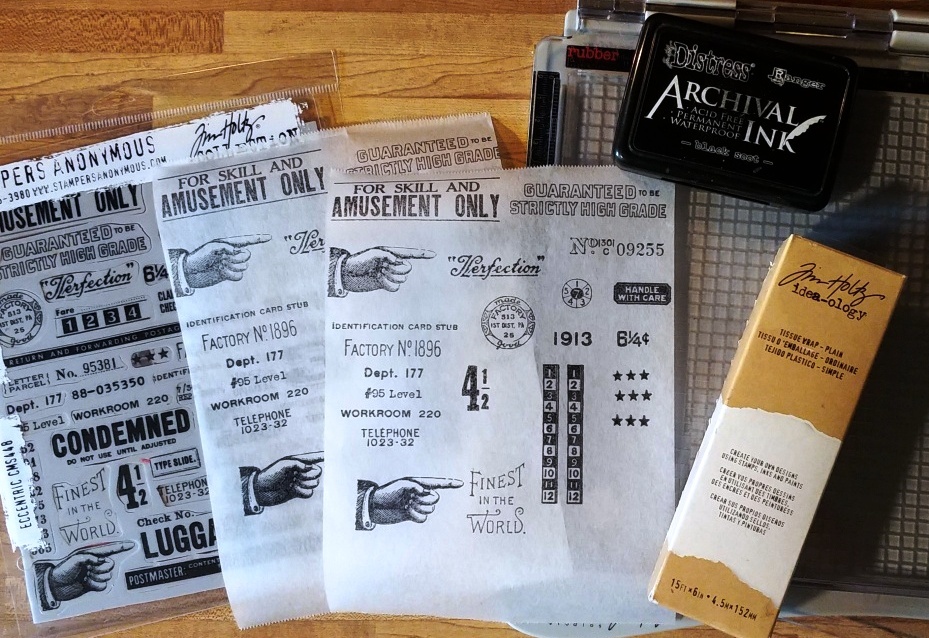
Cut two more pieces of tissue about the same size as before (one for each canvas). Take images from the Eccentric Stamp Set (there are so many to choose from) and arrange those on the platform, keeping in mind that the sentiment that the finger points to will change for the other tissue, or just have both on each tissue and use them for another time. Stamp the images on the tissue using Black Soot. Remove the sentiment and add another and then stamp these again on the other tissue. Restamp the number line on each and set of stars two more times so you have three sets. Set them both aside to dry awhile.

Take two 6x6 inch chunky canvases and paint over both with White Gesso mixed with a little water to thin it down some. Let these dry. The Gesso primes the canvas and makes it smoother for paint and Collage Medium. Using a 1/2 inch thick paintbrush, you can either free hand stripes (like I did) or paint over the whole canvas with Antique Linen Distress Paint. If you have the paint with the dabber the stripes go on real quick. You need stripes on all four sides as well. I made mine about 1/2 inch thick and 1/2 inch apart. Once dry, paint stripes of Gold Metallic in between the Antique Linen. I think this Gold Metallic Paint from Ranger is discontinued now, so if you don't have it another gold is fine (Tarnished Brass Distress Paint would work great.). Let this dry.

Turn one canvas so the stripes are horizontal and one vertical so you have a bit of difference between the two. Cut out the flowers and butterflies leaving a bit of a border so you don't have to be perfect, and adhere one type of flower to the top left of the front side and to the bottom of the right side of one of the canvases. On that same canvas adhere one type of butterfly to the top left side and to the bottom right front of the canvas using Collage Medium under the tissue and then on top to seal it. Let dry. On the other canvas adhere the other flower to the bottom right front side and top left side. Adhere the other butterfly to the top left front and bottom right side. Let dry. Cut out the pointing finger with sentiment for each canvas. Collage one below the flower on the left side front, and collage one on the other canvas above the flower on the right front. Let dry, and clean your brush out as it with be a bit before you need it again.

Choose two colors of Distress Paint to use for each canvas. I used Aged Mahogany and Forest Moss. Using the 'No.', the '1', and the '2' from the Freight Elements Laying Stencil Set, play with the arrangement first so the 'No. 1' fits well in the upper right front corner of one canvas and the 'No. 2' fits well in lower left front of the other, overlapping of course but not covering up any parts of the designs. Stenciling in one part at a time (and letting it dry before doing the other one) use a paint brush and one color of Distress Paint (or paint with a dabber like I did) and fill in the stencil lightly so the paint doesn't bleed under the stencil. You can go back and add more paint later to darken the image. Clean the stencil immediately after with water to remove the paint. Once dry, stencil in the other using the same paint, and repeating the process.

Cut out all the other images from the tissue for each canvas and play with the arrangement first before collaging them on with the medium. I did the same images on the top, bottom, and sides of each canvas but I did the opposite side of each so that when they are finished and placed on the wall or wherever you will see different images on those sides. That sounds a bit confusing, but if you look closely at the picture the sides of the canvases look different but on the opposite sides the designs are the same as the other. It makes it more interesting when they are placed close together when you put them on display. Hope that makes sense. On the front of both I pretty much placed the other images in the same spots for each flower and butterfly...like the number line in the center, the 'handle with care' next to the flower, the '6 1/4 next to the large stenciled number, etc. But, the number circle is placed differently on each one because of space. Just play with your images to see where they fit best. Let these dry for a bit before moving on, at least a few hours.
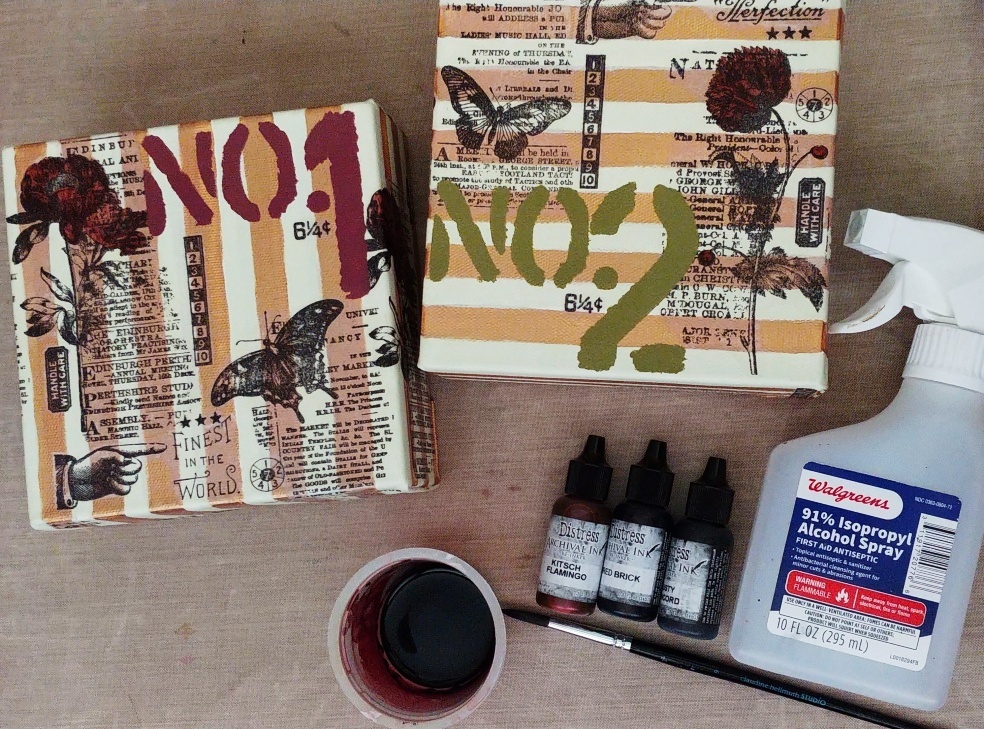
Using Distress Archival Reinkers (they are permanent and translucent and perfect to color in the images on canvas) and 91% Rubbing Alcohol to color in the images, you can mix the colors to get different ones. Since there is no Aged Mahogany Archival YET, to color in all the flowers with a deep dark red tone, mix a few drops of Fired Brick, Kitsch Flamingo, and Dusty Concord in a cup and mist a little Rubbing Alcohol in (you cannot use water as the inks are not water based). This will stay wet for a while, so take your time and paint in everything you want a deep red. (Note: I painted in the 'handle with care' but later I went to add white to the inside and messed it up so bad that I had to stamp it again and just collaged it on the top with no color this time. Sometimes that happens.)

On all the other images I used the exact colors of Reinkers and did not mix any colors. I used Peeled Paint and Crushed Olive on all the leaves, Frayed Burlap on the hand and jacket, and Fossilized Amber on the butterflies and flowers, using a detail paintbrush and the alcohol.

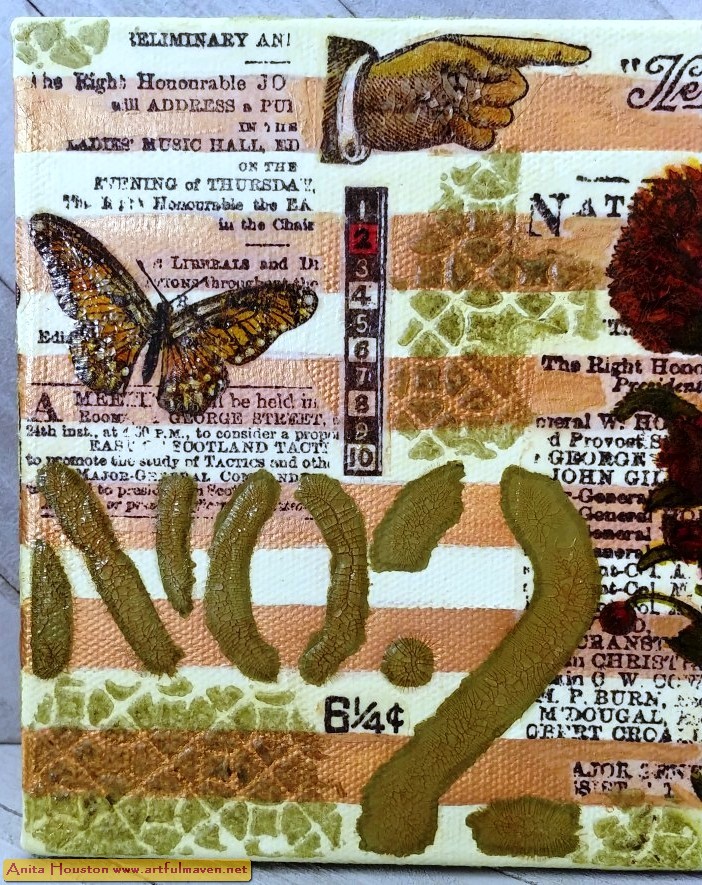
I wanted the stenciled 'No. 1' and 'No. 2' to pop a little more, so I used same tone permanent markers to outline them. You don't have to do that, but it does help. I also used the markers to color in a few words and numbers from the Eccentric images. Use a white pen to add dots to the butterfly wings and the white shirt. To create awesome texture on the canvas, lay the stencils back on and apply a nice medium coat of Translucent Crackle Paint on. You can free hand this if you are worried about it bleeding underneath. Apply more on all the areas you colored in...the flowers, leaves, butterflies, hand, number line, number wheel, whatever. Let dry.

To add even more texture and to fill in any larger open spots, gather an Anti-Static Pouch, a Palette Knife, Translucent Crackle Paste, Peeled Paint Embossing Glaze, and the Mini Focus Layering Stencil. (Note: It's best to work on a side at a time and allow for drying time and embossing before moving on to the next side, so allow ample time for this step.) Pounce the Anti-Static Pouch over the side you want to work on. You must do this or the powder will stick everywhere and not be fun to wipe away...trust me. Lay the stencil where and what direction you want it (I did different directions rather than straight and linear.) and apply the Translucent Crackle Paste through with the Palette Knife in a good medium thickness. Remove the stencil and clean away any paste that you don't want where it is (like images), and immediately pour on the Peeled Paint Embossing Glaze over a scrap piece of paper. Let this dry about 30 minutes before heat embossing. After embossing, move to another side and repeat the steps until all sides have the embossing.
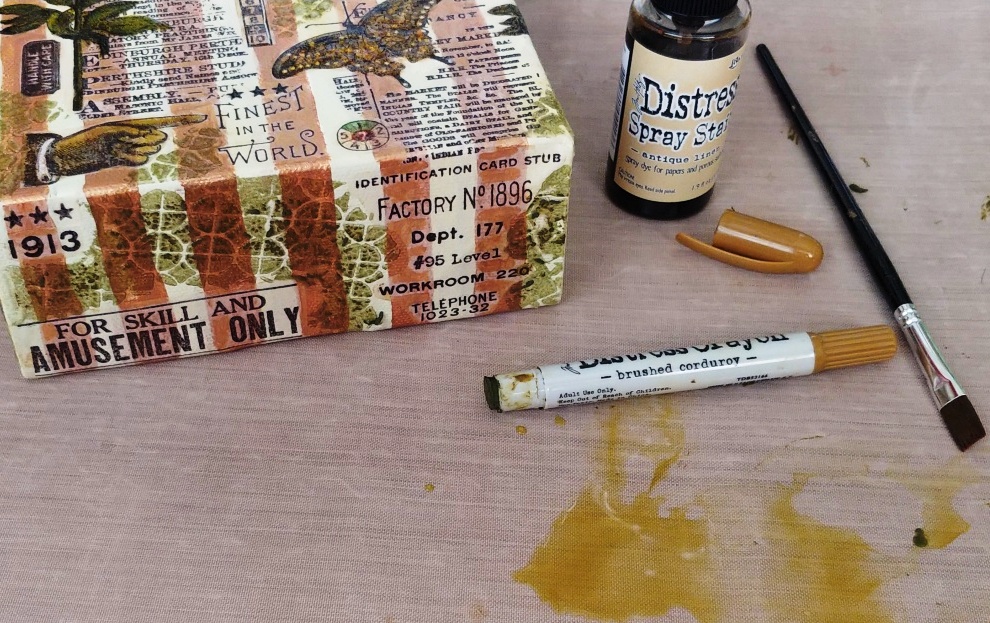
To bring out all the cracks in all the Texture PAINT areas as well as add a vintage tint, add a bit of Antique Linen Distress Spray Stain to a craft sheet or glass mat and pick up with a paintbrush. Color in and push in the spray, let it sit a few minutes, and then softly wipe away with a soft rag so you don't accidentally pull up any of the crackle. For the Crackle PASTE areas, lightly rub a brown (I used Brushed Corduroy) Distress Crayon over the raised areas and then use the Antique Linen Spray with a brush to push in the crayon into all the cracks and between the stenciled areas. Let dry. Once all is done, you can seal the canvas if you want with a spray fixative or sealer.


No. 1 Close-ups


No. 2 Close-ups


 |
| Right Sides |
 |
| Tops |
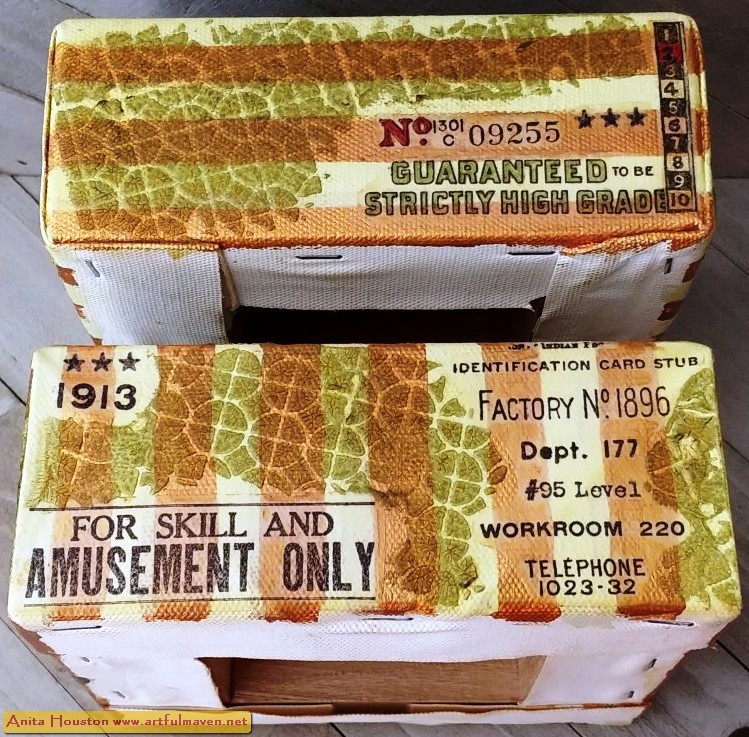 |
| Bottoms |

 |
| Where I put them in my daughter's room until she takes them to her apartment. ;0) |
Supplies:
(Stamp Platform, Scissors, Craft Mat, Small
Detail and Medium Paint Brushes, Collage Brush, 91% Rubbing Alcohol, Palette
Knife, Sheet of Paper, Anti-Static Pouch, Heat Tool)
-Tim Holtz Idea-ology: Plain Tissue Wrap
-Stamper's
Anonymous Tim Holtz Stamp Set: Botanical Collage, Eccentric
-Ranger Tim Holtz Distress Archival Ink:
Black Soot
-Ranger Gesso: White
-Ranger Tim Holtz Distress Paint: Antique
Linen, Aged Mahogany, Forest Moss
-Ranger Paint Dabber: Gold
-Ranger Tim Holtz Collage Medium: Matte
-Stamper's
Anonymous Tim Holtz Element Stencils: Freight
-Ranger Tim Holtz Distress Archival
Reinkers: Fired Brick, Kitsch Flamingo, Dusty Concord, Crushed Olive, Peeled
Paint, Frayed Burlap, Fossilized Amber
-Ranger Tim Holtz Distress Crackle Paint
Translucent
-Stamper's
Anonymous Tim Holtz Layering Mini Stencils: Mini Set 52 (Focus)
-Ranger Tim Holtz Distress Crackle
Paste: Translucent
-Ranger Tim Holtz Distress Embossing
Glaze: Peeled Paint
-Ranger Tim Holtz Distress Spray Stain:
Antique Linen
-Ranger Tim Holtz Distress Crayon:
Brushed Corduroy
-Faber-Castell Pitt Pens: Indian Red,
Earth Green
-2 6x6x2.5 Inch Chunky Canvases, White
Pen, Black Permanent Fine Pen
Phew, that was long. Thanks so very much for stopping by and for commenting...it means so very much! I'll be back again real soon. Until then, I hope your hands get creatively dirty soon!


Really nifty way to use these rub ons! I thought they were stamps! Mwah!
ReplyDeleteHi. There are no rub-ons...these are all stamps and stencils. Thanks.
DeleteWhat a great home decor canvas, Anita. Love the use of all the elements.
ReplyDelete