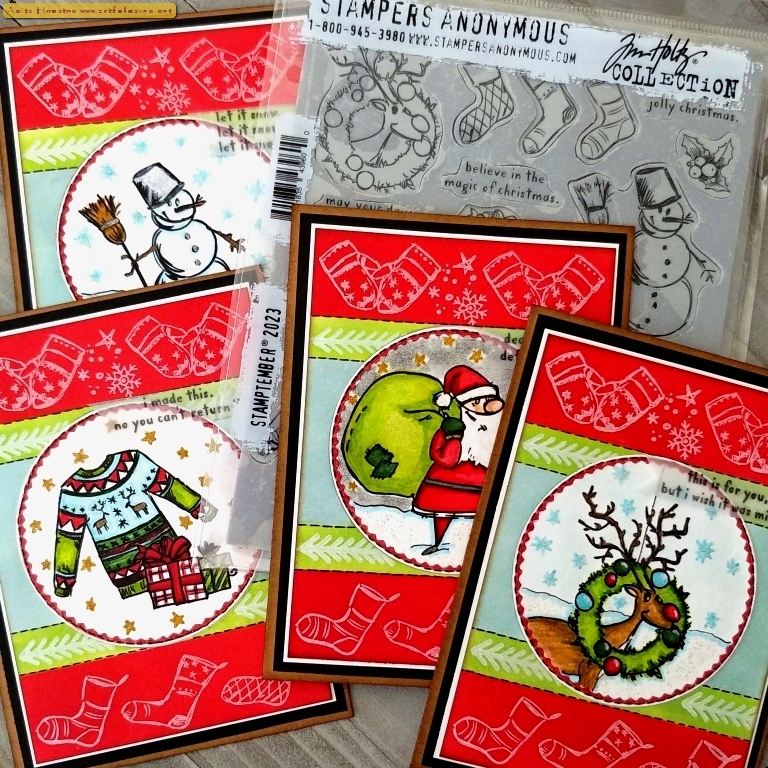
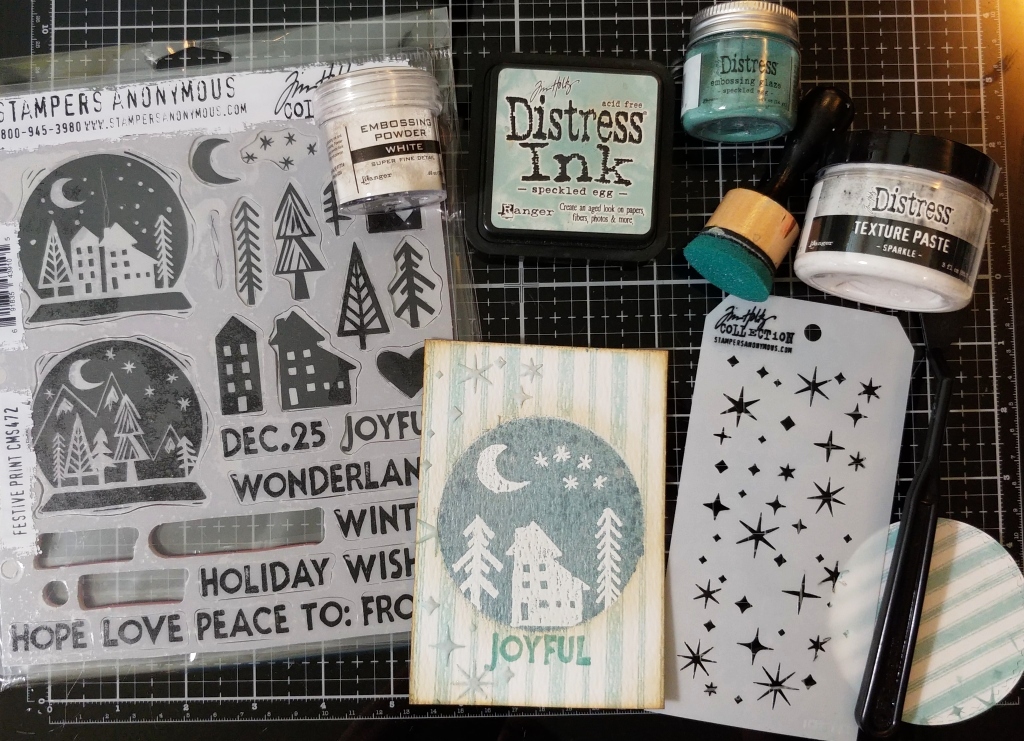
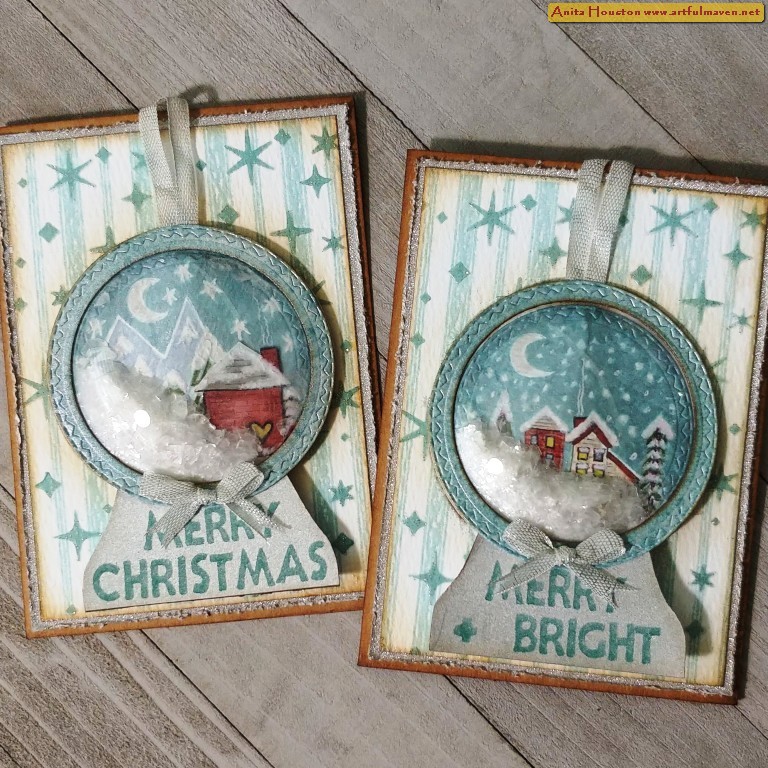
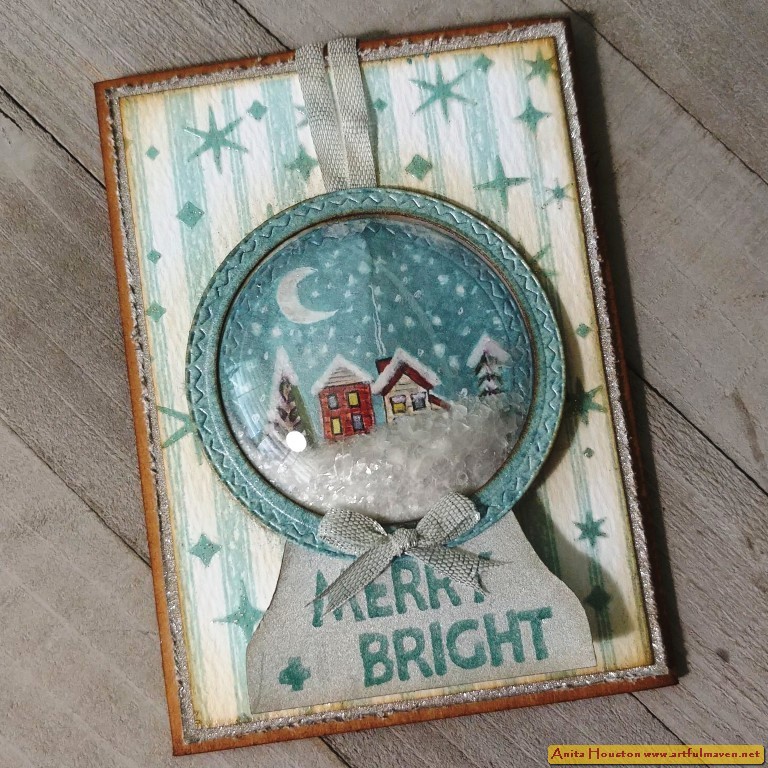
Hello Everyone! The
Tim Holtz Stamper's Anonymous Christmas Release LIVE is still playing, and oh my word is it ever so inspiring! The makes are beyond fabulous and all so different using the same five sets...always impresses me so much. Here is one of my makes from the LIVE, featuring the
Festive Print and Ticking and Grain Stamp Sets plus the
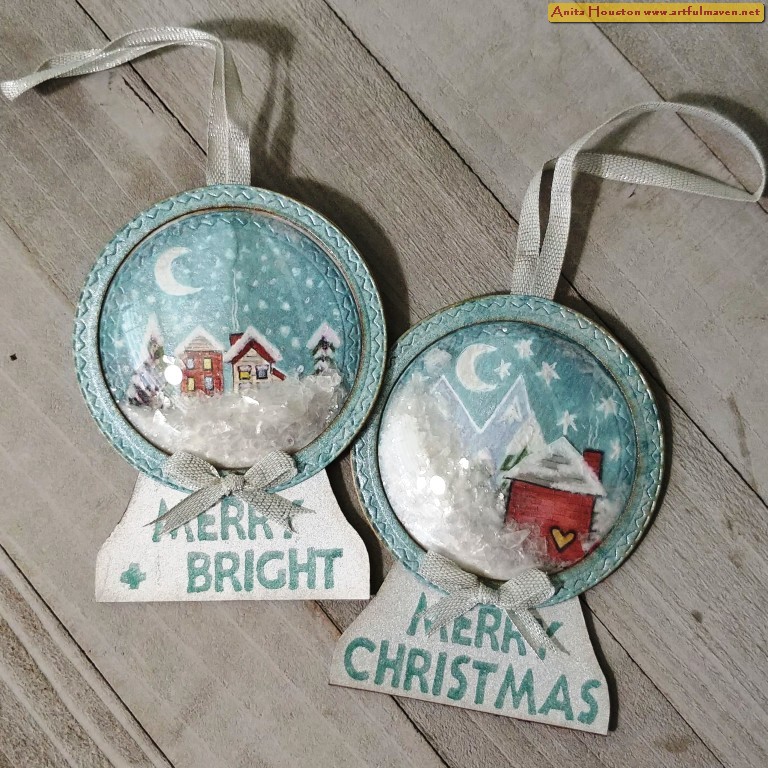
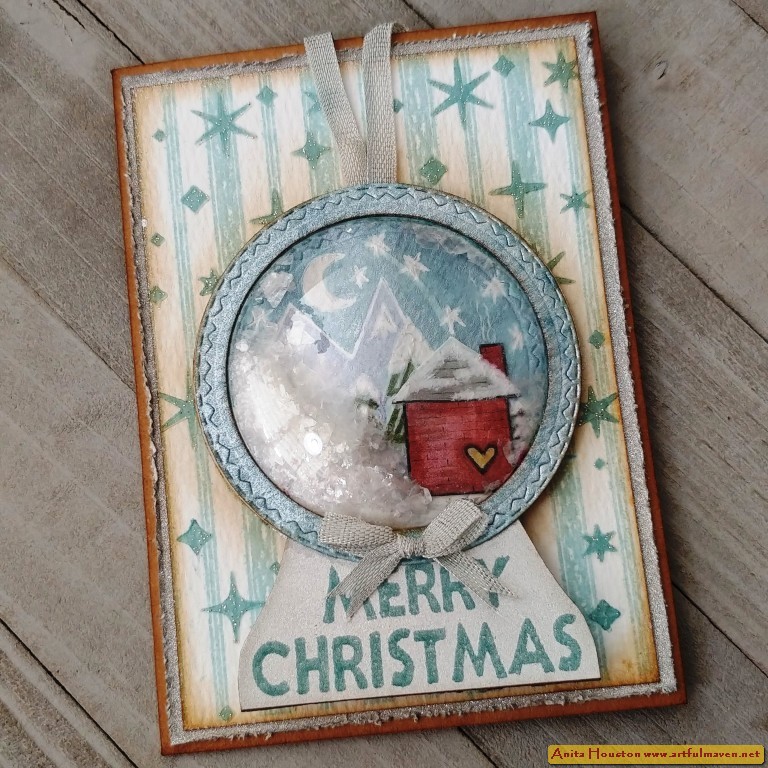
Twinkle Mini Layering Stencil. I thought is would be so fun to add the gift onto the card, so I added a magnetic Snow Globe Ornament to the front that can be taken off and hung and then placed back on after the holidays for storage. I think it would be so fun to receive this. Hope you enjoy!

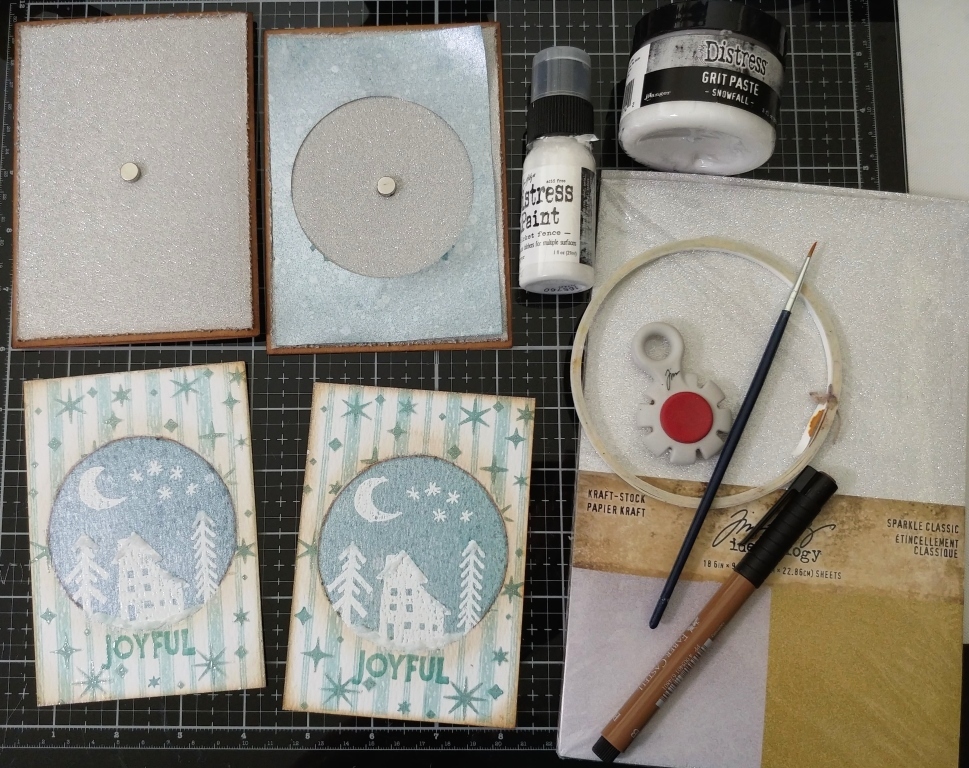
(For two cards) In order
to figure out the sizing on the snow globe, I played around with the 2.5"
Circle Shaker Domes and the Stitched Circles Framelits from Sizzix, along with
the two snow globe images on the Festive Print Stamp Set. Of the 6 Stitched
Circles you will need #3 and #4 (from littlest to biggest). Using #4, die cut
two circles using Distress Watercolor Cardstock from Ranger, then two more but this time
add two sided tape on the back before you die cut. Set the two without tape
aside. For the two with tape, add the smaller #3 die in the center and die cut
so you will have one small circle and a frame for both pieces. Set the two
frame pieces aside. Take the two smaller circles and stamp a snow globe image
onto each using Speckled Egg Archival from Ranger, centering the images best as
you can. Set all these aside for now. (I set these aside to figure out my card
front from here, but you can continue on with Step 6 to finish these if you
want and then come back to the card.) Note: I also stamped two small houses
with the heart, but I wasn't sure at this point if I was going to add them to
the snow globes.

Using a piece of scrap paper, cut it to 3 5/8
x 5 1/8", and then die cut the #4 Stitched Circle from the very center, to
use both of these as a mask. Cut two pieces of Distress Watercolor to 3 5/8 x 5
1/8" for the card fronts. Place the frame mask on one, and ink in the
circle with Speckled Egg Archival with an Ink Blending Tool, and then do the
other. Place one in a stamp platform and add the Ticking Background Stamp over
and close the door to secure it. Place the circle mask over the inked circle
and stamp the Ticking over with the Speckled Egg, and repeat with the other. You
are finished with the Ticking. Place the circle mask over the inked circle and
lightly ink around the circle mask with Gathered Twigs Distress Ink and an Ink
Blending Tool to create a light halo around, and then do the other. Ink the
edges of both card fronts with the Gathered Twigs.

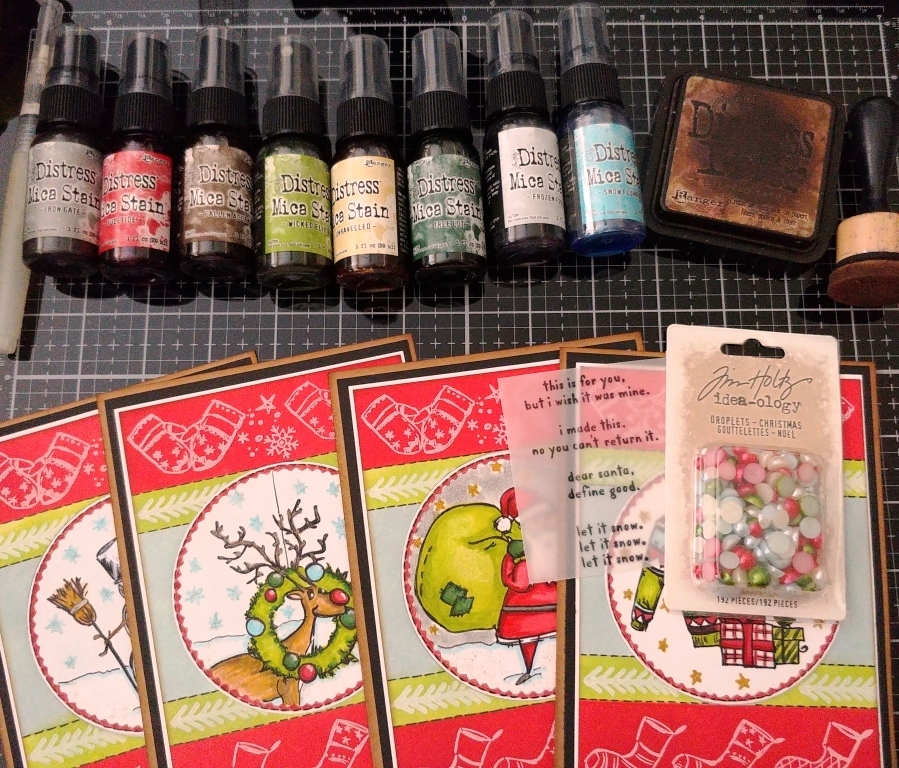
Place the frame over one
of the card front and lay on a paper towel or in a spraying box. Shake up both
Frozen Fog and Winterfrost Distress Mica
Stains, and then lightly mist each over the circle. Let the mask dry a bit and
then repeat with the other. Clean the nozzles of both to prevent clogging
later.

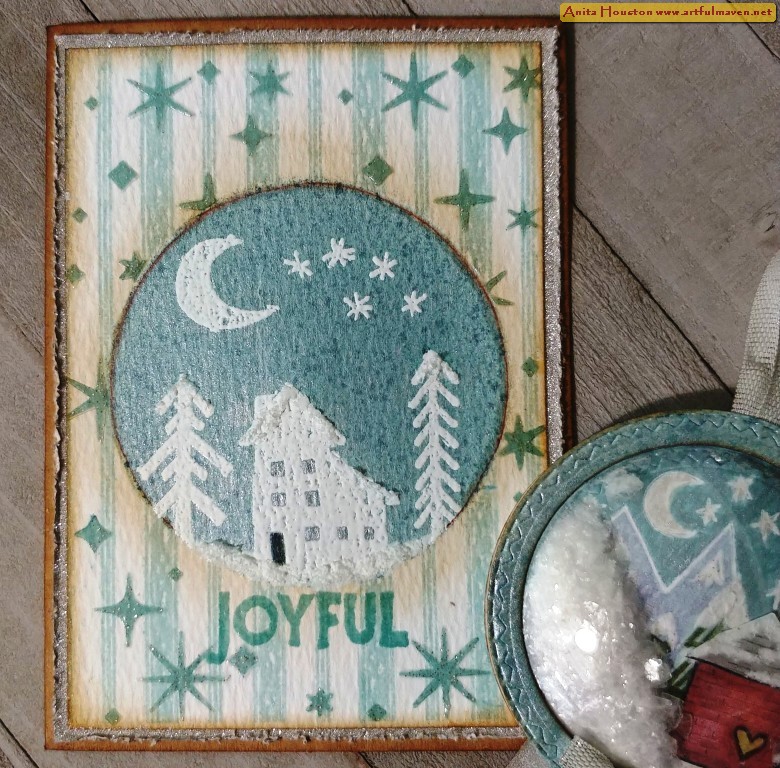
Place one of the card front into a platform
and add the moon, stars, a house, and two trees to create a scene, and close to
secure the stamps. Pounce over the card with an Anti-Static Pouch to prevent
powder sticking where you don't want. Lay the frame mask over to expose only
the circle. Stamp the images with Speckled Egg Distress Ink or Archival a few
times to get plenty of ink down, and then quickly remove the mask and pour
White Embossing Powder over. Tap off excess and heat emboss with a heat gun.
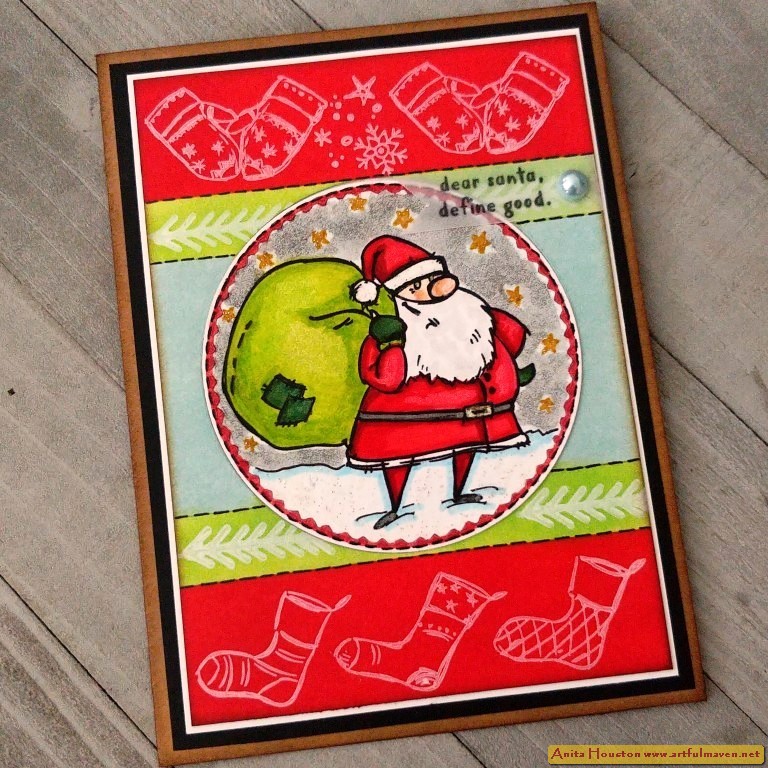
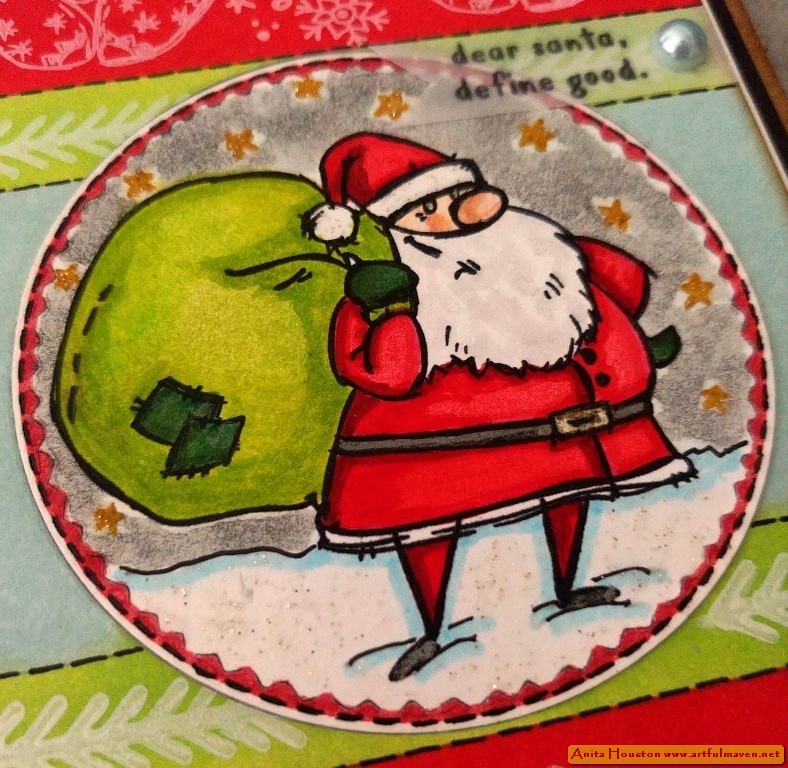
Repeat with the other card front. Select a sentiment from the stamp set and
stamp it below the circle in Speckled Egg and this time pour Speckled Egg
Embossing Glaze over, and then heat set. Do the other, and then you are
finished with the stamping on the card front. Lay the circle mask over the
center, and then lay the Mini Twinkle Layering Stencil over the left side. Ink
in any of the images with Speckled Egg Archival to form a border around the
circle and sentiment, and then leaving the stencil in place, use a palette
knife and the Sparkle Distress Texture Paste and apply the paste over the inked
stars. Remove the stencil and clean and wipe any paste from the circle mask.
Let dry completely, and then do the other side. Repeat with the other card
front.
Use a bit of Picket Fence
Distress Paint to paint in a white snowy area between the tree bottoms and the
bottom edge of the house. Let dry, then apply Snowfall Distress Grit Paste over
the white area and anywhere else you'd like. Let dry. Use a brown permanent pen
to draw a line around the circle to make a border. Cut and fold a Kraft
Cardstock base card to 4 x 5.5" times two, and ink the edges with Gathered
Twigs Distress Ink. Cut a Silver Sparkle
Classic Kraftstock piece to 3 7/8 x 5 3/8" times two, and ink those edges.
Then run a distress tool around the edges of the silver. Add two sided tape to
the back and add these to the card bases. Take one of the mini craft magnets
and adhere it to the center of the Silver Kraftstock with a bit of two sided
tape, using the frame mask to help you locate the center. Then add the card
front on with two sided tape, centering on the silver. Do the other, and then
set these aside.
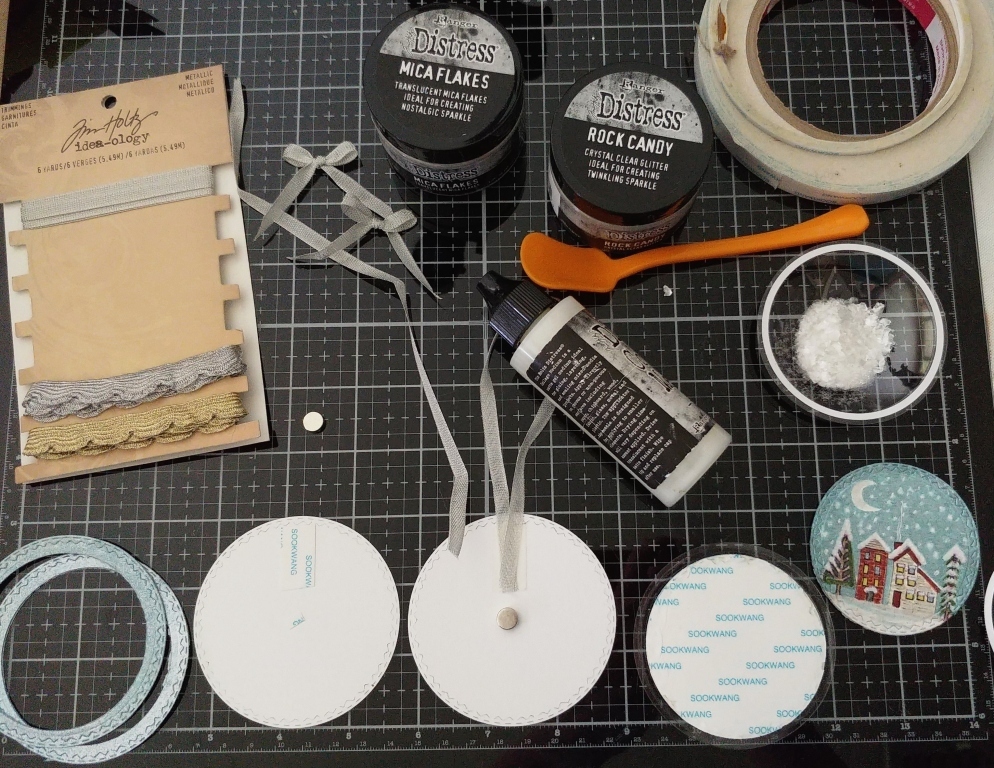
(Back to the snow globe.) Take the two small
circles with the snow globe images, and color the sky in a little darker with
the Winterfrost and Frozen Fog Distress Mica Stains with a Detail Water Brush. Add
watered down Frozen Fog to the moon, stars, and all snowy areas. Use Distress
Watercolor Pencils and a Detail Water Brush to color in the mountains, trees,
and houses. Outline with a brown and black pen, and add white details with a
white pen. Color in one small heart house and cut out, and adhere to the
mountain scene on the right. Use a small brush and add Sparkle Texture Paste to
all the snowy areas and let dry. Take the circle frames and ink over them with
Speckled Egg and then mist them both with Winterfrost and Frozen Fog. Set them
aside.

Take the larger white
circle (smooth side up), and add two sided tape at the top and secure a silver
ribbon loop to it (about 7 inches long), and then add a tiny piece of tape to
the middle and secure the magnet to it making sure it's the correct side so that
it will magnetize to the other on the card. Remove the backing on the colored
images and press onto the larger circle in the middle, matching top side up
with the ribbon hanging, and smoothing around the magnet and pressing well to
secure...it will be slightly raised in the center from the magnet. Pour some
Rocky Candy Glitter and Mica Flakes into a dome about a teaspoon full together
(I put too much.), then remove the sticky backing, add a little Collage Medium
for extra strength, and then lay the top larger circle on top while lifting
above your head and pressing to seal well, and not turning it over it. Keep
pressing and lay it somewhere to dry before flipping it over so that the
glitter moves around go the glitter doesn't stick to any glue. Leaving it on a
cup rim that is smaller will keep it secure until dry. Do not put on ring frame
yet.

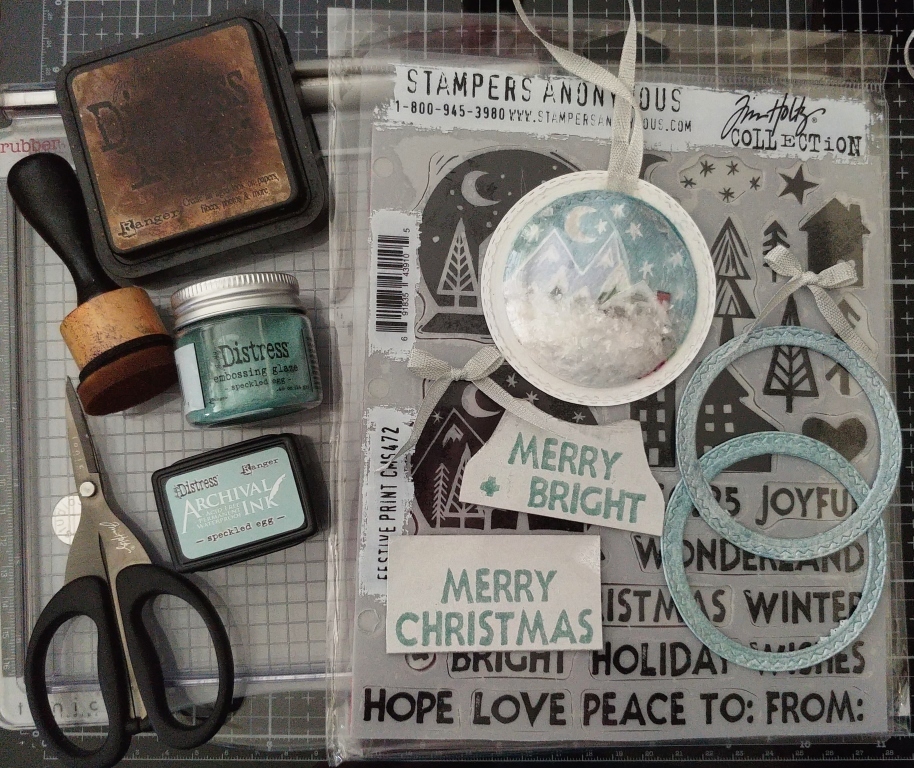
Cut
two pieces of Silver Sparkle Kraftstock to about 1.5 x 6" and set one
aside. Lay one in the stamp platform and add one sentiment to one side (two
words on top of each other) and close to secure. Stamp the sentiment a few
times using Speckled Egg Archival so you can see the image well on the sparkle
and then immediately pour Speckled Egg Distress Embossing Glaze and heat set.
(NOTE: When you heat set the Silver Sparkle the glitter sort of melts away
leaving just a flat silver foil look. I thought this was so cool, so I kept
it.) Flip the paper to the other side and add another sentiment and repeat the
steps. Add two sided tape to the back and secure the other Silver Sparkle on
the back. Cut the sentiments apart about 1/8" away from bottom last
letter. Cut around one to look like a tapered base, and then cut a round shape
at the top that will fit snuggly against the edge of the shaker. Use this
sentiment as a guide to cut around the other sentiment so they look the same.
Ink the edges of this with Gathered Twigs Distress Ink. and add a tiny strip of
two sided tape to the curved cut at the top of each. Adhere the base piece on
to the bottom lip of the shaker. Add a tiny bit of Collage Medium around the
lip of the shaker and secure the circle frame on pressing tightly to make sure
everything is secure. Ink the edges of the frame with Gathered Twigs. Tie a small bow using the same ribbon, and
fish tail cut the ends and cut short. Use Collage Medium to adhere the bow to
the bottom of the shaker above the sentiment base. Lay the snow globe shaker on
the card front to magnetize in place.


(Paper Trimmer, Scissors, Two Sided
Tape, Die Machine, Stamp Platform, Scrap Paper, Ink Blending Tool, Anti-Static
Pouch, Heat Tool, Palette Knife, Distress Tool, Small Paint Brush, Detail Water
Brush)
-Sizzix Circle Shaker Domes: 2.5"
-Sizzix Tim Holtz Thinlits: Stitched
Circles
-Ranger Tim Holtz Distress Watercolor
Cardstock
-Ranger Tim Holtz
Distress Archival Ink: Speckled Egg
-Stamper's
Anonymous Tim Holtz Stamp Set: Festive Print, Ticking + Grain
-Ranger Tim Holtz Distress Ink: Gathered
Twigs, Speckled Egg
-Ranger Tim Holtz Distress Mica Stain:
Frozen Fog, Winterfrost
-Ranger Embossing Powder: White
-Ranger Tim Holtz Distress
Embossing Glaze: Speckled Egg
-Stamper's Anonymous Tim Holtz Layering Mini Stencil: Set
57(Twinkle)
-Ranger Tim Holtz Distress Texture
Paste: Sparkle
-Ranger Tim Holtz Distress Paint: Picket
Fence
-Ranger Tim Holtz Distress Grit Paste:
Snowfall
-Ranger Surfaces: Kraft Cardstock
-Tim Holtz Idea-ology: Sparkle Classic Kraftstock,
Metallic Trimmings
-Ranger Tim Holtz Distress Watercolor
Pencils
-Ranger Tim Holtz Distress Glitter: Rock
Candy
-Ranger Tim Holtz Distress Mica Flakes
-Ranger Tim Holtz Distress Collage
Medium: Matte
-Brown and Black Permanent Pen, White
Pen, 4 Mini Thin Craft Magnets (for two cards)
Thank you all so much for stopping by and commenting! I appreciate you. I'll be back soon. Until then, I hope your hands get creatively dirty soon!