Showing posts with label Encaustic. Show all posts

Sunday, October 18, 2015

Encaustic Animals!!!

A few weeks ago I put out a post on my Facebook Page that I was going to my daughter's High School to teach Art classes for the week, and I promised photos. Well, the week turned into two days, and three days the following week due to the children's sports and activities schedules. I didn't want to rush them to finish, so I offered to give them more time before I came back to finish them up. I'm so glad I did that because they blew me away. I think I learned more from them than they did from me. It was a fabulous experience, and I will definitely do it again. Everyone did a bang up job, and their behavior was wonderful...that was the part I was worried about, but all for nothing. They are a great group of kids, and so talented.  I am so glad my daughter made me go ;0)...and I am so thankful to her exceptional Art teacher Mrs. McClaine for inviting me!
So as promised, here are a few photos. I couldn't take a picture of each piece (90+ children), but I have some of the pieces that really stood out.
This is a super calm and clean photo! This was one of the first classes, so everything was still neat and tidy, and the students were eerily quiet. After six classes, there were Faber Castell Gelatos everywhere, and even color on the floor. It was the most beautiful mess, and loud mess! I told them they could go for an Andy Warhol type vibe, but each person took from what I taught and went their own way. That is what I like the most! Nothing could have made me happier.
I gave each student eight choices of animals for them to use, and this rack held all the canvas boards. It was such a great way to store them. I might need one.
Only these six didn't quite get finished before I left. They only have the last two steps to go, but so far they were amazing.
Lots of the kids gave their animals names. We called this one Blaze the Cat! This photo doesn't do her justice.
LOVE this horse!
This pig was colored so wonderfully!!!
So cool!
Beautiful!
That purple orangutang was precious!
Cute cute cute!
This is Mrs. McClaine's. I love the colors she used!
This is one I was demoing along the way. It's not my favorite, as I had to go real fast, but it's still cute.
And here is the original I made that inspired the class, and in turn they inspired me much much more! They lit an excietment bug under me like I haven't felt for a long time. I truly LOVE my job!!! It's so rewarding.
Thanks for looking, and for all the comments, and as always, I hope your hands get creatively dirty soon!

Monday, June 01, 2015

The Summer Issue of Bella Crafts Publishing

Hello everyone! Just a quick post today to tell you the new Summer issue of Bella Crafts Publishing is up today, and I'm in it!!! I was so excited to be asked to contribute, and I've done a huge encaustic panel and tutorial for you to see. I hope you enjoy it, and her are a few more pics.
Drops of Rain 12x24 Inch Encaustic Wood Panel


Thanks for looking, AND...
I hope your hands get creatively dirty soon!

Wednesday, March 18, 2015

Home Encaustic Panel at Bella Crafts

Welcome back this week! I have a tutorial over at Bella Crafts Publishing today for making this Encaustic Panel using lots of Ranger goodies, and it's great for beginners learning to use heated wax. Here are some close ups of the project as well. Just click this link to see the tutorial.


I hope your hands get creatively dirty soon!

Thursday, March 05, 2015

Spring Break Classes

Hello crafty people! I'm heading out today to the Dallas area for a week's stay in Waxahachie to teach eight classes at The Crafty Scrapper, ranging from Encaustics to fun tags! If you are in the area, I'd love to see you, and I think a couple of the classes have a few spots left, so just call the store if you are interested.
Wax 101 Storybook - (an all day class) - 2 Classes
Large Heart Encaustic Wood Panel
Small Flower Encaustic Wood Panel
Large Flower Encaustic Wood Panel
Butterfly Duo Encaustic Wood Panels
Buggy Liquid Pearls Tags (2 Classes)

Even if you can't get in the classes, please stop by and say hi. The store is fabulous, and you won't be sorry to see it.

I hope your hands get creatively dirty soon!

Wednesday, December 10, 2014

Wax On Wednesday - Five

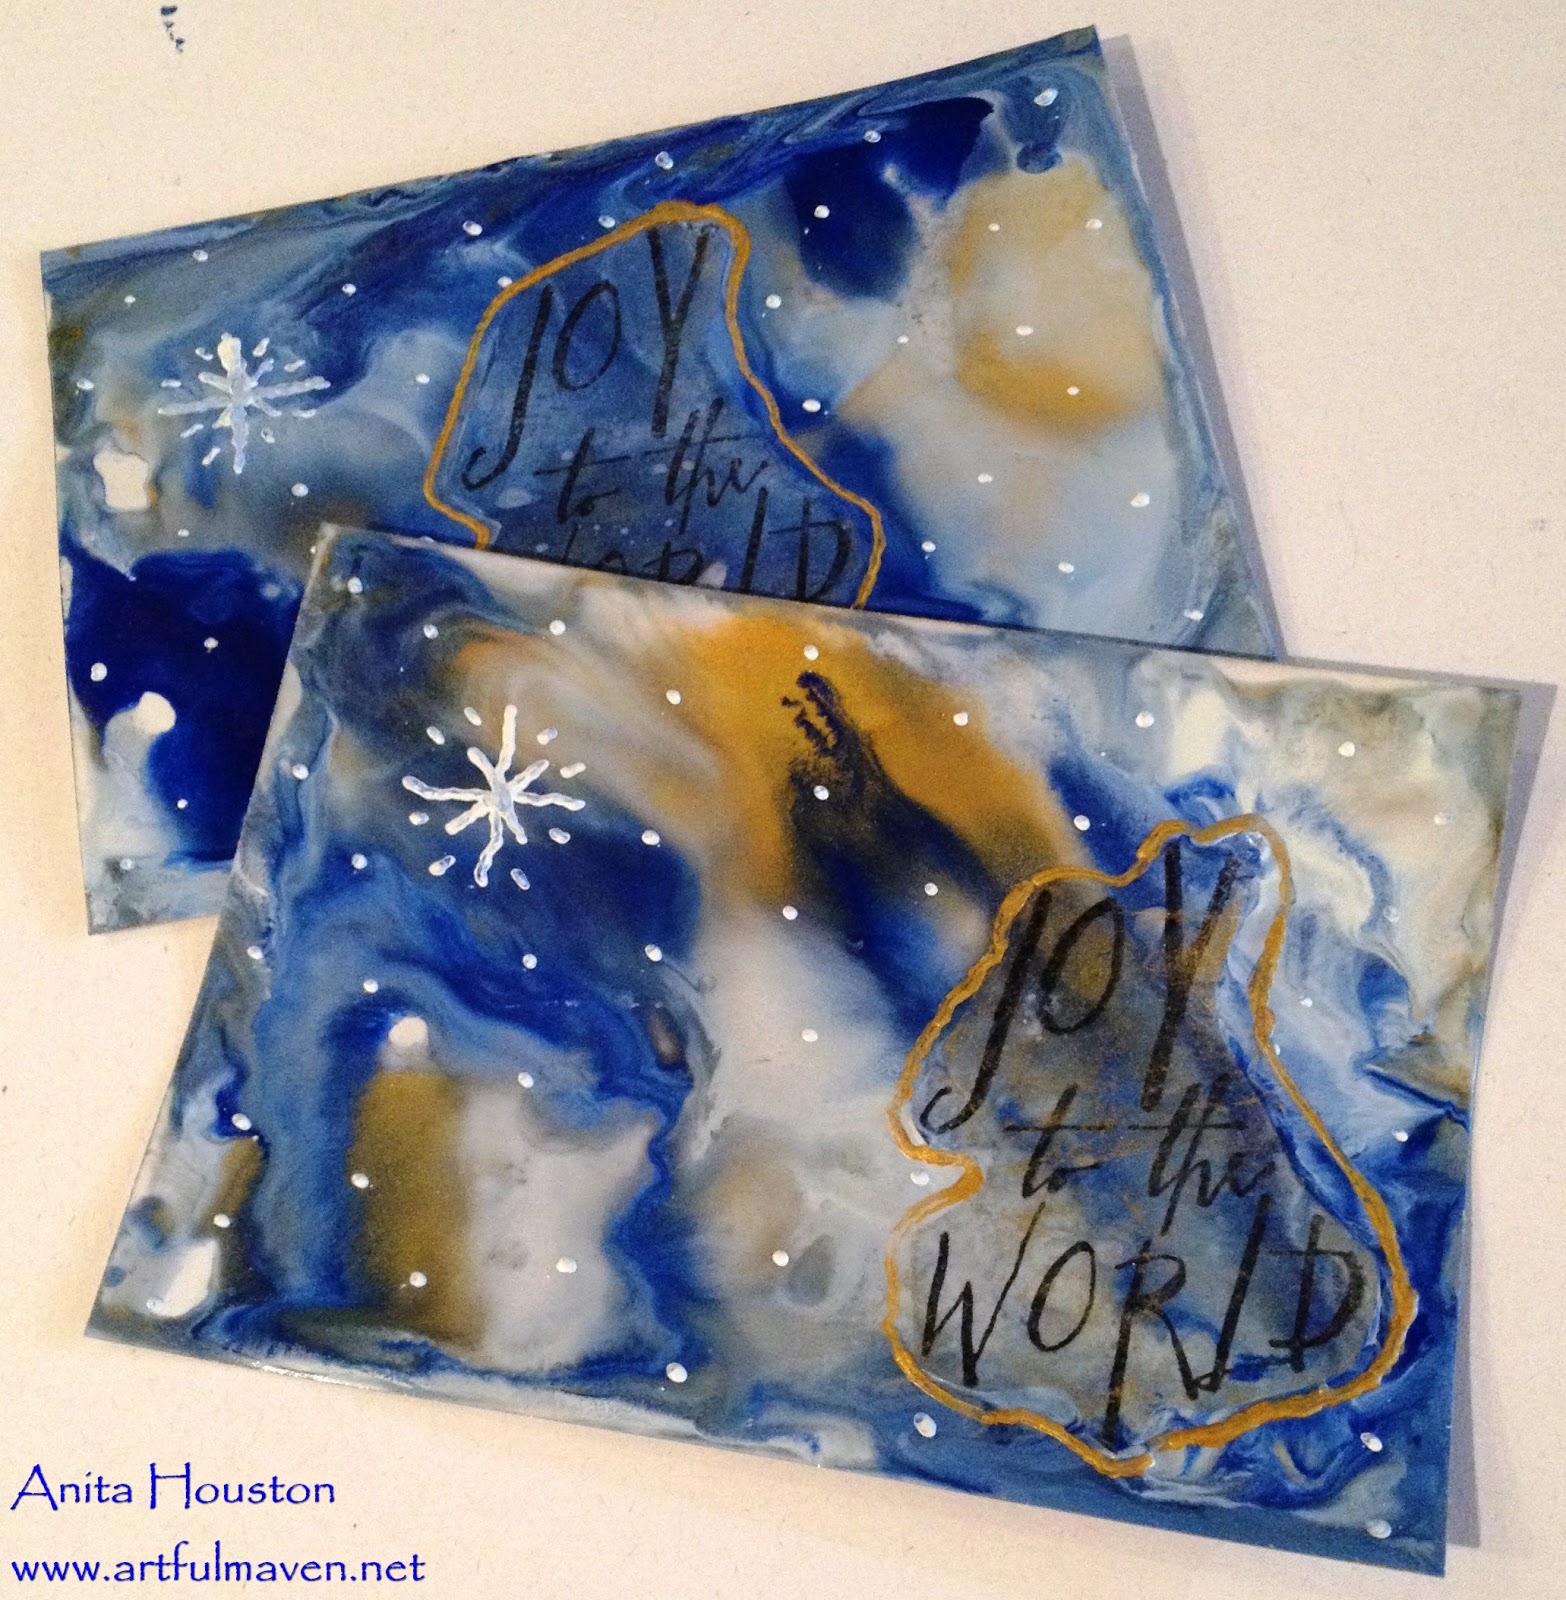
Ho Ho Ho and hi again! Thank you so much for all the positive comments on the last four Wax On Wednesday posts!!! I know it's not everybody's cup of tea, but I do appreciate it so. This is my last post for the year on the wax, as I've got to get geared up for CHA in a few weeks, so I thought I would show you some abstract background work, and I've decided to make Christmas cards to show you that. I've made two each in six different designs, and even though I've tried to do both the same, you will see each one is still unique. I LOVE that about wax.
I wanted images on my abstract backgrounds, so I stamped various images and sayings using Tim Holtz stamps on tissue paper, and stamped them with Ranger's Black Jet Archival Ink. The hardest part about making all of these 12 cards was the fussy cutting, and you know that is not my favorite thing.
After everything was cut out and organized, I prepared my surface and got everything ready. I used Distress Stamping Paper as the base for all the cards. It takes the wax so well.
I went crazy with blues, white, and silver wax. I made lots of waxy mess, but oh my gosh it's so FUN!!! No fuss at all...just apply wax to the iron and slather it on this time, unlike the previous landscape posts.
I laid the tissue images on, and applied heat with my heat tool and the tissue paper just melted in. The heat tool pushes the wax around to create gorgeous marbling of color. I added blue to all the edges like I showed you in the last Wax on Wednesday post, but this time I melted the edges with the heat tool and made irregular shaped borders. I LOVED the effect. The more I play, the more I learn! I wish you could see the metallic colors just gloriously shining in the photos.
I decided to have a play at really creating a marbled background, so I added lots of melted wax in puddles, and used the heat tool to move it around. LOVE LOVE LOVE!!!
Here are all the cards, BUT of course I thought they needed more, so I added the stylus to the Melt Tool.
The stylus sorts of sucks up the wax when you lay it on it, and then you can do detail work or write with it.
I added dots of snow and/or stars to each one, and added some gold dots and framing to some others. I am so thrilled with how these all came out. The photos do not do them justice. It took me just over an hour to make these 12 cards. That's fast by my standards!


I hope you liked the cards, and hopefully learned something new. Thank you truly for following me along this new journey. I will wax on and wax off again next year! Happy Crafty Holidays everyone!

Supplies:

I hope your hands get creatively dirty soon!