
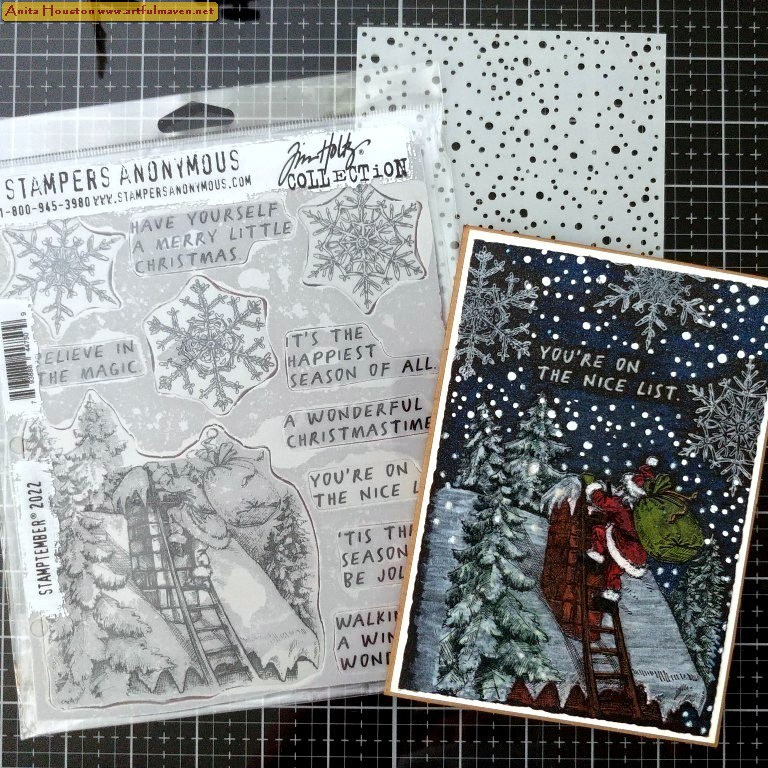
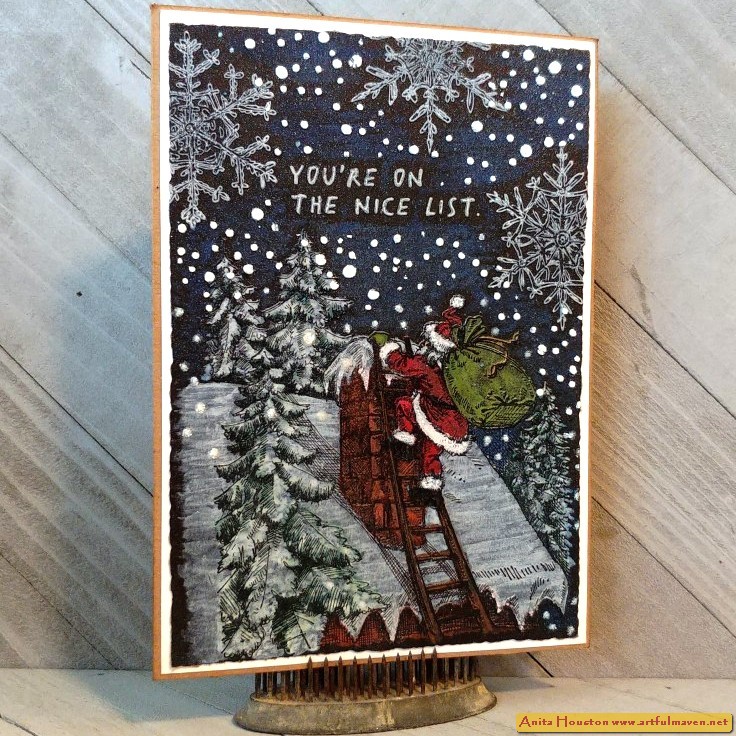
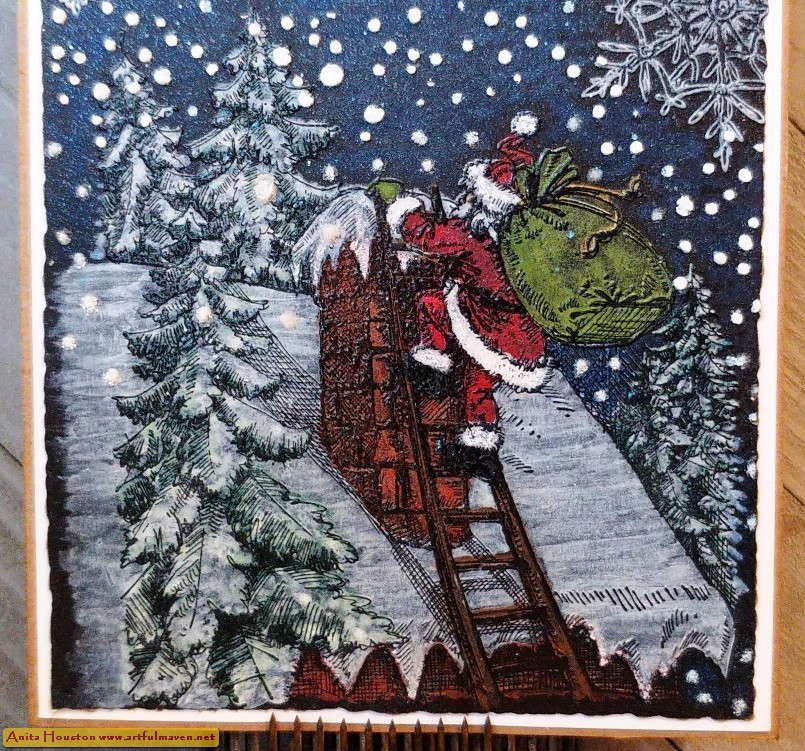
Hello crafty friends! It's Stamptember, and Simon Says Stamp has collaborated with Tim Holtz once again to bring you another fabulous Christmas stamp set and stencil from Stamper's Anonymous which are only available while supplies last through Simon Says, so don't delay. The card I made using the new stamps and stencil was so easy and fast to make, yet doesn't look that way, as there is so much going on...Santa climbing up, the snowy scene, the new fresh snow... but it truly was, which makes it nice as a mass making kind of card. Enjoy!

Take a full sheet of
Black Kraftstock and place into the largest Stamp Platform. Arrange all the
snowflakes, a sentiment in between them, and the Santa stamp from the
Stamptember 2022 Stamp Set from Stamper's Anonymous onto the Black Kraftstock,
leaving about two inches of nothing on the bottom, and close the lid to secure
the stamps. Ink the stamps with Glacier White Pigment Ink from Ranger and stamp all the
images a few times for a nice crisp look. You are using the white ink on the
black paper so you can see the Santa image clearly to watercolor it in next.
Leave the stamps in place on the platform for restamping later, and remove the
Black Kraftstock. Let it dry or use a Heat Tool to dry the ink.

Color in the Santa image with the new Distress Watercolor Pencils
from Ranger. (See my video that I am posting on Instagram on Sept. 30th for more detail on
watercoloring with the Pencils.) Color in the background with the Prize Ribbon
Pencil leaving a little black around the images. Let paper dry completely.
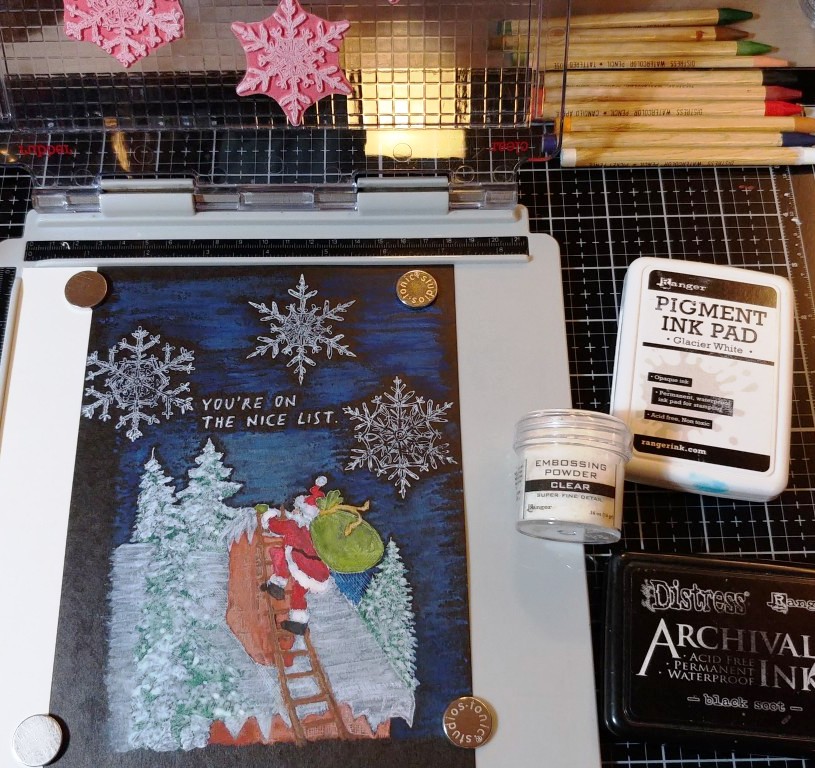
Place the paper back into
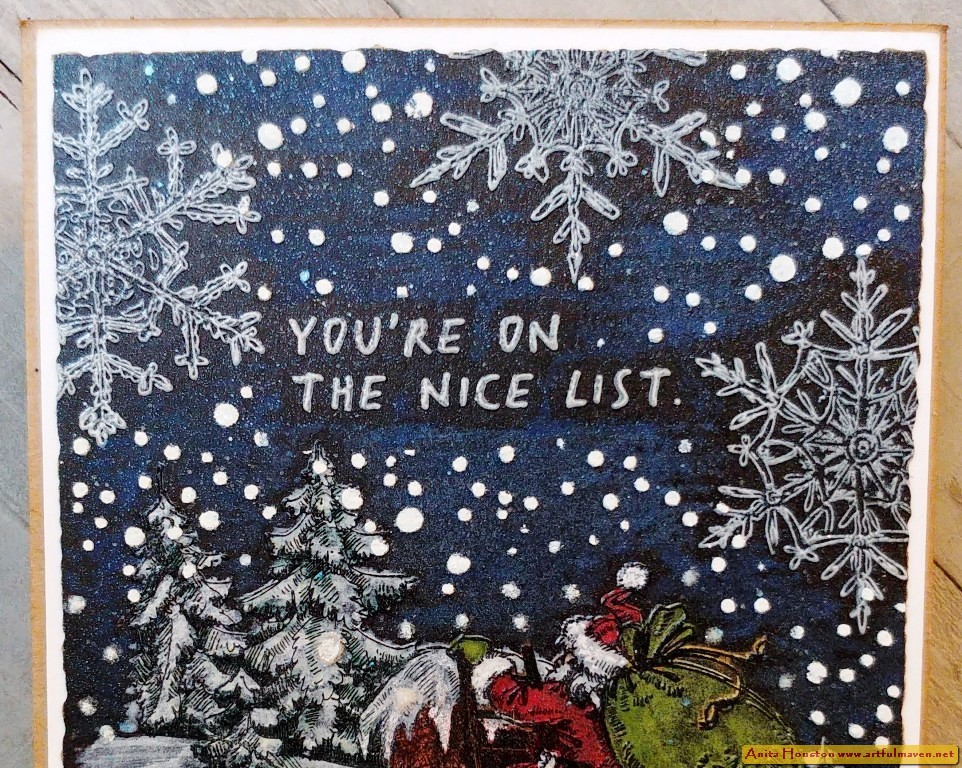
the platform, and ink over the snowflakes and sentiment only with the Glacier
White Pigment Ink, and the Santa image with Black Soot Archival, and stamp. Remove from
the platform and immediately pour Clear Embossing Powder over the whole paper.
Remove excess powder and heat emboss.

Using the Deckle
Trimmer, cut the Black Kraftstock to 4 3/4 x 6 3/4 inches. Use a sanding block
to barely sand the edges around the paper so that you can see a bit of the
Kraft color underneath. Add two sided tape to the back and set aside. Cut and
fold a Kraft Cardstock base card to 5 x 7 inches. Ink the edges with Gathered
Twigs Distress Ink. Cut a piece of White Heavystock or other white cardstock to
4 7/8 x 6 7/8 inches, and mount on the Kraft base with two sided tape. Set
these both aside.

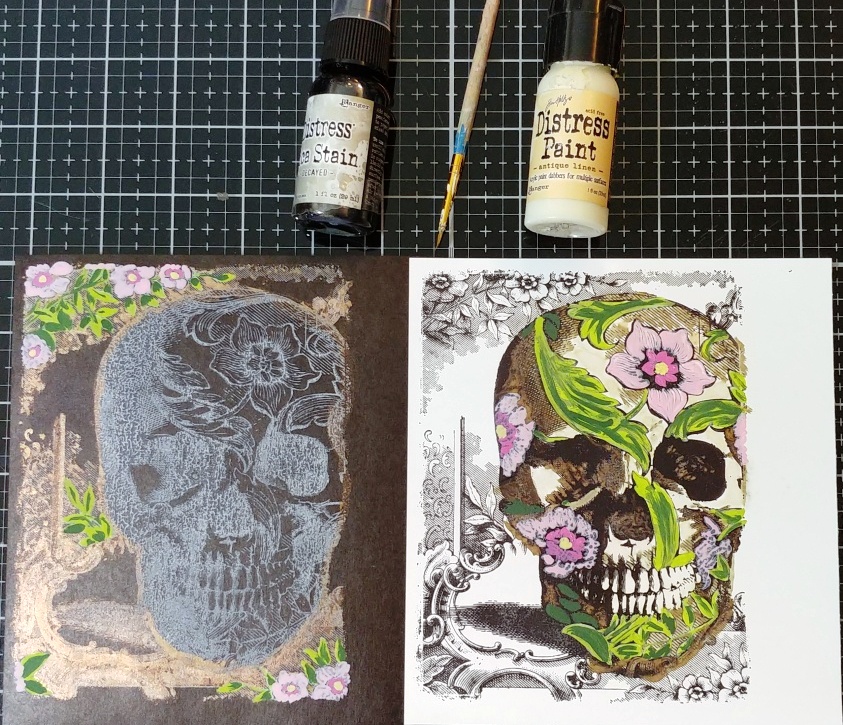
Take the Black
Kraftstock piece and lightly mist Snow Flurries Mica Stain over the whole paper
after shaking the Stain well to mix up the Mica inside. Let dry. Using the
stencil that came with the Stamp Set, lay the stencil over the Black
Kraftstock, and randomly apply Opaque Grit Paste through with a palette knife,
taking care not the get the paste over the images. You can put a little on the
edges of the Santa image. Move the stencil to add more wherever you want. Remove
the stencil and while the paste is wet pour Rock Candy Glitter over the paste
and remove the excess. Let dry. Clean the stencil. Mount the Black Kraftstock
onto the card base.


Supplies:
(Stamp Platform, Detail Waterbrush, Deckle
Trimmer, Sanding Block, Palette Knife, Paper Trimmer, Two Sided Tape, Ink
Blending Tool)
-Tim Holtz Idea-ology: Black Kraftstock
-Stamper's Anonymous Tim Holtz Stamp Set: Stamptember 2022
-Ranger Pigment Ink: Glacier White
-Ranger Tim Holtz Distress Watercolor
Pencils: Picket Fence, Tattered Rose, Black Soot, Candied Apple, Peeled Paint,
Wild Honey, Fired Brick, Vintage Photo, Rustic Wilderness, Prize Ribbon
-Ranger Tim Holtz Archival Ink: Black
Soot
-Ranger Embossing Powder: Clear
-Ranger Surfaces: Kraft Cardstock
-Ranger Tim Holtz Distress Heavystock:
White
-Ranger Tim Holtz Distress Ink: Gathered
Twigs
-Ranger Tim Holtz Distress Mica Stain:
Snow Flurries
-Ranger Tim Holtz Distress Grit Paste:
Opaque
-Ranger Tim Holtz Distress
Rock Candy Glitter
Thank you so much for stopping by and for commenting. Don't forget about the video I'm posting over on Instagram on the 30th, showing how I colored in this card with the new Distress Watercolor Pencils. Until then, I hope your hands get creatively dirty soon!


