
Hello Makers! Today, I have another make that was on the Tim Holtz Stamper's Anonymous Christmas Live...the one with the Bottlebrush Trees. I have had so many emails and comments on this one, so I hope the tutorial does these justice. Thank you truly for all the comments...it means so very much! Enjoy!


Cut a piece of Black
Woodgrain and Gray Woodgrain Two Tone to 4.75 x 6.75 inches. Choose which
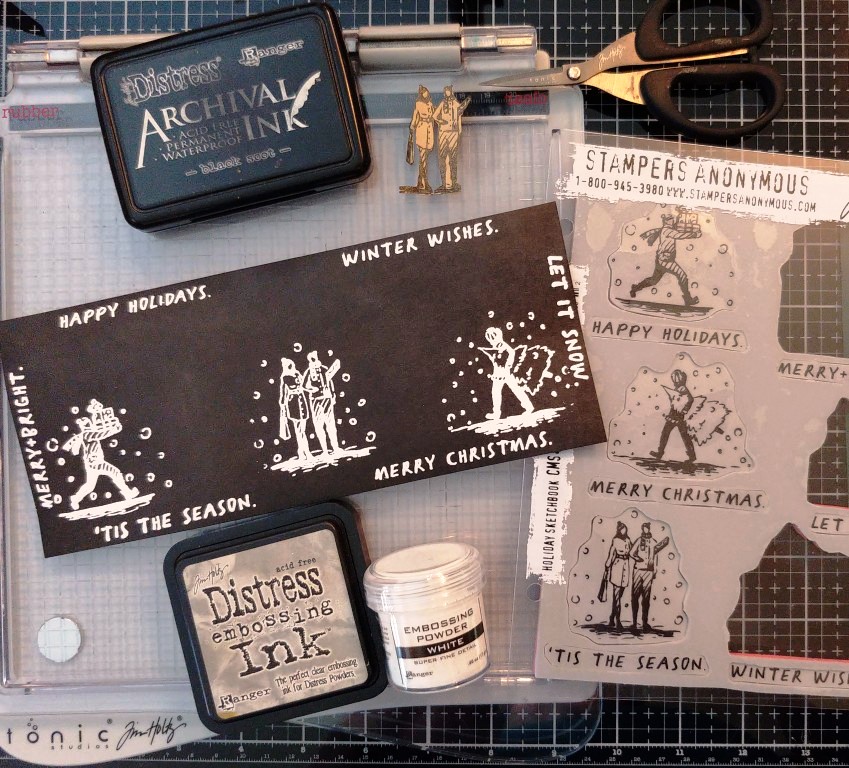
sentiments you want from the Christmas Element Stencils as well as sentiments
from the Small Talk Stickers that go well together. Place each stencil flush
with the bottom of each Woodgrain piece and centered. Tape down the stencil and
use a palette knife to apply Snowfall Grit Paste from Ranger, pretty heavily through the
stencils so that you cannot see any paper underneath. Remove and clean the
stencils and let the papers dry naturally.

For the Small Talk
sentiments, mount a black background one on White Heavystock (or other white
cardstock) and use a little Collage Medium for extra reinforcement. Mount a
white background sentiment onto Black Kraftstock. Cut them both out leaving a
slight border. From the Chit Chat stickers choose the word 'Christmas' and an
'is' or 'in' or 'at'...whatever makes sense with the stenciled words. Ink the
edges of those with Gathered Twigs Distress Ink from Ranger and mount on either
white or black to go with the other sentiments. Do not adhere these yet, but
place them where they will go so you know the spacing for the next part.

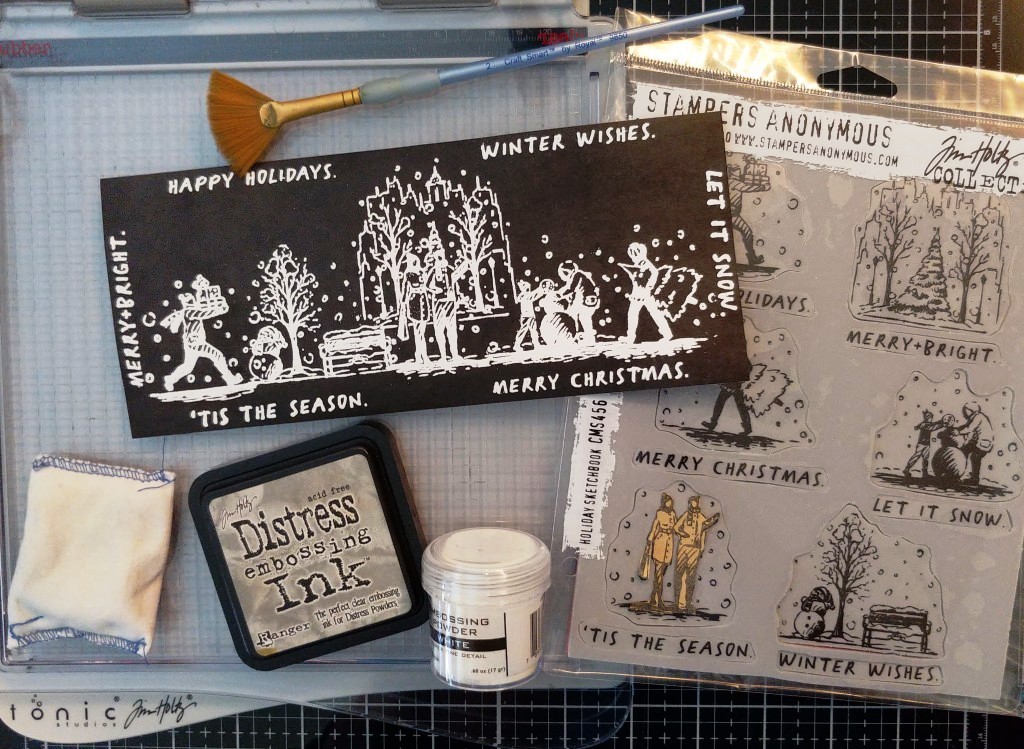
Place one of the
woodgrains into the platform, and add the Small Talk above the stenciled word
for placement of the stamps. Take three of the largest trees from the
Bottlebrush Tree Stamp Set and place them evenly spaced above the sentiment. You
want the bottom of the wood base from the tree to be right above the sentiment
so it looks like it's sitting on it. Close the platform to secure the stamps
and remove the sentiment. Ink the stamps with Antique Linen Distress Oxide and
stamp. Remove the woodgrain and repeat with the other woodgrain. Dry both with
a heat tool or let the ink dry naturally as the ink stays a little wetter on
the woodgrain.

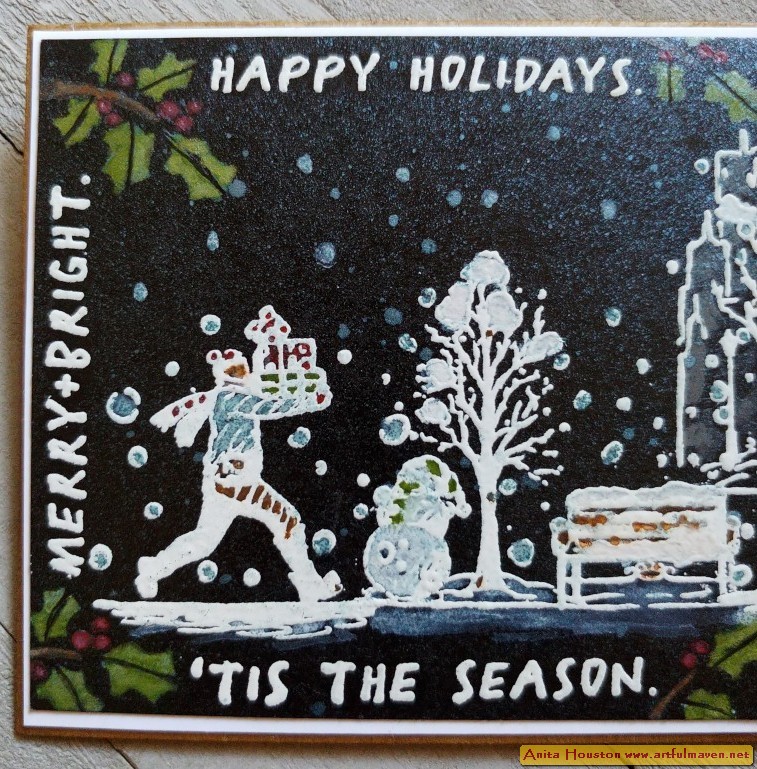
Using a Detail Waterbrush
and Distress Watercolor Pencils, color in the trees to look like regular
bottlebrush trees that are not dyed, using Hickory Smoke on the metal stem,
Vintage Photo, Frayed Burlap, and Antique Linen on the brush branches, and Picket
Fence to blend in all the colors on the branches. Color in the wooden bases
with Vintage Photo. Let dry. Apply Iron Gate Distress Pencil to the silicon mat
and pick up with the waterbrush and recolor over the stems and add some stem
pieces through the middle of the tree. Let dry.

Place the woodgrain back
into the platform with the stamps, and this time only ink the tree parts with
Distress Embossing Ink (wipe off the stems to make sure no ink is on them), and
then immediately pour Frosted Crystal Powder over the trees. Heat emboss.
Repeat with the other woodgrain. Clean the stamps and you are finished with
these.

Place the woodgrain back
into the platform and select two small trees from the stamp set, and add them
between the other three trees. Close the platform to secure. Ink these with
Antique Linen Distress Oxide and stamp. Repeat with the other. Let the ink dry.
Color the tree on the left the same as the other three. For the one on the
right, color the stem and base the same, but color the branches in three
sections, top one with Candied Apple, middle with Antique Linen and Picket
Fence, and bottom with Peeled Paint. Paint the stem with the Iron Gate as well.
Let dry. Place back into the platform and ink with Distress Embossing Ink and
pour the Frosted Crystal over and heat emboss. Repeat with the other.

Having black thread
ready in a sewing machine, stitch around the Gray Woodgrain in a straight
stitch all around the card. When you get to the upper right corner, change
stitch to zigzag and go forward and backward about an inch changing the width
of the zigzags. Repeat with the Black Woodgrain but change the thread to white.
When finished, use a needle and the white or black thread to fill in the sewn
tree with branches. Using thicker Craft Thread stitch a base rectangle for each
tree by stitching around the edge of the card about three times. If the thread
is not quite dark enough use a Vintage Photo Distress Pencil to darken the
thread. Add the sentiments in place using two sided tape or Collage Medium. Use
a Paper Distress Tool to distress the edges of each. Mount onto a White
Heavystock for the Black Woodgrain and Black Kraftstock for the Gray Woodgrain
using two sided tape, both cut to 4 7/8 x 6 7/8 inches. Cut and fold a Kraft
Cardstock base to 5 x7 inches for each and mount onto the front of the base
card with two sided tape. Adhere a smaller Mirrored Star to each colorful tree
with Collage Medium. Add Collage Medium randomly to all the trees and then pour
Mica Flakes on and push them down slightly with your hand. Shake the cards to
get the extra flakes off. Let dry.


Supplies:
(Paper Trimmer, Scotch Tape, Palette
Knife, Ink Blending Tool, Scissors, Two Sided Tape, Stamp Platform, Detail
Waterbrush, Water Mister, Heat Tool, Sewing Machine with Black and White
Thread, Needle, Craft Thread, Paper Distresser)
-Ranger Tim Holtz Distress Two Tone
Woodgrain: Black, Gray
-Stamper's Anonymous Tim Holtz Element Stencils: Christmas
-Ranger Tim Holtz Distress Grit Paste:
Snowfall
-Tim Holtz Idea-ology: Chit Chat,
Seasonal Chit Chat, Small Talk, Mirrored Stars
-Ranger Tim Holtz Distress Ink: Gathered
Twigs
-Ranger Tim Holtz Distress Collage
Medium: Matte
-Tim Holtz Idea-ology: Black Kraftstock
-Ranger Tim Holtz Distress Heavystock:
White
-Stamper's Anonymous Tim Holtz Stamp Set: Bottlebrush
Trees
-Ranger Tim Holtz Distress Oxide:
Antique Linen
-Ranger Tim Holtz Distress Watercolor
Pencils: Hickory Smoke, Vintage Photo, Frayed Burlap, Antique Linen, Picket
Fence, Candied Apple, Peeled Paint
-Ranger Tim Holtz Distress Pearlescent
Crayon: Iron Gate
-Ranger Tim Holtz Distress Ink:
Embossing
-Ranger Embossing Powder: Frosted
Crystal
-Ranger Surfaces: Kraft Cardstock
-Ranger Tim Holtz Distress
Mica Flakes
Truly, I thank you all for all the responses on these cards...I was just so overjoyed with all the comments and emails on these! WOW!!! I will be back soon with another Christmas make...a big one! Until then, I hope your hands get creatively dirty soon!


