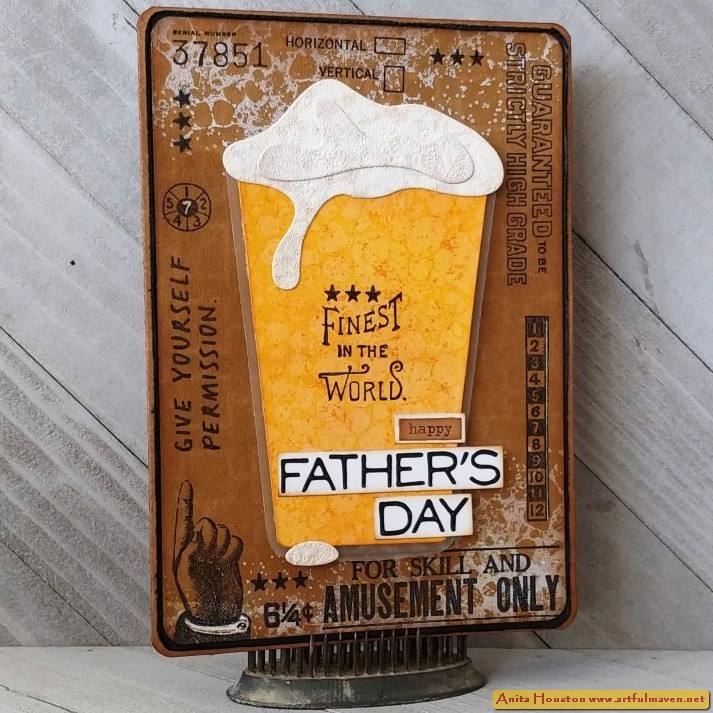
Hi Everyone! Thanks so much for all the love on my last post. Today, I have another card made with the new Curiosity Stamp Set from Tim Holtz and Stamper's Anonymous, that is more on the masculine side...I was thinking Father's Day, but really it could be anything. This stamp set is not only yummy vintage but nostalgic and fun as well, and I really had a lot of fun playing with it. It is super versatile and really can be used for so many occasions. Enjoy!


Cut a piece of Kraft
Cardstock to 4 x 4 5/8”. Place the paper in the platform and add the bowler hat
from the Curiosity Shop Stamp Set, about ½ inch down from the left side. Stamp
in Black Soot Archival from Ranger. Clean the stamp off by stamping the
remaining ink onto a sticky note, and then cut the hat out. Remove the bowler
hat from the platform as you are finished with it. Place the sticky note over
the bowler hat and then position the top hat upside down and above and to the
right of the bowler hat so that it is still touching in the corner and close
the platform to secure. Stamp it in the Black Soot. Clean the stamp off by
stamping the remaining ink onto another sticky note, then cut it out. You are
finished with that stamp.

Gather Pine Needles, Rustic Wilderness, Black Soot, Scorched Timber, and Walnut Stain Distress Oxides, as well as Picket Fence Distress Ink (which actually is a pigment ink as well so it’s perfect to use with Oxides) and the Labels Layering Stencil. Secure the Kraft card with the hats on the table with scotch tape up at the top, then add the sticky note masks on the hats. Position the stencil over so the images are evenly spaced and lined up, and then add tape to secure it. Using the smallest Detail Ink Blending Tools, you will randomly ink in the individual label parts with the different colors of it. (Note: I was trying to go for the Starbucks green color, so I started with Rustic Wilderness then added Pine Needles on top and then a bit of Black Soot on top of that and then blended in to get that nice dark green.) The lines between the labels are very thin, so if you get another ink color on top of another, just blend it out with the other color. When finished, remove the stencil and clean it with water, remove the masks, and give this a good dry with the heat tool.

(I made two of these so
you can see the front and back on the same photo.) Use a paper trimmer to cut
across the top of the hat paper and stop when you get to the top hat on both
sides, and then use scissors to cut around the hat, as seen in the top
left. Flick a bit of water onto this to
create a mottled look on the labels as well as to make sure all the ink is set,
and dry with a heat tool. Ink around the edges with Gathered Twigs Distress Ink
or another brown color. Flip the hat paper over to apply the two sided tape in
all the correct places to allow the gift card and coffee lid plug sticks to fit
correctly, as seen in the bottom left of the pic with the sticks and gift card
used for measuring. You don’t have to use two sizes of tape, but I found that
the ¼” and 1” worked perfectly. The main thing is to leave the top hat area
deep for the sticks to go into so it will be sort of like a magic hat that
holds long items, and to make an area for the gift card to fit into, while
sealing up the rest of the border. I forgot to add the small paper punch (1/2”)
to make a half circle cut in the middle of the border area for the gift card to
allow it to be easily pulled out. Set this aside now.

For the background of the card, cut a piece of SSP to 4 5/8 x 6 5/8”. Directly onto the Glass Mat, apply Gathered Twigs Distress Ink straight from the pad randomly a few times (you will not be able to see it well), as well as Pine Needles Distress Oxide, and Walnut Stain Oxide, randomly in about a 6x6” area, and mist pretty well with water. Take the SSP and run it through the wet inks, and dry a short bit with the heat tool, and then continue to tap the paper into the wet, dry it, tap again, dry until you like the look of it, and then dry completely. Ink the edges well with the Gathered Twigs and bring it onto the surface around the borders a bit. Then lightly mist with water to get the tiniest water spots to really finish off a beautiful marble look. I did two in the photo to show you how different each will be and still be gorgeous. Dry with a heat tool.

Place the paper into a
stamp platform, and taking the number strip image (I only used 1, 2, and 3 so I
cut those from the strip to make stamping a bit easier.) stamp the 1 in Pine
Needles Distress Ink (I forgot to add it in the photo), and the 2 and 3 in
Black Soot Archival. You can do both color at the same time being careful to
only apply the inks to the correct numbers. Continue the pattern so that the 1
is skipping around some, and until you have two rows of numbers. Dry this well
as ink stays wet longer on SSP. Take a piece of green colored Design Tape and
affix it below the numbers and around the back to secure it well. The rest of
the paper will not be seen as the hat paper will cover it up. Set these aside
for now.

Taking more SSP, about 3.5 x 8.5”, place into the stamp platform, and arrange the typewriter and both pointing hands on, leaving room for two more hands at the bottom. Close the lid to secure. Stamp the images with Black Soot Archival Ink, and then dry with the heat tool. Turn the paper upside down to stamp the other two hands, and then dry again. (I cut mine off not thinking about it being better to leave them in place in case I had to restamp later.) Leave the images in place on the platform in case you have to restamp after coloring them in….always a good thing to do. (HUGE NOTE: I used a Craft Knife to cut around the typewriter parts to insert the paper behind the those parts, BUT if I would have just not inked that top part where it looks like the paper is stopped and left that open, I could have just cut a paper shape coming off that, and wouldn’t have had to use the craft knife and made life much easier.)

(Like my Oxides, I hadn’t
used the Crayons in awhile so I decided to use those for coloring this, and
there are two shown here, but I only ended up using the left side one.) Using
Distress Crayons and a Detail Water Brush, color in the hands with Tattered
Rose and Tea Dye by applying some Crayon to the white mat and picking up with
the brush. Use Hickory Smoke to color in the suit and most of the typewriter,
as well as Black Soot. For the hats I colored in the bands with Pine Needles
Distress Ink since it was laying right by me instead of the Crayon. I used Tea
Dye on the bowler and Hickory Smoke on the top hat. Back to the typewriter, go
over all the metal parts with a little Iron Gate Crayon to add a nice pearly
sheen. Tea Dye was great for the inside of the keys for a little aged look.
Once dry, use a silver metallic pen for thin metal parts to make them stand
out. I also used a gold metallic pen and made some scribbles to make it look
like there might be wording on the typewriter. Once finished, I added two sided
tape to the back, and thought about restamping as mentioned above, but I
thought everything looked ok.

I cut out all the parts, and used a craft knife to cut around the top typewriter parts which was tedious, so please see what I mentioned above about saving myself the time. I used a black permanent marker to edge all the pieces since they were small and some parts too tight to get a blended tool in there. I cut a small piece of SSP to be the paper for the typewriter that would fit about 2x2”, and stamped the sentiment first from the Curiosity set, and found the word ‘you’re’ on another old stamp on the Stuff to Say set, instead typing it myself on my typewriter which would have been much smaller, and I stamped those in Black Soot Archival. I found the ‘No. 1’ on the Eccentric Remnant Rubs set and added it below. I also added the two extra dots after the sentiment with the black permanent pen. I edged around the paper with the same pen, and then attached the paper to the back of the typewriter with two sided tape, and then I added it to the right side of the card. I used Glossy Accents on all the typewriter’s keys as well. For the fingers, I added a tiny bit of Collage Medium to the coffee lid plug sticks, and then removed the backing of one, and stuck it on above the notch, and then added the finger behind it matching it up and pressed them tightly to seal them together. I did the other the same way, and then added them inside the top hat, pushing them as far as could go and arranging them to look as though they are laying in the hat, then I added the gift card.


Supplies:
(Paper Trimmer, Stamp Platform, Scissors,
Sticky Note, Glass Mat, Tape, Detail Ink Blending Tool, Heat Tool, Water
Mister, Two Sided Tape (1”, ¼”), Ink Blending Tool, ½” Small Circle Punch, Detail
Water Brush, Craft Knife, Rub On Tool)
-Ranger Surfaces: Kraft Cardstock,
Specialty Stamping Paper
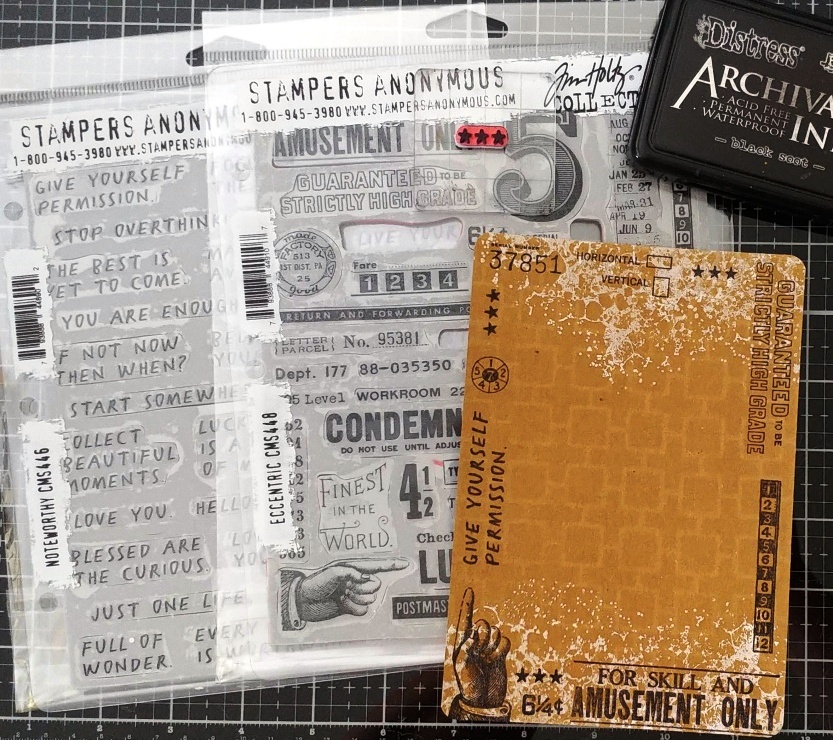
-Stamper’s
Anonymous Tim Holtz Stamp Set: Curiosity Shop
-Ranger Tim Holtz Distress Archival Ink:
Black Soot
-Stamper’s
Anonymous Tim Holtz Layering Stencil: Labels
-Ranger Tim Holtz
Distress Oxide Ink: Pine Needles, Rustic Wilderness, Black Soot, Scorched
Timber, Walnut Stain
-Ranger Tim Holtz Distress Ink: Picket
Fence, Gathered Twigs, Pine Needles
-Tim Holtz Idea-ology:
Travel Design Tape, Black Kraftstock, Eccentric Remnant Rubs
-Ranger Pigment Ink: Glacier White
-Ranger Tim Holtz
Distress Crayons: Tattered Rose, Tea Dye, Hickory Smoke, Black Soot, Iron Gate
-Stamper’s Anonymous Tim
Holtz Stamp Set: Stuff to Say
-Ranger Glossy Accents
-Ranger Tim Holtz
Distress Collage Medium: Matte
-Silver and Gold Metallic Extra Fine
Pen, Black Permanent Marker, Gift Card, Green Coffee Lid Plug Sticks
Thank you so much for stopping by here today, and for all the wonderful comments on social! Until next time, I hope your hands get creatively dirty soon!