Hi Crafters! I'm back again this month, bringing you my last card that was featured in the
Ranger Booth at Creativation this year. This one uses
Tim Holtz's Distress Mixed Media Ink Palette. Thanks for all the comments and love on the last two posts! Enjoy!
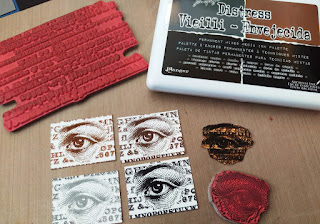 |
| I cut four pieces of Specialty Stamping Paper, into 2x2.5 inches. I stamped the eye images in each of the four colors in the Ink Palette, and dried them with a heat tool. Then I stamped the eye image on a piece of scrap and cut it out to use as a mask. I masked off each eye, and stamped the Newsprint image over each eye using the same color inks as on each eye. Then I dried. |
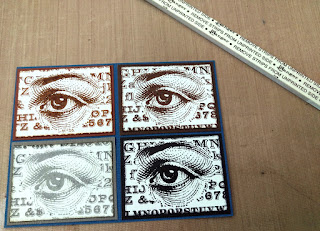 |
| I mounted each eye onto coordinating colors of cardstock. Then I foam taped those onto a blue cardstock base. |
 |
| For the base of the card, I cut more Specialty Stamping Paper. I laid the palette onto the craft sheet and rubbed all the ink colors onto it. Then I misted the inks with alcohol, since they are Archival based, alcohol allows them to move. I placed the card into the wet inks and rubbed it around to lift up the colors. |
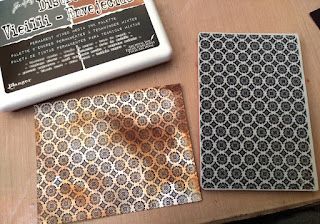 |
| Once dried, I stamped the Floret image over the card with Black Soot Archival from the palette, and dried it. |
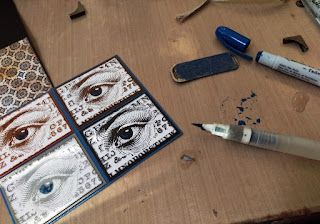 |
| I rubbed the blue Distress Crayon into the recessed areas of the quote band, and remove the excess with a rag so that the crayon stayed inside to bring out the wording more. I also used the crayon to watercolor in the eyes, before adding Glossy Accents to them. I attached the linen ribbon to the quote band and card, and then mounted the card on the base piece. Finally, I adhered the nailheads on. |
I'm working on Halloween projects, so I'll be back soon. Thanks so much for stopping by!
Supplies:

I hope your hands get creatively dirty soon!


