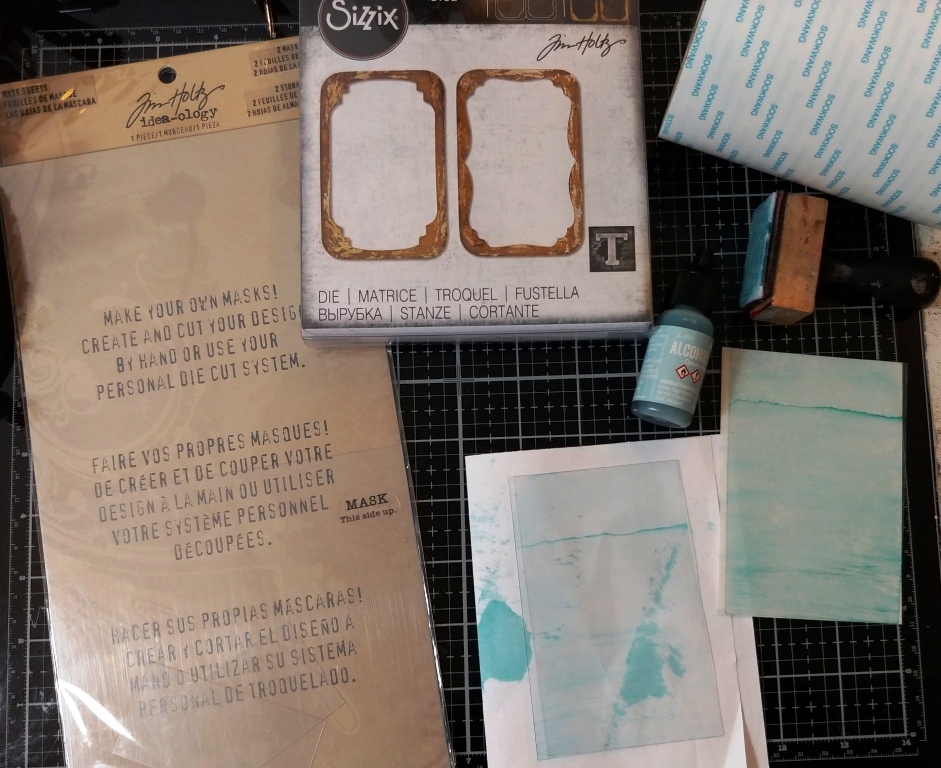
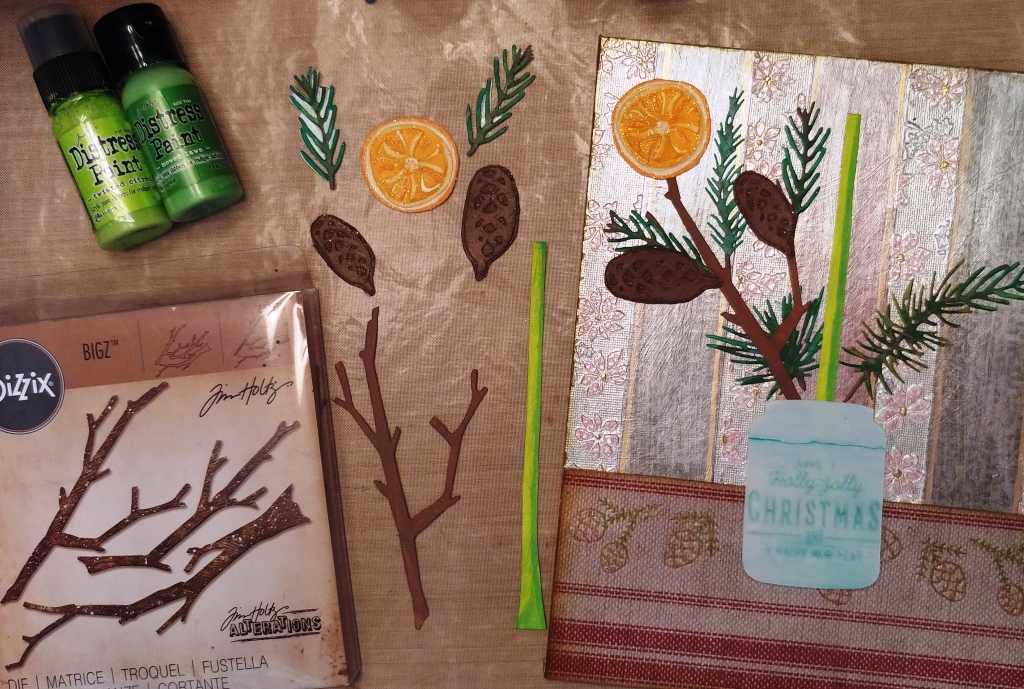
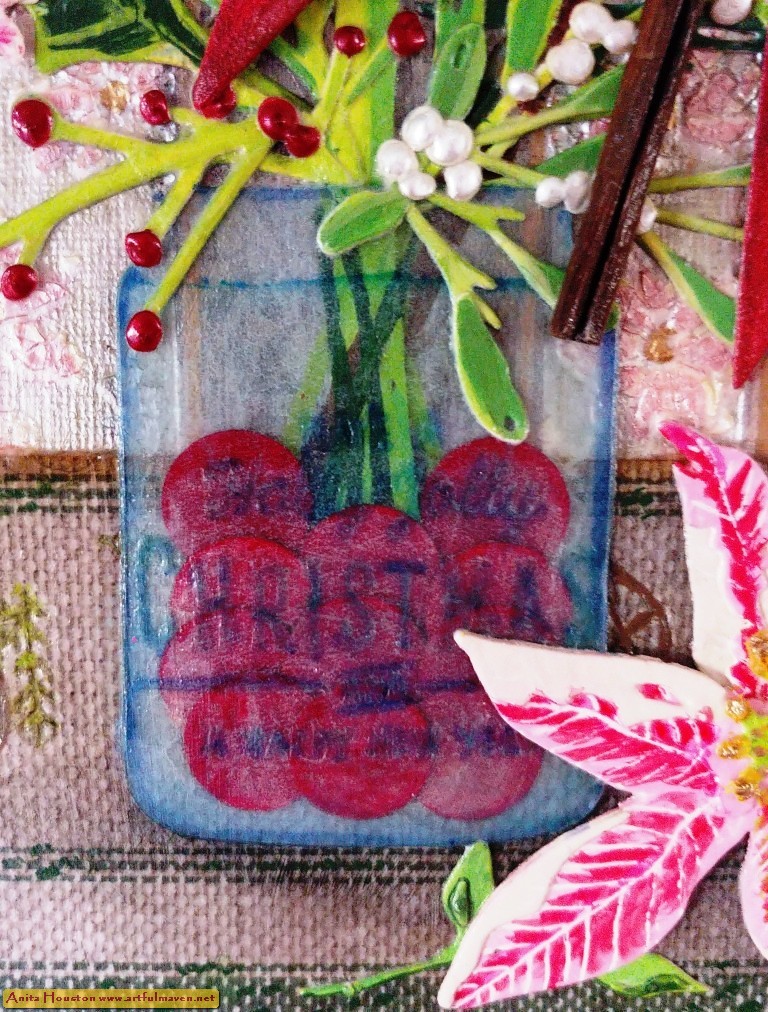
To make the masked frames look like Mason Jars, I trimmed the bottom off, curving it slightly, and also trimmed the tiny lip off the top. They are now Mason Jars! I'll keep the outside of the frames for another project, as always. For the wording on the jars, I selected the 'Holly Jolly Christmas' saying from the Festive Overlay Stamp Set, and placed it into the small Stamp Platform along with the jar. I stamped the sentiment in Salvaged Patina Archival a few times, and then sprinkled Clear Embossing Powder over. I let the Embossing Gun heat up pretty good and then embossed the sentiment as quick as it could melt as I was scared the mask part might warp, but it did not (the two sided tape backing is the key I think), holding it with tweezers. When the embossing was cool, I stamped the sentiment over the embossing again to darken the sentiment as much as I could get it. I inked the edges of the jar heavily with the Salvaged Patina and let it dry good.
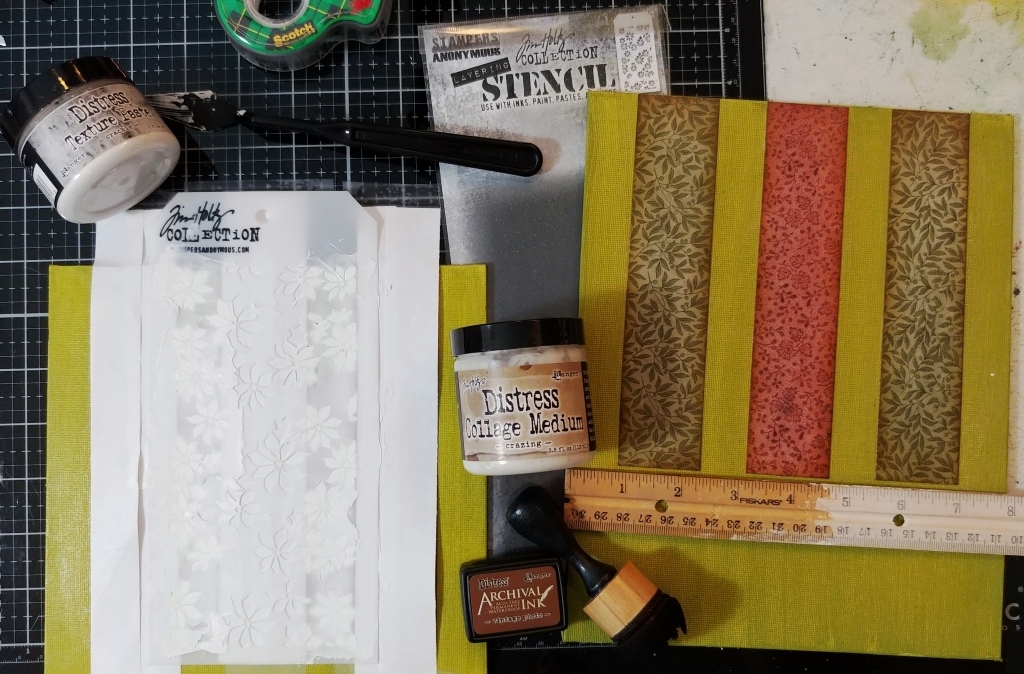
I cut the paper in half length wise, and then a 1/2 inch off of each of those. The 1/2 piece is for the thin stick, and the other is for the double curled stick. To curl the paper easier, I misted it with water and started at one long end, rolling it with my fingers over the mat, until it was rolled up tight. I inked the edges using Vintage Photo, and added a little Collage Medium to seal the edges.

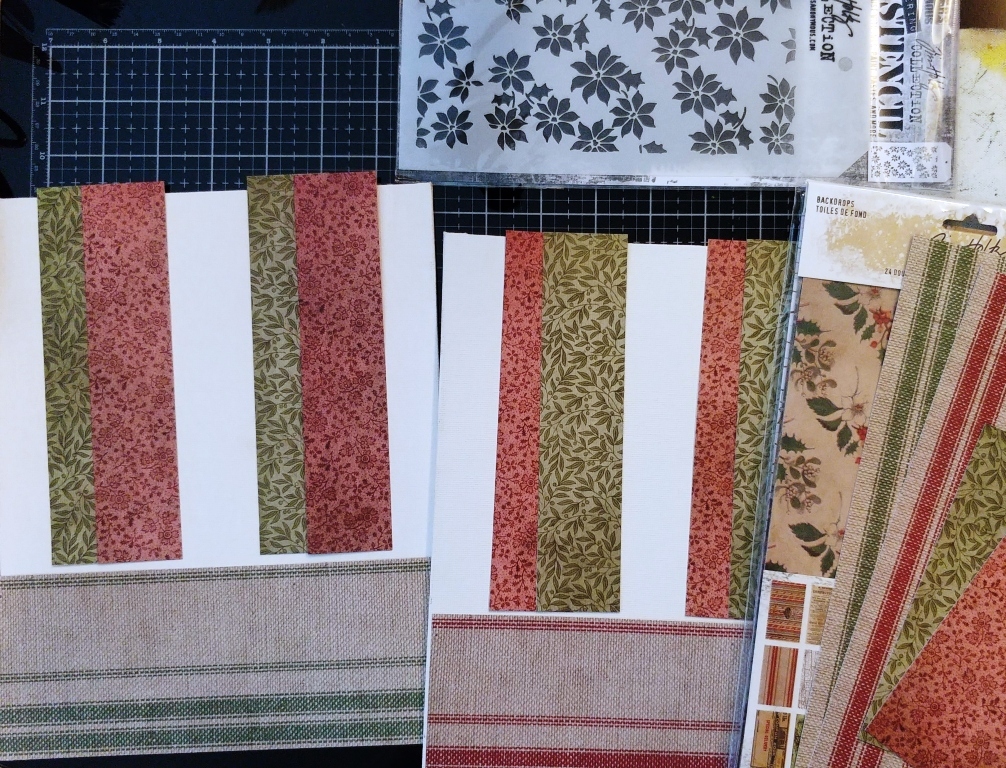
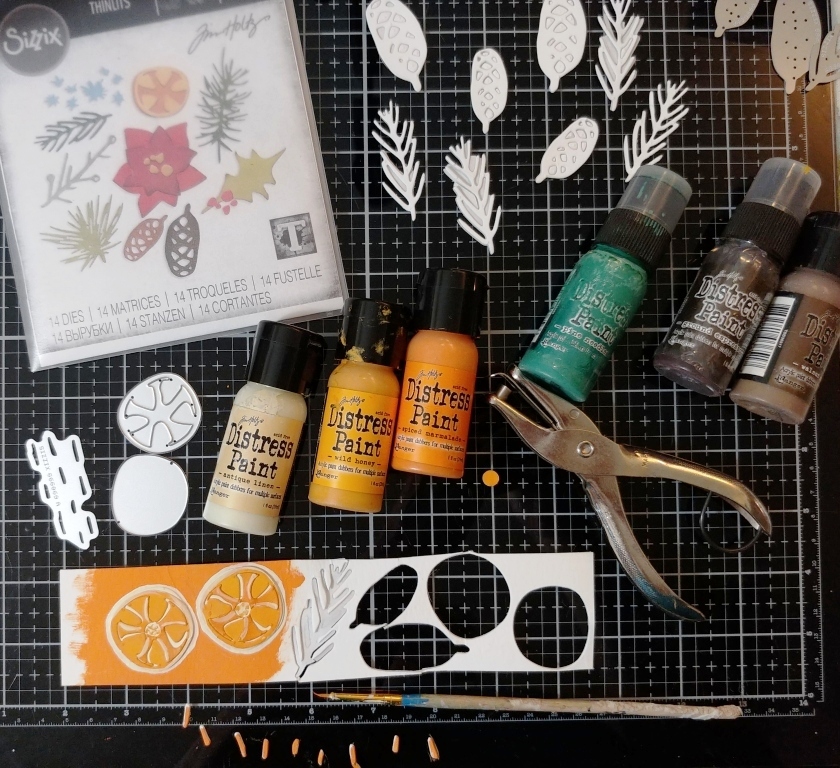
For the greenery parts, I added two sided tape to the back of more Watercolor (cut to about 5x7 inches) and die cut the parts shown from both the Modern Festive and Holiday Brushstroke 3 sets (two sets of berries on each as well), and I did this 4 times (two sheets per canvas), but I left the pieces inside the negative base to make painting and handling a little easier. I painted the Mistletoe with Squeezed Lemonade first, then Twisted Citron on the edges, and Mowed Lawn on the leafy parts, and the berries for it are Antique Linen. The holly branch is painted the same as the Mistletoe, but the leaf is edged in Squeezed Lemonade as well as the veins and the main part is Rustic Wilderness, and the berries are Lumberjack Plaid. The juniper branch is Evergreen Bough and Pine Needles. The long fluffy branch is Forest Moss and Peeled Paint. The short fluffy branch is Pine Needles and Evergreen Bough. The other pine branch (same as in orange slice swag) is Rustic Wilderness and Mowed Lawn. All of them have Walnut Stain centers. Once dry, I laid the jar where is will go as well as the orange slice parts (not removing the backing yet) so I could get an idea of how the bouquet will be arranged. I used a die pick to help remove the greenery parts from the negative, and removed the backing on only the long and short fluffy pieces first and adhered on the canvases with a little Collage Medium for extra stay power. I only did those two pieces so far.
I die cut one of the branches from the Branches Bigz Die for the orange slice swag, and painted it with Walnut Stain from Watercolor with two sided tape. I adhered it on next (one on left side of one canvas and one on right side of the other), and adhered the pine branches with acorns on top, and orange slice to the top. I added the long spruce branch to another on the swag. Using more Watercolor I cut a stem looking piece about 5 inches long for the main stem of the Paperwhites, and painted it with Twisted Citron and Mowed Lawn. I adhered it to the middle of the bouquet using the jar as a guide as it's not stuck down yet. I added another pine branch piece to the top of the long fluffy branch for some fullness. Then I added one of the holly branches to one side of the Paperwhite's stem with two holly leaves, and added the red berries, and then one of the mistletoe branches to the other side with the white berries.
Using Twisted Citron and Walnut Stain paints, I extended the stems of the branches and added in more under where the jar will go, so you will be able to see them like they are in the water in the jar. I painted some scrap Watercolor with Lumberjack Plaid and used a 5/8 inch hole punch to punch several circles to use as cranberries in the jar of water. Silly probably, but Mrs. Claus likes the Martha Stewart style!!! I removed half the backing on the jar and added the cranberries (color side up) to the sticky about half the way up. Then I finally removed the rest of the backing and added lots of Collage Medium as well and stuck the jar in place. I added the other holly branch and berries on so that some are on top of the jar like they are spilling over, and added the other mistletoe branch and berries to the other side, again like they are spilling over. I added another piece of greenery to the bouquet over the Paperwhite stem.
(Note: I printed off a picture of Paperwhites from the internet for a guide to paint by.) For the Paperwhites, I die cut 10 (5 for each canvas) flower bases from Modern Festive, and 10 circles from sticky Watercolor, and painted them with Antique Linen. I used scissors to define the petals a little by cutting them apart some. I die cut 5 sets of the 3 stamen center parts from the Festive Bouquet set, and painted those with Mustard Seed Distress Paint. Using the largest balled stylus from Tim's Flower Shaping Set and the base foam part, I rubbed and moved the stylus in a circular motion to cup the circle parts up and the petals on the flowers as well, so they would all have some dimension and depth. I painted some Picket Fence stripes on all the petals and centers as well for a little detail.

I added the circle to the centers of the flowers, and then the stamen to the centers of the circles for a Paperwhite look. Then using Yellow Flower Soft fluffy stuff that I had in my stash, as well as this cool pointy curved tool that I found at a junk shop years ago and have never used (I have no idea what it's really for.) I scooped up the Flower Soft and laid it into the centers of the stamen with some Collage Medium for a more realistic look. This tool was perfect to do this. Once dry, I adhered the flowers on to the upper center of each canvas.

(Note: I printed off a picture of pink and red poinsettias from the internet as a guide to paint by.) For the poinsettias, I used sticky Watercolor and die cut 1 large and 2 small from the Festive Bouquet set, and the poinsettia and leaves part from the Holiday Brushstroke 3 set (times 2). I also die cut the regular leaf from the Festive Bouquet set that will be cut into two parts. I adhered all the parts to the petals on the flowers. One little poinsettia will go on top of the large, and then one little by itself, and the leaves on the other will be colored like poinsettia petals instead of leaves, fyi. For the pink poinsettias, I painted the whole thing with Kitsch Flamingo first. Then I added Antique Linen to the edges and made some veins. Then I added Lumberjack Plaid coming out from some of the veins here and there. Once dry, I used a white pen to add more detail veins on each petal. For the red poinsettias, I painted the base of each flowers with Festive Berries, then added Lumberjack Plaid to all the raised parts and made veins with it. All the centers where painted with Twisted Citron, and dots of Mustard Seed to the stamen. Then same as the Paperwhites, I added Flower Soft to the stamens. The leaves were painted with Twisted Citron and Rustic Wilderness.

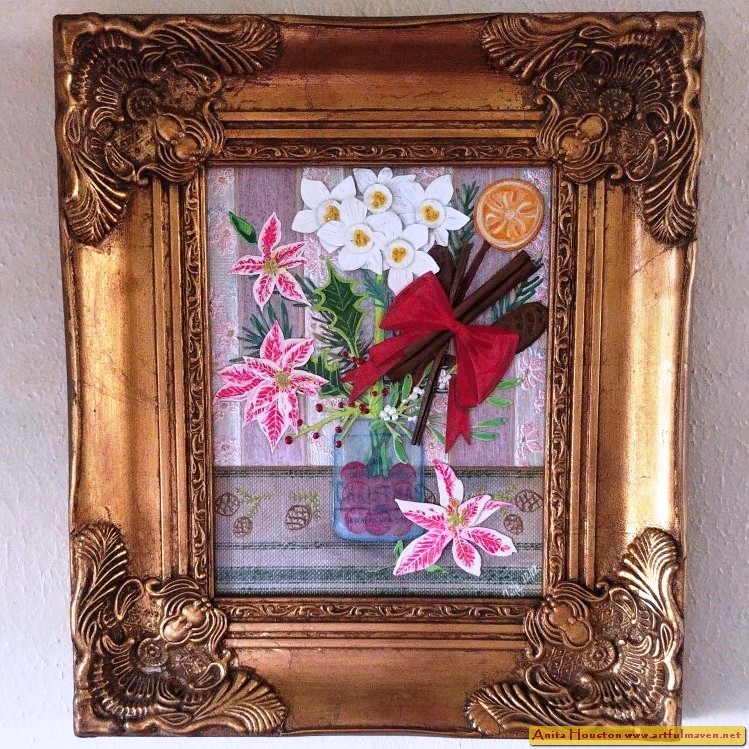
I adhered the cinnamon sticks on finally, criss-crossed, and added the bow on top. Then I adhered the poinsettias on each, with the leaves on the bottom one, and one leaf cut off for the small poinsettias up top. I added a little more detail with Rustic Wilderness to more of the greenery and some Lumberjack Plaid to the bow. I used some Pitt Pens for a little shadow under the jar and some of the petals. Then I coated the whole canvas with lots of Crazing Collage Medium to create more texture and sheen. Once dry, I added dots of White Opal Liquid Pearls to the white berries, and dots of Garnet to the red berries. I signed each, and framed them. I altered with Distress Paint as well...Ground Espresso the pink poinsettia one and Black Soot to the red poinsettia one...painting it on in the recessed areas and then wiping off the excess.
Paperwhites and Pink Poinsettias
Paperwhites and Red Poinsettias
Here it is in my dining room with all my other paintings, a Sunflower painting my son did when he was in third grade, and a painting my Mother In Law did years ago.
Supplies:
(Paintbrush, Water Mister, Paper
Trimmer, Scissors, Ink Blending Tool, Two Sided Tape, Ruler, Scrap Paper,
Scotch Tape, Palette Knife, Die Cut Machine, Alcohol Ink Applicator, Stamp
Platform, Tweezers, Heat Tool, Die Pick, 1/2 to 5/8 Hole Punch, Sizzix Flower
Shaping Tool)
-8x10 Inch Canvas Panel
-Ranger Tim Holtz Distress Paint: Peeled
Paint, Antique Linen, Wild Honey, Orange Marmalade, Pine Needles, Walnut Stain,
Ground Espresso, Squeezed Lemonade, Twisted Citron, Mowed Lawn, Evergreen
Bough, Forest Moss, Rustic Wilderness, Lumberjack Plaid, Mustard Seed, Picket
Fence, Kitsch Flamingo, Festive Berries
-Tim Holtz Idea-ology:
Christmas Backdrops, Mask Sheets, Classic Kraftstock
-Ranger Tim Holtz Distress Archival Ink:
Vintage Photo, Peeled Paint, Fired Brick, Salvaged Patina
-Ranger Tim Holtz Collage Medium:
Crazing, Matte
-Stamper's Anonymous Tim Holtz Layering
Stencil: Tiny Poinsettia
-Ranger Tim Holtz Distress Texture
Paste: Crackle
-Ranger Paint Dabber: Pearl Metallic
-Sizzix
Tim Holtz Thinlits (Christmas 2022): Pine Patterns, Colorize Bow Tied, Holiday
Brushstroke 3, Modern Festive
-Sizzix Tim Holtz Bigz Die: Trinket
Frames, Branches
-Ranger Tim Holtz Alcohol Ink: Cloudy
Blue
-Stamper's Anonymous Tim Holtz Stamp
Set: Festive Overlay
-Ranger Embossing Powder: Clear
-Ranger Tim Holtz Distress Watercolor
Cardstock
-Ranger Tim Holtz Distress Rock Candy
Glitter
-Ranger Tim Holtz Distress Woodgrain
Cardstock
-Sizzix Tim Holtz Thinlits: Festive
Bouquet
-Ranger Liquid Pearls: White Opal,
Garnet
-Light Green, Dark Red,
Gray Pitt Pen, Marvy Deco Color Premium Gold Pen, Red Velvet, Flower Soft
Yellow
That was a doozy! Thanks for staying until the end, and especially for the comments! I hope I'll be back before Christmas as I'm still working on a lot of stuff, but with the time being what it is I'm not sure I will be. Stay safe and healthy everyone, and I hope your hands get creatively dirty soon!