
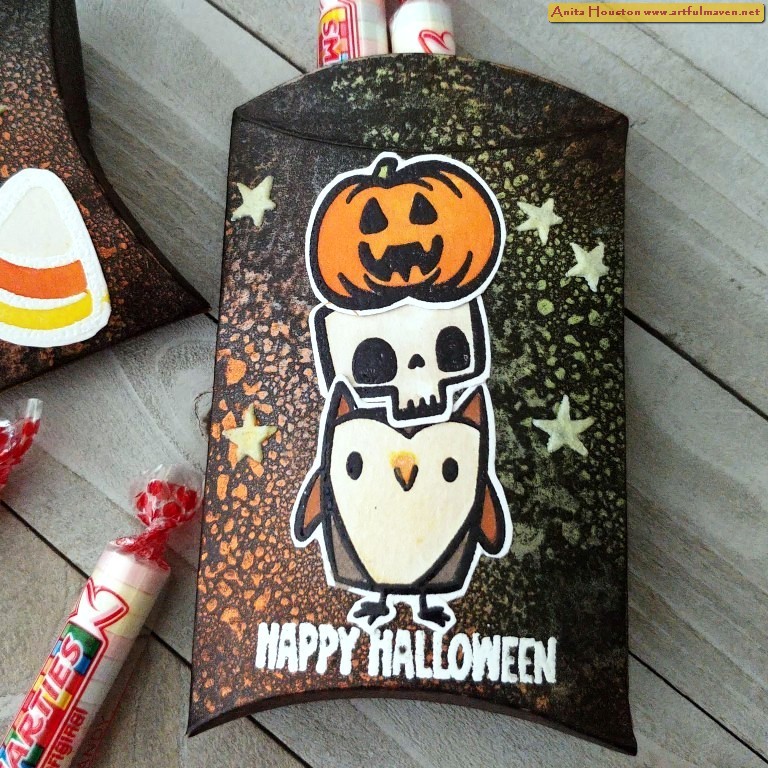
Hello again this week Everyone! Today, I have the Halloween Pillow Box Candy Holders seen in the Tim Holtz Stamper's Anonymous Halloween Live, made with the Tiny Frights Stamp Set along with the Mini Spellbound and large Peek-a-boo Layering Stencils. I would give these out to my special Trick-or-Treaters or use them for party favors. They also glow in the dark with the new Glow Distress Grit Paste, so they are super fun at night. Hope you enjoy!


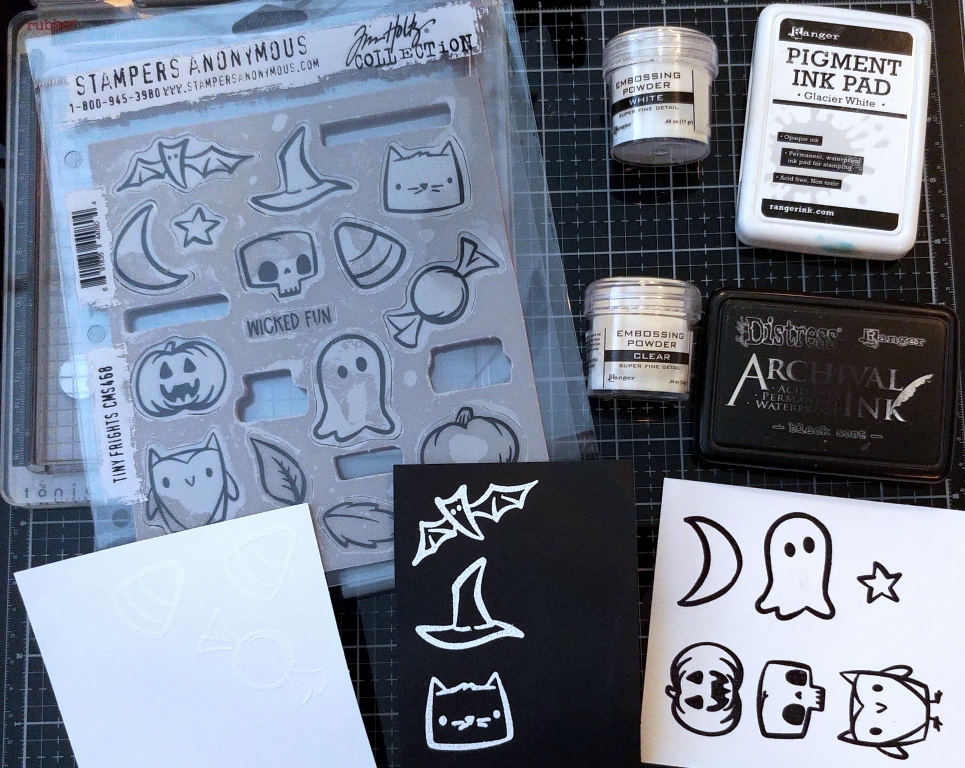
To make embossing
cleaner, make sure to pounce all papers with an anti-static pouch first. From
the Tiny Frights set, and using Black Cardstock, stamp the bat, hat, and cat
stamps using Glacier White Pigment Ink and then heat emboss with White
Embossing Powder from Ranger. Make sure to leave space around the cat for the
next part. Onto Watercolor Cardstock, stamp the jack-o-lantern, skull, owl,
moon, ghost, and star using Black Soot Archival and heat emboss with Clear
Embossing Powder. Onto more Watercolor, stamp the candy corn, candy, and
another candy corn in Glacier White and heat emboss with White Powder.

For the cat only, use
the Mini Stars Layering Stencil an Embossing Pen color in a small circle with
three dot circles that look like a paw print just slightly to the right below
the head for the cat's hand, and then quickly pour white powder over and heat
emboss. Then use the pen to draw two line for the arm, two lines for the sides
of the body, and the outline of a wand above the hand, pour powder on and heat
emboss. Add two sided tape to the back of all the papers, then cut out all of
the embossed images leaving a tiny border around each. Set aside for now.

Take the Pillow Box
w/Labels Bigz Die from Sizzix, and using Black Kraftstock, die cut five of the
boxes. You will need one small label for later, so you can save all the other
labels for something else.

Take
two of the boxes and lay them in a spray box or on paper towels, one vertical
and one horizontal. Shake up the Mulled Cider, Flickering Candle, Ominous
Twilight, and Fortune Teller Distress Mica Stains until all mica is released
from the bottom. Heavily spray each color in a striped diagonal pattern on both
boxes alternating colors until all the paper is covered. Make sure to clean the
nozzle of each so there is no clogging the next time you use these. When dry,
lay the stamped images on each were they will go on the front panel, but don't
stick down yet. Select the sentiments for each and see where they will go.
Remove the images and put them in a safe place, and place one box in a stamp
platform and secure the sentiment. Pounce the anti-static pouch over where it
will be, and stamp the sentiment with Glacier White Pigment Ink and heat emboss
with White Embossing Powder. Do the other the same. NOTE: On the opposite panel
of the box (the back side) you will need to select a pair of Peek-a-Boo eyes
from the Layering Stencil that will be stenciled in with the Glow Grit Paste,
but I found out the hard way that the Mica will bleed through the Glow, so to
alleviate this you need to stencil in the eyes with Glacier White Pigment Ink
first to be a barrier between them. Using a Mini Detail Inking Tool and the
Glacier White Pigment Ink, stencil in one pair of the eyes on the back panel of
each box, and let this dry awhile. Remember the eyes will be upside down on the
horizontal box so that when folded the eyes will be right side up. Set aside
for now.

Take two more of the
black Pillow Boxes, and lay them in the spray box or on towels, again one
vertical and one horizontal, and shake up the Empty Tomb, Wicked Elixir, and
Jack-O-Lantern Distress Mica Stains, and spray those heavily, horizontally
alternating colors on each box. Let dry. Lay the stamped images on each were
they will go on the front panel, but don't stick down yet. Select the
sentiments for each and see where they will go. Remove the images and put them
in a safe place, and place one box in a stamp platform and secure the
sentiment. Pounce the anti-static pouch over where it will be, and stamp the
sentiment with Glacier White Pigment Ink and heat emboss with White Embossing
Powder. Do the other the same. Using a Mini Detail Inking Tool and the Glacier
White Pigment Ink, stencil in one pair of the eyes on the back panel of each
box, and let this dry awhile. Remember the eyes will be upside down on the
horizontal box so that when folded the eyes will be right side up. Take all
four of the colored Pillow Boxes, and using the Glow Grit Paste and a palette
knife, stencil in all the pairs of eyes, and set these aside to dry. Clean the
stencil and knife.

Take all the candy
images, the owl, jack-o-lantern, and skull, and color them in with Distress
Watercolor Crayons and a Detail Water Brush (Antique Linen, Vintage Photo,
Walnut Stain, Spiced Marmalade, Mustard Seed, Twisted Citron). The owl's belly
and shadowy spots on the skull are Antique Linen fyi. Then take coordinating
Distress Mica Stain, shake them up, and pour a tiny bit out onto the white mat.
Pick up with the brush and color over the other matching colors. Unraveled is
on the Antique Linen. Now all the colors will shimmer.

Remove the backing on the
stamped images and stick them on where they go. Take the Mini Stars Stencil and
using the Glacier White Pigment Ink again as the barrier and the Mini Inking
Tool, stencil in stars on the owl box and on the ghost box. Stencil in asterisk
looking ones on the candy box and around the top of the wand to look like magic
stars. You can also stencil in some circles around the wand like I did, but I
didn't put an Glow on those. When dry, add the Glow Grit Paste over those, and
let dry. Gently fold all the boxes along the fold lines, and then add two sided
tape to the thin joining part, and adhere the panels together for each box.
Fold the round parts in one side, fill with candy, and enjoy giving to your favorite
Trick-or-Treaters. To recharge the Glowing parts just leave under a light and
they will glow bright again.

On the last pillow box,
I decided to change it up and just make it a mummy. With the box vertical,
stencil in a pair of eyes with the Glow on the upper left side. Let dry. Fold
all the parts first, and then adhere the panels together using two sided tape,
and then secure the ends to close the box. Take Mummy Cloth (probably about a
yard) and wrap around the box diagonal one way and then the opposite way,
finishing around the eyes. Fold the parts over if they are covering the eyes.
Secure the end with Collage Medium. Using Gathered Twigs Distress Ink, ink the
both edges of the strips of cloth so they look old. Brush Medium over both
sides. Take about a foot long piece of cloth and wrap it around twice and tie
just one to secure. Stamp the sentiment on one of the labels from the die using
Glacier White Pigment Ink and heat emboss in White Powder. Punch a small hole
in one end of the label. Distress the edges and ink them using the Gathered
Twigs. Place the label through one of the tied strings and then tie again to
make a knot. Trim off to short the strings. Ink the edges of the strings with
Gathered Twigs.


Supplies:
(Two Sided Tape, Stamp Platform, Anti
Static Pouch, Heat Tool, Scissors, Mini Detail Inking Tool, Palette Knife, Detail
Water Brush, Distress Tool, Hole Punch, Collage Brush)
-Ranger Tim Holtz Watercolor Cardstock
-Ranger Surfaces: Black Cardstock
-Stamper's
Anonymous Tim Holtz Stamp Set: Tiny Frights
-Ranger Tim Holtz
Distress Archival Ink: Black Soot
-Ranger Embossing Powder:
Clear, White
-Ranger Pigment Ink Pad:
Glacier White
-Stamper's Anonymous Tim Holtz Layering Mini Stencil Set: 56
(Spellbound)
-Ranger Embossing Pen
-Tim Holtz Idea-ology: Black Kraftstock,
Mummy Cloth
-Sizzix Tim Holtz Bigz Die: Pillow Box
w/Labels
-Ranger Tim Holtz Distress Mica Stain: Mulled
Cider, Flickering Candle, Ominous Twilight, Fortune Teller, Empty Tomb, Wicked
Elixir, Jack-O-Lantern, Unraveled, Phantom Mist, Harvest Moon, Fallen Acorn
-Stamper's Anonymous Tim Holtz Layering Stencil: Peekaboo
-Ranger Tim Holtz Distress Grit Paste:
Glow
-Ranger Tim Holtz Watercolor Pencils:
Antique Linen, Vintage Photo, Walnut Stain, Spiced Marmalade, Mustard Seed,
Twisted Citron
-Ranger Tim Holtz Distress Ink: Gathered
Twigs
Thank you so much for stopping over and looking, and especially for leaving a comment. I will be back soon. Until then, I hope your hands get creatively dirty soon!


