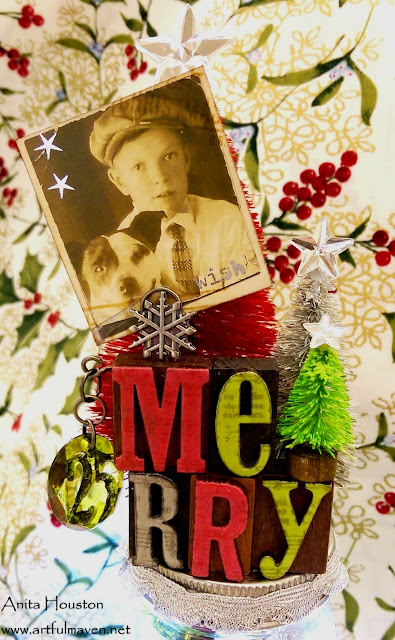
Hello everyone! Today, I'm showing you my 'favorite' Christmas project that I made on the retreat, and the one I am most excited about. It involves drilling through glass, something I was a little timid about, but it was all good and really easy to do. I hope you enjoy, and thanks so much for all the comments lately! Note: The pictures were a little dark taken at the retreat, and I already gave one away, so I've taken more photos, so you are getting a miss mash...sorry...and a whole lot, so grab a cup of hot chocolate!
 |
| These were the original three I made, but I gave the red and green away already, and couldn't retake photos with it, so I am very sorry for the bad photo. They are made with lots of Idea-ology goodies. |
 |
| These two I have not given away yet, and I think I will keep one! |
 |
| Drilling through glass is not hard at all, a little scary at first, but really just time consuming. You must have all the proper tools...the correct bit, drill, goggles, water, and a towel. Drill outside near a water hose to make it easier, and place the glass on a towel. Keep water on the glass and drill bit at all times to keep it from getting hot. Angle the bit at first to make a little notch to place the bit in to keep it from slipping, and DO NOT put too much weight on the drill...just go slowly and let it do it's thing. It takes about 5 minutes to drill through each one of Tim's Mason Jars, so have patience. |
 |
| This is the special diamond tipped drill bit to drill in the glass. There are several videos on youtube to watch if you are scared to do it, and I've linked one I liked the best. |
 |
| Here are all three Mason Jars with holes on the bottom. You can see the little glass chunks I drilled out on the bottom left. I didn't break a one!!! |
 |
| The base of the piece is a corrugated food container I found at the grocery. I misted them with Distress Spray Stain, and made a hole at the top center. Then I laced the battery operated lights through the hole in the base first and then up through the Mason Jars. I glued the base to the jar, and the battery pack is underneath the base strapped on with velcro. See pic below as well. |
 |
| Once base was adhered to the jar, I filled it with glittered and mercury glass ornament balls, while winding the lights all around them for evenness and balance of the lights. Then I screwed on the lid. So easy! |
 |
| I painted the Letterpress with Distress Paint. |
 |
| When dry I stamped on them with Ranger Archival and an old Tim Stamper's Anonymous Christmas Sheet Music image. I screwed in a Screw Eye into each first letter to be able to hang the Facet. I also use a craft pick to make a hole on top of each first letter for the Memo Pin to go in. |
 |
| I misted all the trees with Distress Spray Stain, let them dry, and then glued everything into place on the top of the jar lids. |
 |
| I used Alcohol Ink to color in the Facets, then stamped the '25' on them with Jet Black from that awesome Christmas Ticket. Then I coated the '25' with Glossy Accents to make it really stand out. | |
 |
| I stamped the Sparkles on the Kraft in Watermark Resist, and then the sentiment in Jet Black. I cut those out banner style, and fish tailed the ends, then added Platinum Stickles. The photos were inked and stamped on, and then I added the new Gilded Holidays Remnant Rubs to them. |
 |
| I cut off the charm hole on the Snowflakes and glued them onto the Memo Pins, and also used two sided tape to adhere the ribbon around the jar. |
 |
| This one is my favorite! |
Tim's Mini Mason Jars can be used for a zillion things, and I love the smaller size. They still can hold a whole lot of loot too. Gotta love that!
I have two more Christmas projects to show you in the upcoming week, so please stay tuned. Thanks again everyone!!!
Supplies:

I hope your hands get creatively dirty soon!


