Ho Ho Ho and hi again! Thank you so much for all the positive comments on the last four Wax On Wednesday posts!!! I know it's not everybody's cup of tea, but I do appreciate it so. This is my last post for the year on the wax, as I've got to get geared up for CHA in a few weeks, so I thought I would show you some abstract background work, and I've decided to make Christmas cards to show you that. I've made two each in six different designs, and even though I've tried to do both the same, you will see each one is still unique. I LOVE that about wax.
 |
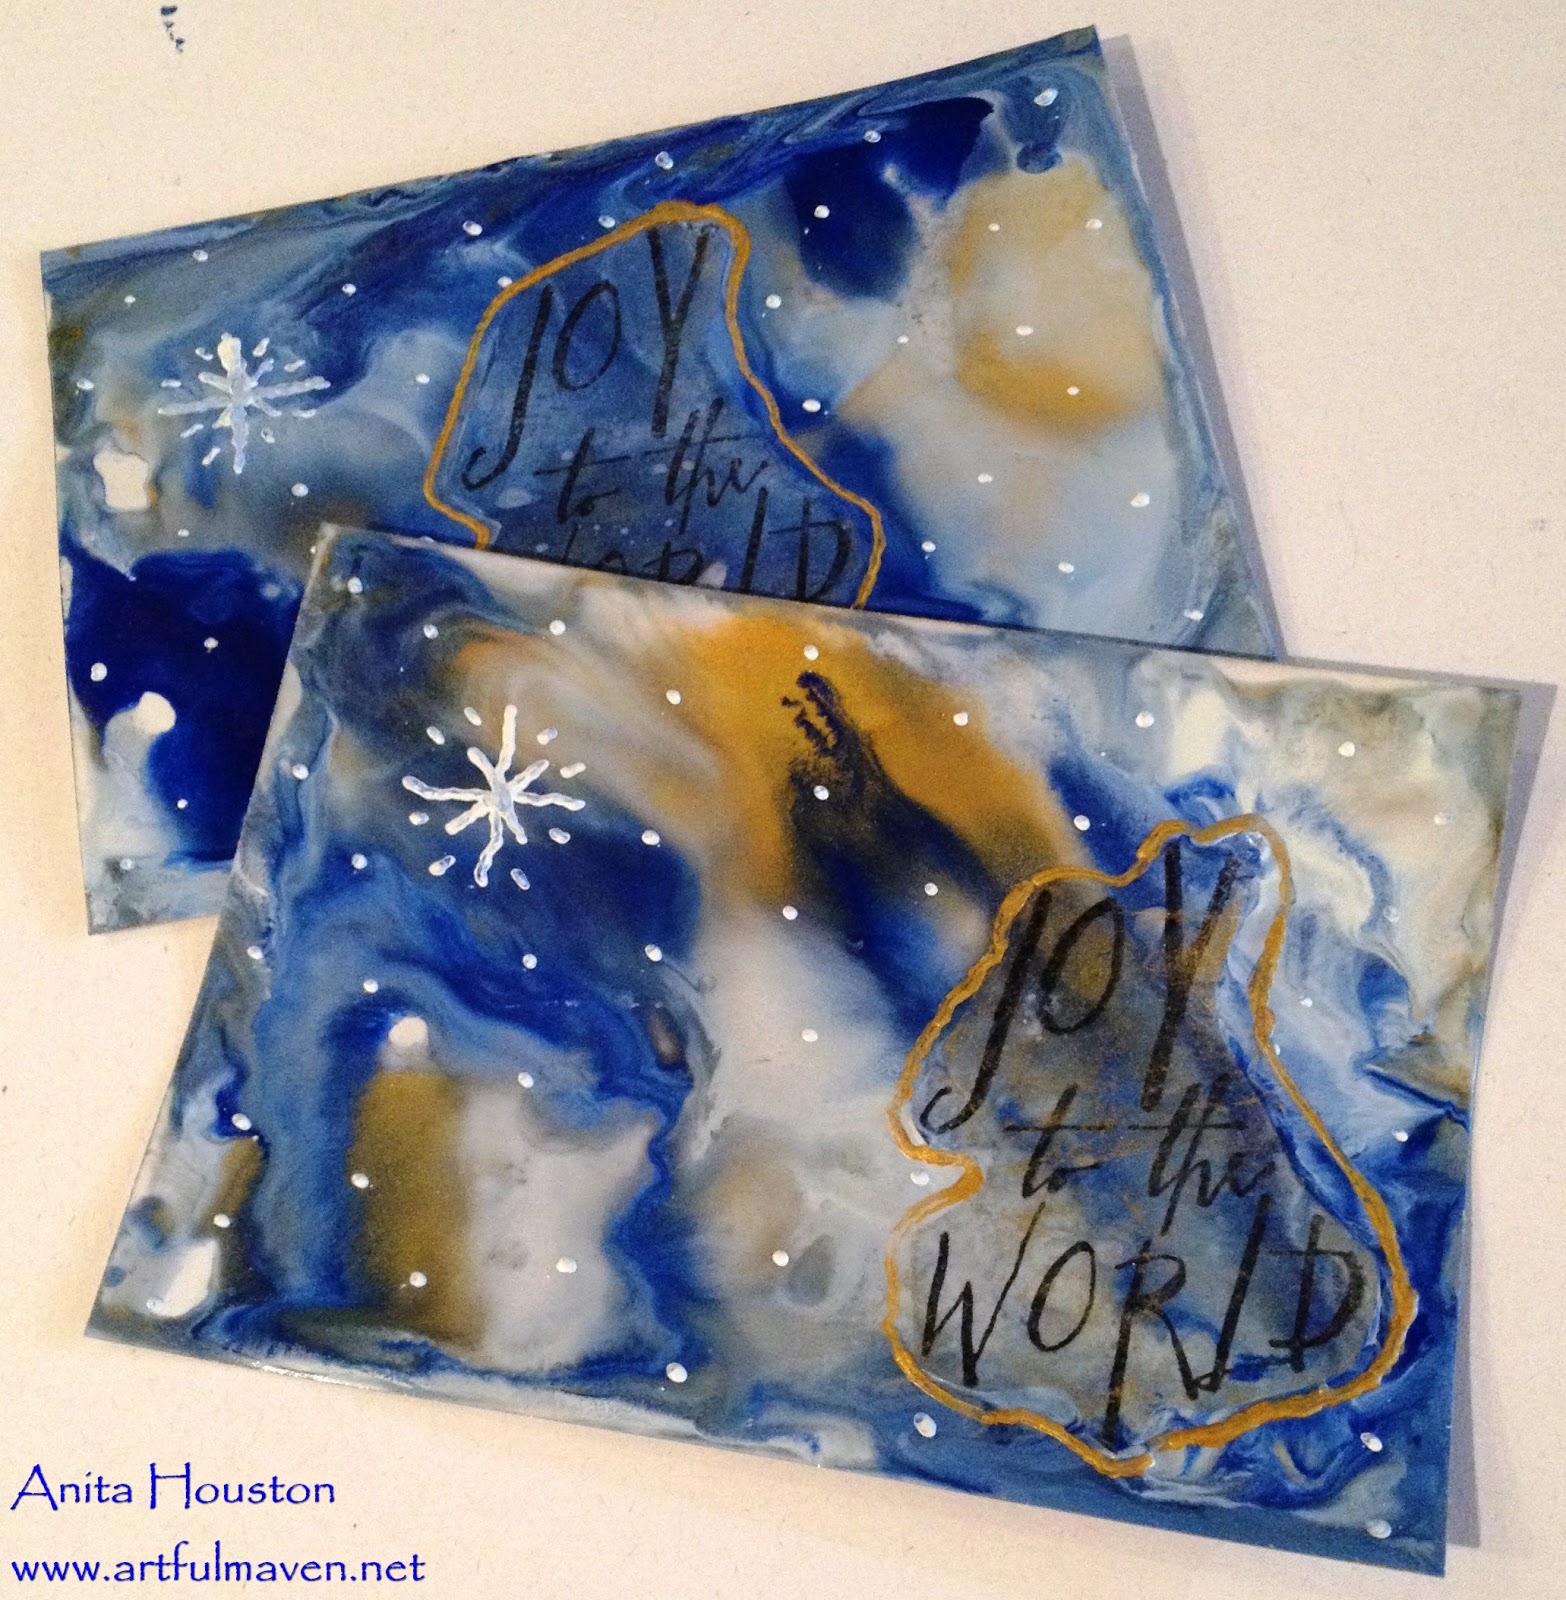
| I wanted images on my abstract backgrounds, so I stamped various images and sayings using Tim Holtz stamps on tissue paper, and stamped them with Ranger's Black Jet Archival Ink. The hardest part about making all of these 12 cards was the fussy cutting, and you know that is not my favorite thing. |
 |
| After everything was cut out and organized, I prepared my surface and got everything ready. I used Distress Stamping Paper as the base for all the cards. It takes the wax so well. |
 |
| I went crazy with blues, white, and silver wax. I made lots of waxy mess, but oh my gosh it's so FUN!!! No fuss at all...just apply wax to the iron and slather it on this time, unlike the previous landscape posts. |
 |
| I laid the tissue images on, and applied heat with my heat tool and the tissue paper just melted in. The heat tool pushes the wax around to create gorgeous marbling of color. I added blue to all the edges like I showed you in the last Wax on Wednesday post, but this time I melted the edges with the heat tool and made irregular shaped borders. I LOVED the effect. The more I play, the more I learn! I wish you could see the metallic colors just gloriously shining in the photos. |
 |
| I decided to have a play at really creating a marbled background, so I added lots of melted wax in puddles, and used the heat tool to move it around. LOVE LOVE LOVE!!! |
 |
| Here are all the cards, BUT of course I thought they needed more, so I added the stylus to the Melt Tool. |
 |
| The stylus sorts of sucks up the wax when you lay it on it, and then you can do detail work or write with it. |
 |
| I added dots of snow and/or stars to each one, and added some gold dots and framing to some others. I am so thrilled with how these all came out. The photos do not do them justice. It took me just over an hour to make these 12 cards. That's fast by my standards! |
I hope you liked the cards, and hopefully learned something new. Thank you truly for following me along this new journey. I will wax on and wax off again next year! Happy Crafty Holidays everyone!
Supplies:

I hope your hands get creatively dirty soon!