Last summer, I took a class from
Marion Smith from
Prima, who took a regular manila folder and transformed it into a mini book cover with really cool strung in pages. I wanted to make my own mini Art Journal using this type of cover, so I used her idea of the manila folder to make an Art Journal cover but instead using the
Faux Leather Technique, and using a ring binder so I could take the pages out for easier art journaling.
 |
| I trimmed the manila folder 6 inches wide the whole length of the folder. I'll use the other part for something else. |
 |
| I stained the manila with Vintage Photo and Walnut Stain Distress Stains. |
 |
| I flipped it over and liberally sprayed the back with Ranger Inkssentials Ink Refresher, and massaged it in until the paper became very pliable. |
 |
| I waded it all up very carefully so I wouldn't rip it, and allowed it dry for a while. |
 |
| I ran Rusty Hinge Distress Ink directly over the top of the paper (now a journal cover) to highlight the wrinkles made. I then gave it a little blast with the Heat Tool. |
 |
| I cut a strip of Grunge Board 1 1/2 x 6 inches. I adhered the button printed paper from Idea-ology onto the Grunge, and inked the edges with Rusty Hinge. Then I attached the Large Ring Binder from Idea-ology as well to it. |
 |
| I flipped the journal cover over and placed the ring binder right next to the fold in the middle of the cover. I drew a line on the other side of the ring binder. I then removed the ring binder and drew dotted lines down the middle of the of the drawn line and fold. This is the spine of the journal. I used the rest of the button paper and cut it in half making 6 inch wide strips. |
 |
| I adhered the strips of paper to the journal, one on each side of the dotted line. I trimmed the button paper so it was now the same shape as the journal cover. |
 |
| I placed the ring binder right in the middle where the papers were adhered, one side being on the fold that was originally there, and gave both sides a good crease. I removed the binder and then stitched around the edge of the whole cover. My machine did not like the glue I think, because it often stopped moving from stitch to stitch and jammed a few times. This made the stitching very jagged and heavy on some spots. I was not happy, but you can only notice it on the inside. It's not a gift, so I will live with it. |
 |
| I adhered the ring binder between the creases, and gave everything a good inking with Rusty Hinge. |
 |
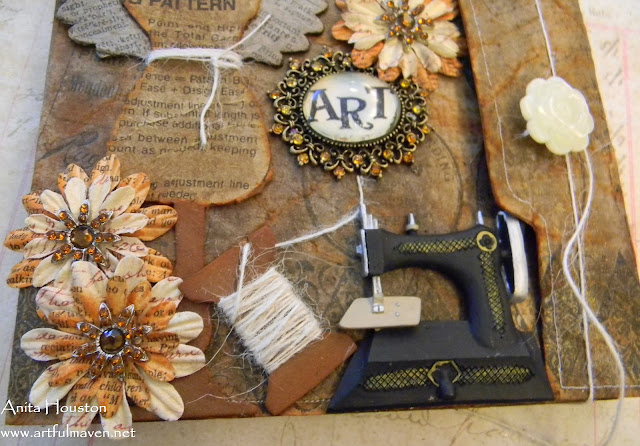
| I die cut the shapes from the Sizzix Tim Holtz Sewing Room Bigz Die using Grunge Board. |
 |
| I stained them with Vintage Photo Distress Stain and inked the edges with Rusty Hinge. I adhered pattern tissue to the dress form, added twine around the spool, and inked the button. The dress form also got Tissue Wrapped wings and embellishments. |
 |
| The side of the journal that was 2 1/2 inches longer was creased at 6 inches and again at 7 inches from the spine to make the closure flap of the journal. I stitched a button on the front with the twine while stitching the Grunge one onto the back at the same time to cover the stitches, also leaving about 18 inches of twine to wrap around the journal. |
 |
| I cut several strips of good weighted ivory cardstock 6x10 inches, folded each strip in half, punched holes to line up with the ring binder and placed them into the journal for my blank pages to create on. |
 |
| I added the die cuts, wings, Prima stamped flowers, sewing machine Blossom Bucket, and title piece to the front of the journal. |
I am entering this into
Simon Says Stamp & Show's challenge of "Read All About It", and
Sunday Stamper's challenge of "Stamped Flowers".
Supplies:
From My Stash: regular manila folder, pattern tissue paper, Recollections Flower Bling Brads, brooch given to me from Marion

I hope your hands get creatively dirty soon!


