Saturday, December 20, 2014

CC3C - Pocket Pages

 
Hello and happy Saturday! Five more days until Christmas...are you ready??? I'm not!!! BUT, it's time for another challenge, number eighteen, in the new Compendium of Curiosities III Challenge!!!   Again, The Curiosity Crew and I absolutely love at all the entries for all these challenges!!! It so inspiring, especially this time of year!  Thank you for joining in on all the fun, and of course for all of the comments. We hope you all participate again and again! That being said, sadly, I didn't have enough time to complete a project for this challenge with all the holiday business and preparing for CHA, but I hope you do! Please forgive me.
Challenge number eighteen is using Pocket Pages.  They are such a cool addition in albums due to the unique pocket sizes they come in. You can fill them up with all sizes of things and paper!  I hope you can play along on this challenge so you can win some amazing fabulous prizes donated by the ever generous Tim and Mario, and this challenge's sponsor, The Funkie Junkie Boutique!!! Thank you sponsors for your generosity! You will have two weeks to complete this challenge and link it up to the CC3Challenge site, and you can carefully read all the rules here. Please take the time to visit every member of the Curiosity Crew (See below.) for not only some cool pocket filling inspiration, but for a chance to win some extra goodies!

I know it's so close to Christmas, and many of you are so busy preparing and celebrating, but it you can take time out to decompress and craft...wink...we would love to have you join the challenge! Happy Crafty Christmas to all who celebrate!


I hope your hands get creatively dirty soon!

Saturday, December 13, 2014

Happy Birthday Wendy Vecchi!!!

Happy birthday to you! Happy birthday to you! Happy birthday dear Wendy! Happy birthday to you! Thank you Wendy for all you've done for me and for everyone! You inspiration is abounding!!!
Taking techniques from Wendy, I started with Tim's Sizzix Tarnished Trophies Bigz Die, and turned it into a vase by chopping the top off.
Then I attempted Wendy's  Faux Enamel Ware technique, but it definitely did not come out as good as hers....I must practice more.
I folded a Ranger giant #12 Manila Tag in half, and stamped and embossed Wendy's In Full Bloom image on.
I stenciled in the color with Distress Ink using the stencil that comes with the stamp...LOVE that it does!
More stenciling with the Checkmate Stencil.
Then more stamping.
Then more stenciling...I thought it needed more...go figure!!!
Then I repeated the stamping, embossing, stenciling, and fussy cut them out and layered them on the card. Stickles was a must for the centers. I thought it needed more...yes I know...so I used some die cut flowers laying around from Tim's Tattered Flower Garden. Then it needed a sentiment, then a bow, and finally done. A little gaudy I know, but that's me!


Hope you like it Wendy...enjoy your day, your week, your month, your year! And if the rest of you are on Facebook today, stop by and wish wonderful Wendy a Happy Birthday!

Supplies:

I hope your hands get creatively dirty soon!

Wednesday, December 10, 2014

Wax On Wednesday - Five

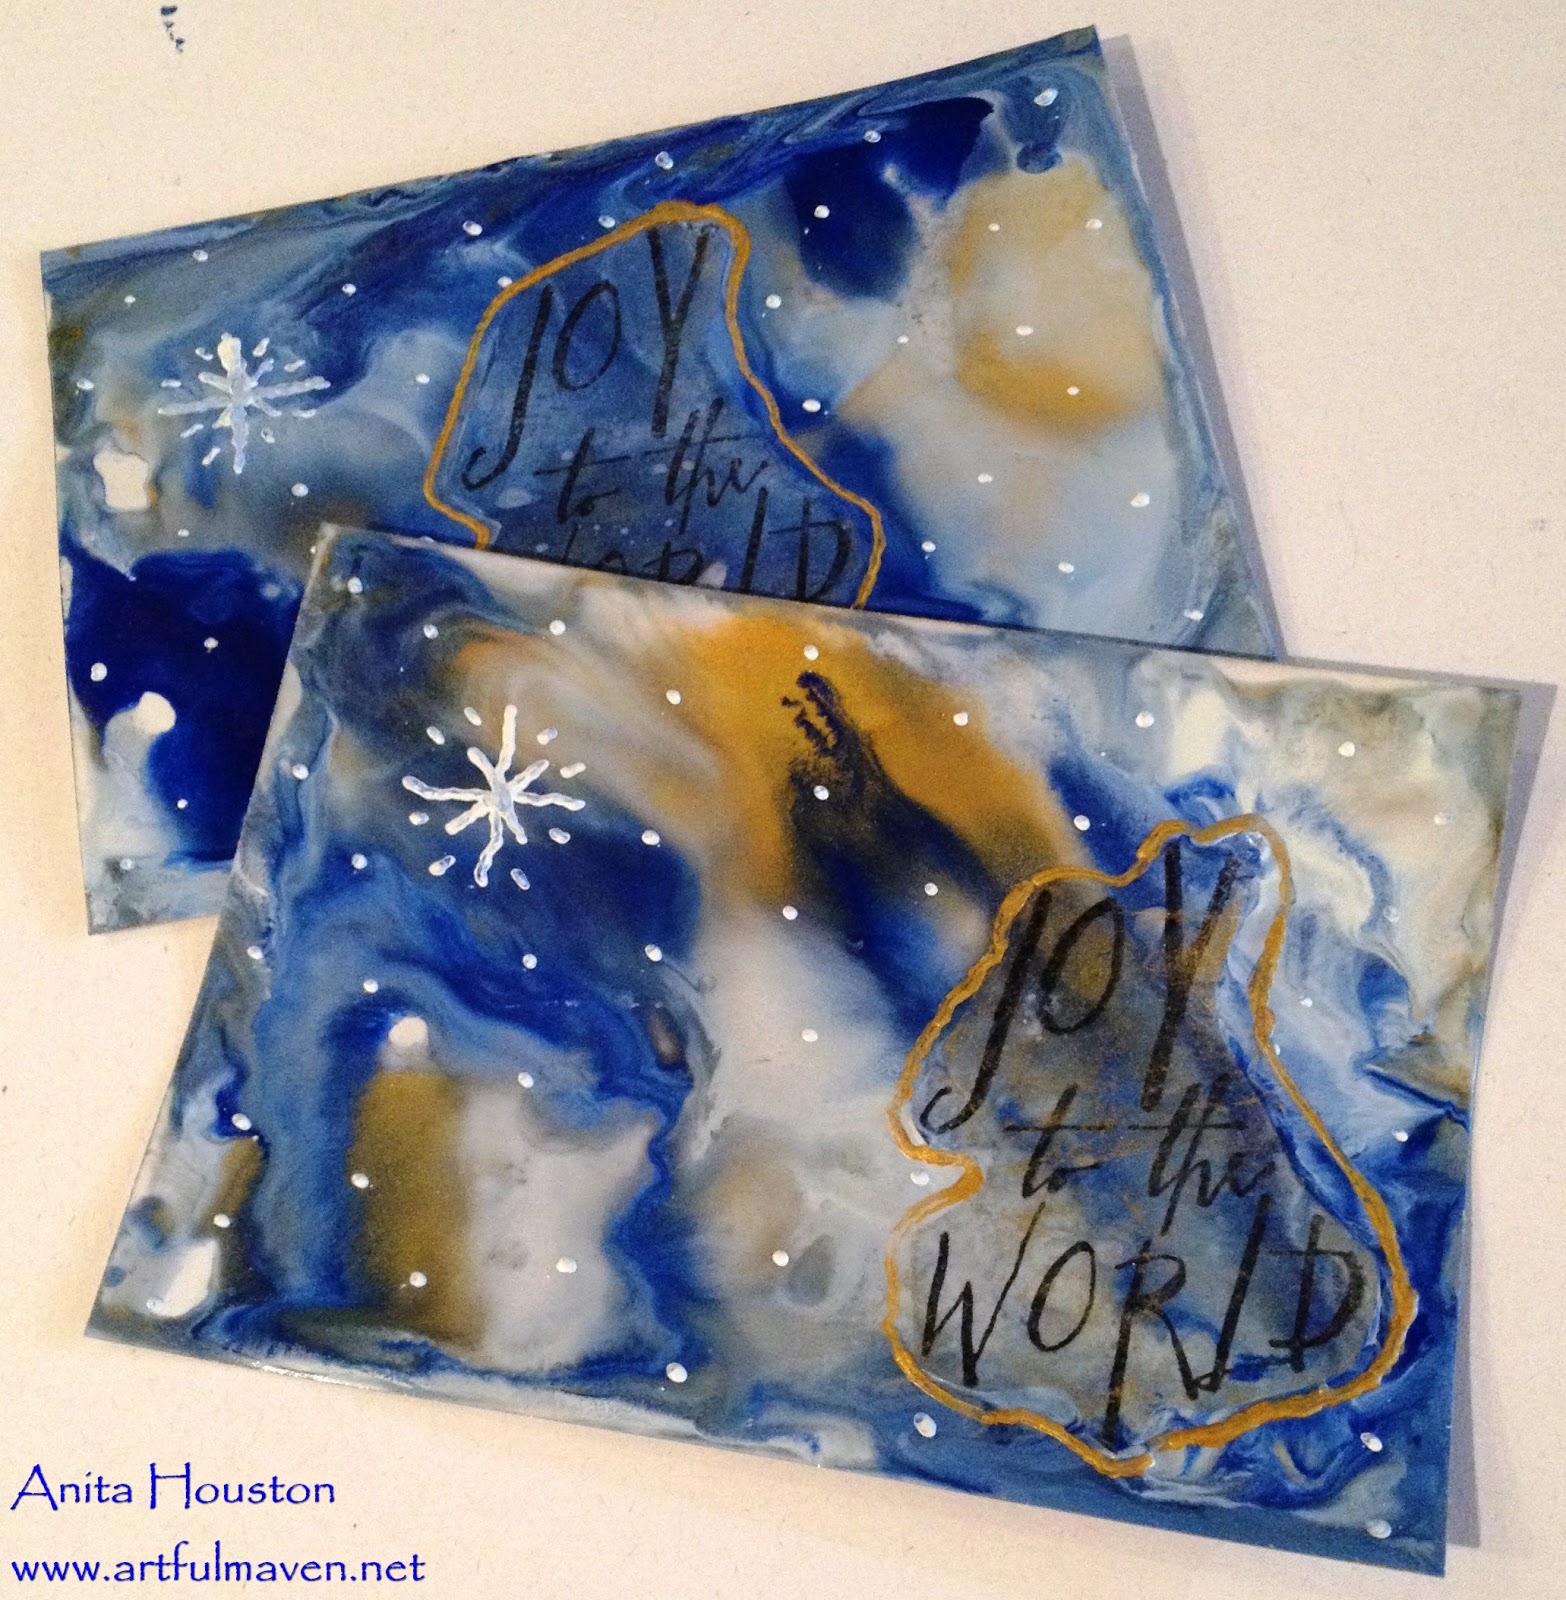
Ho Ho Ho and hi again! Thank you so much for all the positive comments on the last four Wax On Wednesday posts!!! I know it's not everybody's cup of tea, but I do appreciate it so. This is my last post for the year on the wax, as I've got to get geared up for CHA in a few weeks, so I thought I would show you some abstract background work, and I've decided to make Christmas cards to show you that. I've made two each in six different designs, and even though I've tried to do both the same, you will see each one is still unique. I LOVE that about wax.
I wanted images on my abstract backgrounds, so I stamped various images and sayings using Tim Holtz stamps on tissue paper, and stamped them with Ranger's Black Jet Archival Ink. The hardest part about making all of these 12 cards was the fussy cutting, and you know that is not my favorite thing.
After everything was cut out and organized, I prepared my surface and got everything ready. I used Distress Stamping Paper as the base for all the cards. It takes the wax so well.
I went crazy with blues, white, and silver wax. I made lots of waxy mess, but oh my gosh it's so FUN!!! No fuss at all...just apply wax to the iron and slather it on this time, unlike the previous landscape posts.
I laid the tissue images on, and applied heat with my heat tool and the tissue paper just melted in. The heat tool pushes the wax around to create gorgeous marbling of color. I added blue to all the edges like I showed you in the last Wax on Wednesday post, but this time I melted the edges with the heat tool and made irregular shaped borders. I LOVED the effect. The more I play, the more I learn! I wish you could see the metallic colors just gloriously shining in the photos.
I decided to have a play at really creating a marbled background, so I added lots of melted wax in puddles, and used the heat tool to move it around. LOVE LOVE LOVE!!!
Here are all the cards, BUT of course I thought they needed more, so I added the stylus to the Melt Tool.
The stylus sorts of sucks up the wax when you lay it on it, and then you can do detail work or write with it.
I added dots of snow and/or stars to each one, and added some gold dots and framing to some others. I am so thrilled with how these all came out. The photos do not do them justice. It took me just over an hour to make these 12 cards. That's fast by my standards!


I hope you liked the cards, and hopefully learned something new. Thank you truly for following me along this new journey. I will wax on and wax off again next year! Happy Crafty Holidays everyone!

Supplies:

I hope your hands get creatively dirty soon!