
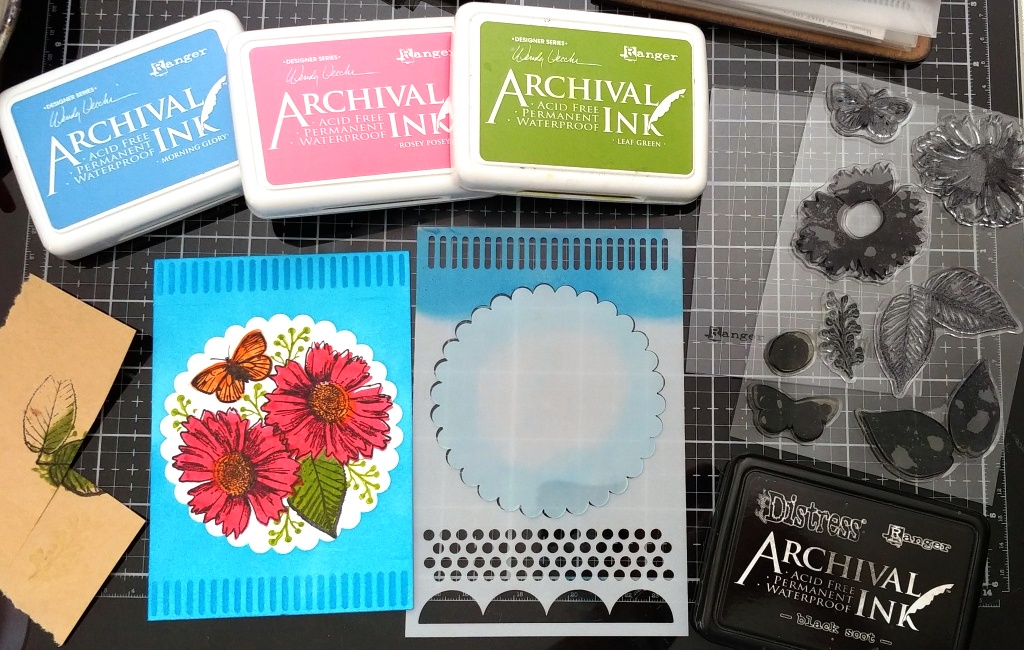
Hey Everyone! Today, I have the first of the two projects that were on the Tim Holtz Stamper's Anonymous Summer Live. These two cards were made with the Floral Elements and Noteworthy Stamp Sets with the Linked Circles or Squares Layering Stencils in the center, and all on a solid black background (Matte Black Kraftstock). How did I get these vibrant colors on a black background??? I used Ranger's Glacier White Pigment Ink first and then colored on top...see below. This technique never disappoints. Enjoy everyone!


(NOTE: It's useless to add a
colored ink to black paper if you want to see it, BUT if you add a permanent
white base first then you can add colorful ink on top to be able to see it. I
have done this many times using Glacier White Pigment Ink and Black Cardstock
from Ranger and it always works perfect, but as I now think the Black Cardstock
is discontinued, I needed a replacement and decided to try Tim's Black
Cardstock, and I did a comparison of the two that you will see below to help
you decide which paper to use. Black Cardstock matters here. If you are using
Ranger Black Cardstock which has no coating on it, ink and paint will adhere
and absorb in more and therefore dry faster for less chance of smearing, but
will be lighter in color and intensity, even after several coats. If you are using Idea-ology Black Kraftstock
which has a slight sheen coating on it, the colors of ink and paint will be
much more vibrant and intense as they stay on the surface, but take longer to
dry due to the coating on the paper. Colors also can bleed under stencils
easier due to the coating, but give a great distressed look if you like that.
You might want to play around with papers first to see what you like as I did. (See
step 3 for the differences in looks.)).
I cut a piece of Idea-ology
Black Kraftstock in half for two cards, and two pieces of Black Cardstock from
Ranger 4.5 x 6 inches for two cards (for my comparison). Using a blank sheet of
paper cut to the same size as the black pieces (4.5 x 6) I die cut the middle
of the blank sheet using the second largest Stitched Oval from the Thinlits set
from Sizzix, to use for a mask. I made a few just in case they got too messy to
keep reusing. You can discard the oval part as you won't use it.

Place
a black piece on the glass mat (I did two at a time with the different stencils
using one of each of the black papers to see what would happen.) and place the
white oval framed mask on top and secure these with whatever you usually use...I
used tape. Lay one of the stencils on top (either Linked Circles or Linked
Squares) horizontally and add tape on one side to act as a hinge as well as
hold the stencil in place. Hinging the stencil is important with this as it
makes things much easier, first so it doesn't move, and second so you can lift
the stencil to dry with a heat tool and not warp the stencil. Make sure your
Glacier White Pigment Ink is nice and juicy as they tend to dry up a little
faster than other inks, so reink if necessary before hand. Using a clean
blending foam on an Ink Blending Tool, add Glacier White to it from the ink pad,
and lightly rub the ink in over the stencil on the oval opening part, working
in circles as well as lightly pouncing to really get the ink in. Once covered
in the oval area lift up the stencil swinging from the hinged part and dry the
stenciled image with a Heat Tool, as Glacier White needs to be dry to be
permanent. (It will take longer to dry
on the Black Kraftstock and you might have some ink that went under the stencil.)
Do the same with the other stencil over the other piece of black paper, and
dry. Take Mermaid Lagoon and Evergreen Bough Archival Inks (only a permanent
ink for this technique but you can use any other colors), and ink over the
white alternating the ink colors, pouncing them on for best intensity of color,
then dry. You can even remove the stencil and mask to ink over the white, if
using Black Cardstock, but if using the Black Kraftstock, you might notice some
of the white ink moving while pouncing over the colored ink, so it's best to
keep the stencil on with the Black Kraftstock.
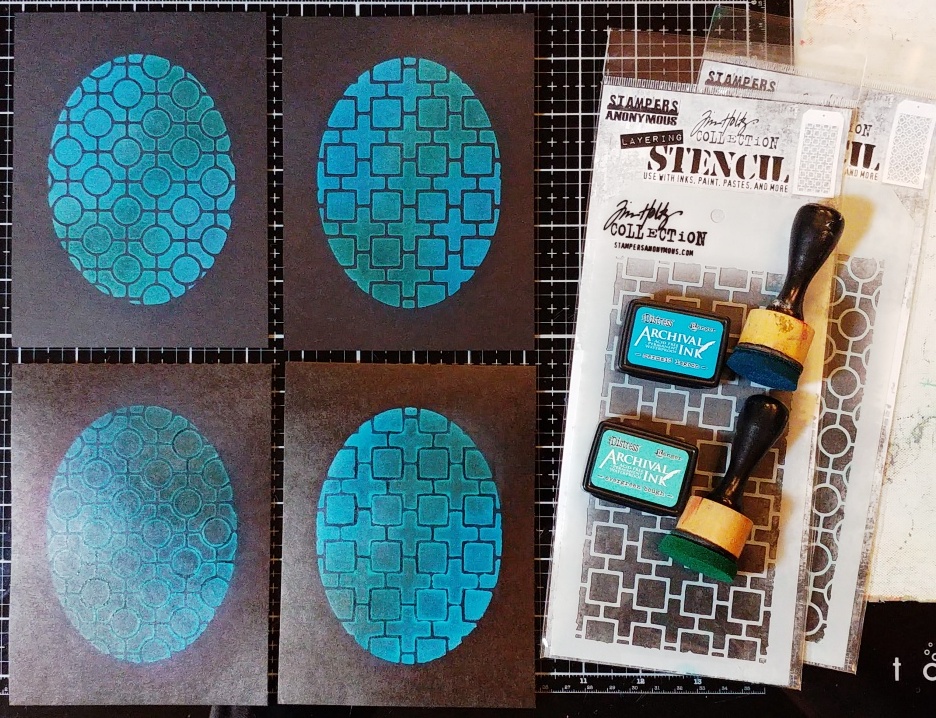
Here
is the comparison with the Black Cardstock pieces on top and the Black
Kraftstock pieces under. Although it is harder to notice in the picture, the
ink colors on the Black Kraftstock are much more intense and brighter and less
chalky looking, although you can see some of the ink that went under the
stencil so the image is not as crisp. The Black Cardstock pieces are very crisp
in image with no bleeding under the stencil, but the colors are less intense
and somewhat dull and a little chalky looking. At this point I really thought
I'd go with the Black Cardstock, but once paint was added later, I clearly made
the choice to go with the Black Kraftstock as the paint colors were much more
intense with only one coat, even though it took longer to dry, as with the ink.

(For the next part, it's
easier to do with two stamping platforms, but if you only have one you can
still do it but it will take much longer.) Lay the stenciled paper in a stamp
platform and using the stamps from the Floral Elements set, arrange the images
that you want in the forefront around the oval border. This will be the first
set, the forefront set. Close the platform to secure the stamps. Ink them with
Glacier White Pigment Ink and stamp the images. Carefully remove the paper and
add the other one in and stamp the images. Dry both pieces until the white ink
is dry. Leave the stamps in the platform as they are and lightly clean the
white ink from them with a damp papertowel. If white ink is between the raised
cuts of the stamps, don't worry about it as it will not affect your next
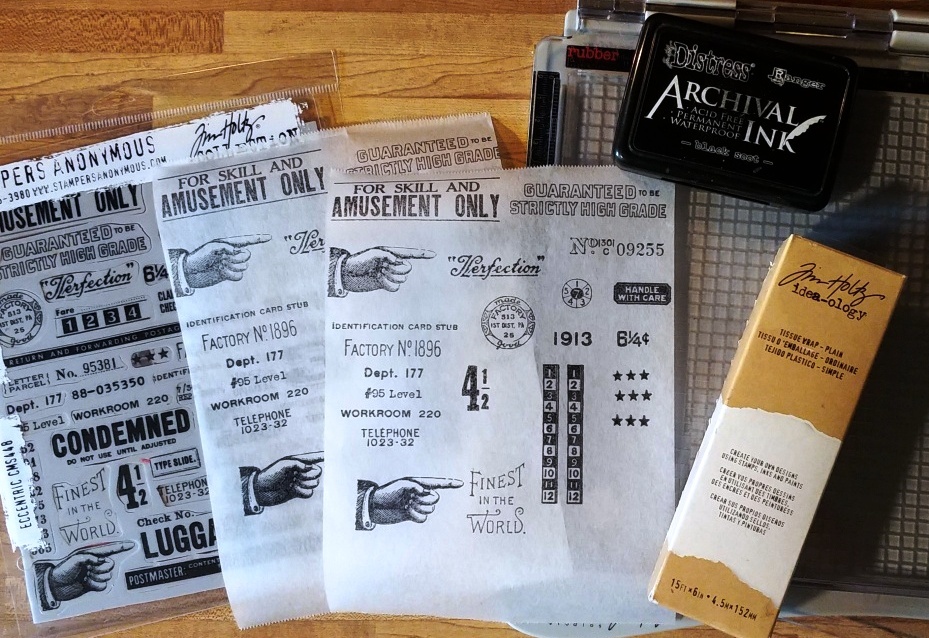
stamping and you will clean them well once you are finished with them. Stamp
the images again onto sticky note using a dark ink (I used Black Soot Archival)
to be used for masking. Cut the flower images out only from the sticky note,
and don't worry about the leaves or buds. (Note: I used the Black Cardstock
pieces here.)
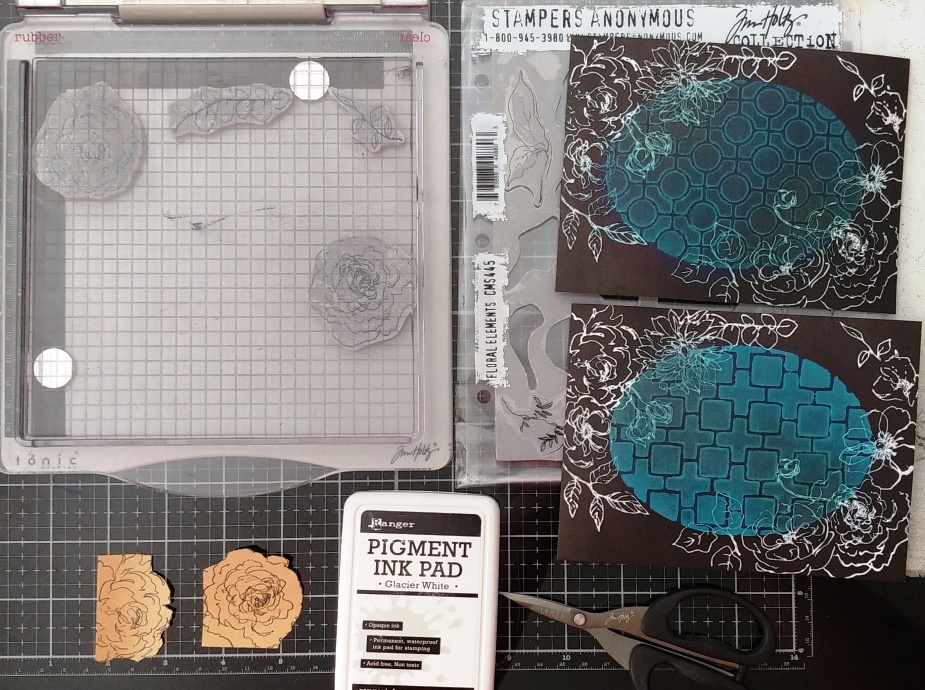
(If
you are only using one platform, you will need to do this part after you have
painted in and embossed the first set of flowers before you can remove them to
add the second set.) Using another platform, lay the paper back in and arrange
the flowers and leaves that will go in the background under the first set of
flowers, and close the lid to secure. Add the masks on top of the flowers on
the paper, and then stamp the second set using Glacier White. Remove the paper
and add the other and repeat the process. Dry both. (Note: I used the Black
Kraftstock pieces here.) Leaving the stamps in place, lightly clean the white
ink, and then stamp the large flowers only on sticky note to use later.

Starting with the leaves,
stems, and buds, paint over them using Twisted Citron Distress Paint with a
detail paint brush. Cover over the white ink if you want, but that will be
covered up later, so don't worry about it. The reason I used the white ink on
the black was to see the images well enough to paint in. Use Rustic Wilderness
paint to add the lines in the leaves, stems, and buds. For the flowers, I did
the same as the leaves, a light and a dark paint in the same color family for
each group of flowers, starting with the lighter for the whole flower and then
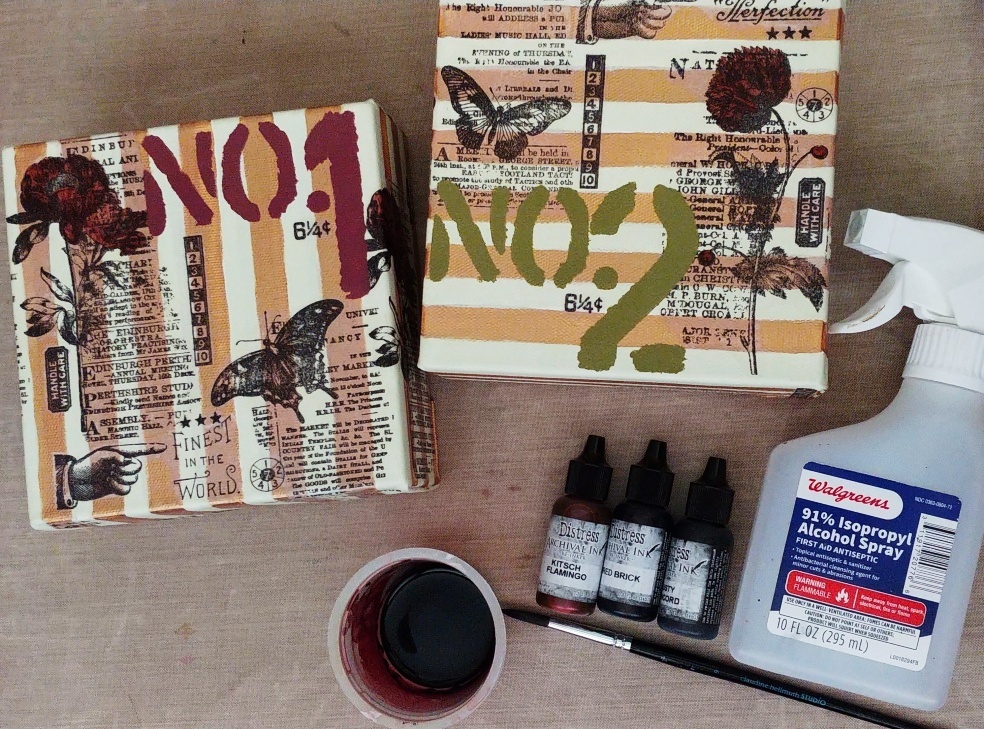
the darker for the shadows and details. I used Saltwater Taffy and Abandoned
Coral for the three poppies. I used Kitsch Flamingo and Worn Lipstick for the
dahlia looking flower. I used Picket Fence and Antique Linen for the two larger
rose looking flowers. I used Squeezed Lemonade and Mustard Seed for the last
flower. Once all the flowers are painted in, use Black Soot Distress Paint in
the center of the flowers on the stamen. Let dry, and do the same on the other
piece. (Once dry, if using Black Cardstock, you might notice the paint color
intensity weaken a lot and need another coat of paint. If using the Black
Kraftstock the color of paint will remain nice and intense but take longer to
dry.)

Place the dry card in
the second platform (the one with the background flowers). Add a sentiment from
the Noteworthy Stamp Set between the budded flowers and close the lid to
secure. Pounce an Anti-Static Pouch over the whole card so powder doesn't stick
where you don't want it, blowing off any excess. Add the masks over the
forefront flowers. Use Distress Embossing Ink to stamp the background flowers
and sentiment, and then immediately remove the masks, pour Gold Embossing
Powder over, pour it off, and then heat emboss. Repeat with the other card, but
change sentiments only. You are now finished with these flowers and the
sentiments and you can wash the stamps with soap and water to remove all the
white ink and replace the stamps back on the plastic cover. (If you only used
one platform, then you have to emboss the forefront flowers first and then
remove and clean them, then add the background flowers, stamp and paint them,
then emboss them and the sentiment.)

Add the card into the
first platform with the forefront flowers. Pounce more of the Anti-Static Bag
over. Take the two large flower masks and cut the sides off so that you just
have the middle of the flower as that is all you need masked so the bud stems
don't cover up any of the large flower, and stick it on. Ink the stamps with
Distress Embossing Ink, remove the masks, pour on the Gold powder, remove, and
heat emboss.

Cut and fold a Kraft
Cardstock base to 5 x 6.5 inches. Ink the edges with Gathered Twigs Distress
Ink. Cut a blue piece of Classic Kraftstock (one that matches the middle
stenciled area) to 4 7/8 x 6 3/8 inches, ink the edges using the Mermaid Lagoon
Archival, and mount to the Kraft base with two sided tape. Ink the edges of the
black piece with Black Soot Archival. Cut a Gold Metallic Kraftstock piece to 4
5/8 x 6 1/8 inches and mount the black card front onto this. Add foam tape or
Foam Adhesive Sheet to the back of the gold, and then mount this onto the card
base. Use Collage Medium to add three Gold Metallic Droplets in various sizes
around the sentiment.


Supplies:
(Sheet of Paper, Die Cut Machine, Ink
Blending Tool, Heat Tool, 2 Stamp Platforms, Sticky Note, Scissors, Glass Mat, Small
Detail Paint Brush, Anti-Static Pouch, Paper Trimmer, Two Sided Tape)
-Sizzix Tim Holtz Thinlits: Stitched
Ovals
-Tim Holtz Idea-ology: Black Kraftstock
(or Ranger Black Cardstock), Metallic Kraftstock, Classic Kraftstock, Metallic
Droplets
-Stamper's
Anonymous Tim Holtz Layering Stencil: Linked Circles, Linked Squares
-Ranger Pigment Ink: Glacier White
-Ranger Tim Holtz Distress Archival Ink:
Evergreen Bough, Mermaid Lagoon, Black Soot
-Stamper's
Anonymous Tim Holtz Stamp Set: Floral Elements, Noteworthy
-Ranger Tim Holtz Distress Paint: Twisted
Citron, Rustic Wilderness, Kitsch Flamingo, Worn Lipstick, Abandoned Coral, Saltwater
Taffy, Mustard Seed, Squeezed Lemonade, Antique Linen, Picket Fence, Black Soot
-Ranger Tim Holtz Distress Ink:
Embossing, Gathered Twigs
-Ranger Embossing Powder: Gold
-Ranger Surfaces: Kraft Cardstock
-Sizzix Foam Adhesive Sheets
-Ranger Tim Holtz Collage Medium: Matte
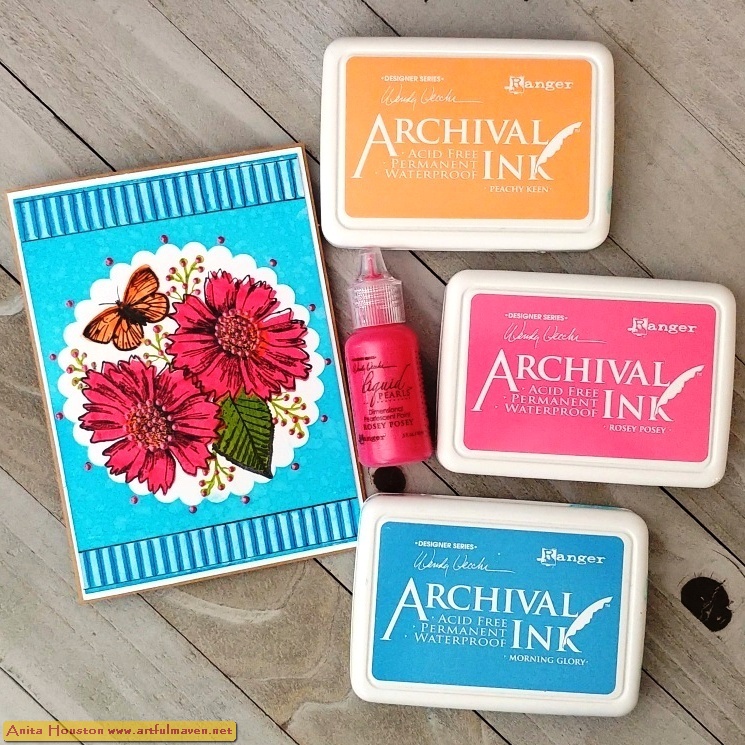
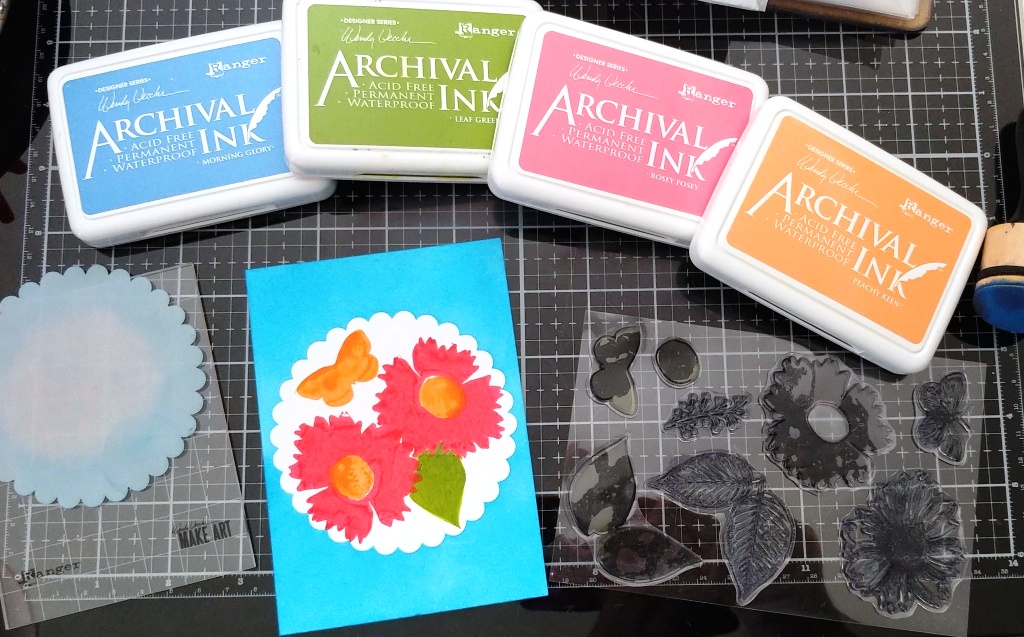
I've got one more from the Live to show you...in a few days. Until then, I hope your hands get creatively dirty soon!


