
Happy happy LOVE Day everyone!!! I wish you all tons of LOVE and hopefully chocolate, or maybe some new craft supplies so you can play along with us! It's time for another challenge, number twenty-two (WOW!), in the new Compendium of Curiosities III Challenge!!! The Curiosity Crew and I absolutely LOVEd all the entries from the last challenge, especially the Valentines...you all really inspire me!!! Thank you for joining in, and of course for all of the LOVEly comments.
Challenge number twenty-two is using the Dimensional Cutting Pad. Don't be scared to try this. It makes your project interactive and 3D, and that is so FUN!!! This is a technique to visit again and again as it's so practical and really makes your project pop! I hope you can play along on this challenge so you can win some amazing fabulous prizes donated by the ever generous Tim and Mario, and this challenge's sponsor, The Funkie Junkie Boutique!!! Thank you sponsors for your generosity! You will have two weeks to complete this challenge and link it up to the CC3Challenge site, and you can carefully read all the rules here. Please take the time to visit every member of the Curiosity Crew (See below.) for not only some fun and clever inspiration, but for a chance to win some extra goodies!

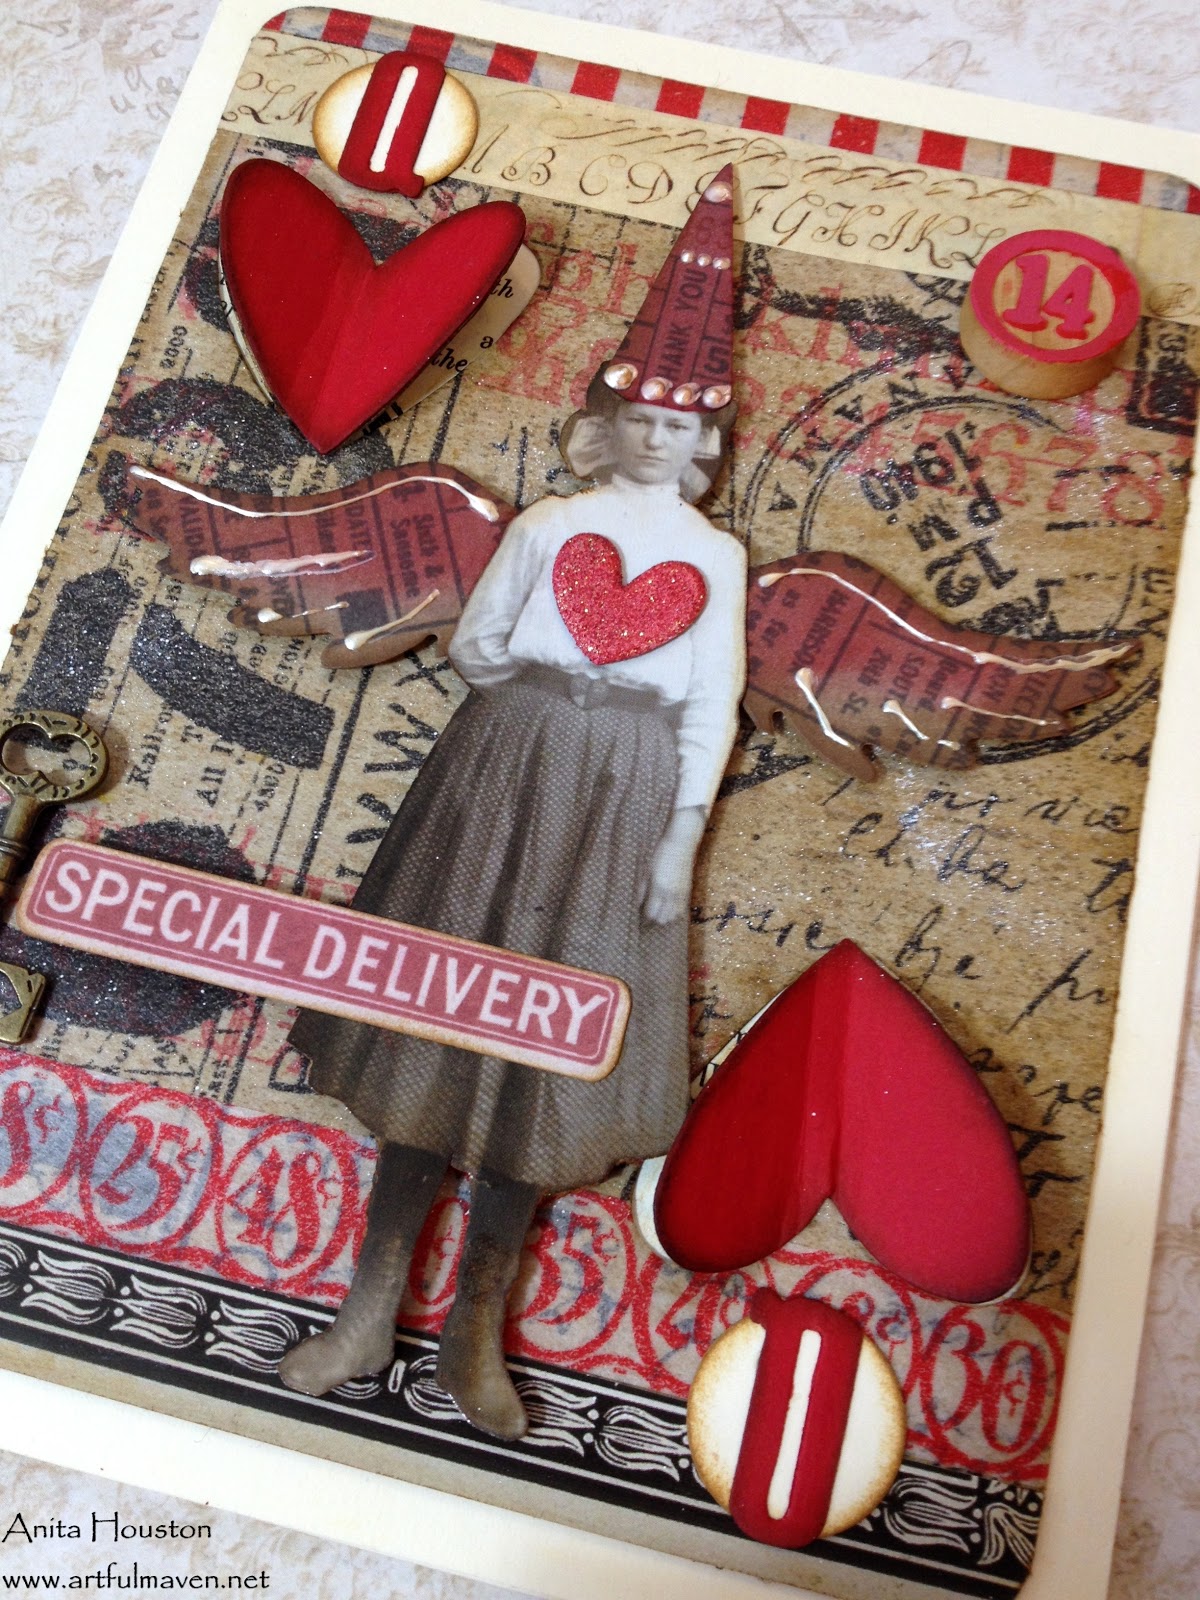
In case you haven't noticed over the last few weeks, I really do LOVE Valentine crafts! There is no pressure like at Christmastime, and I get to really dive into my LOVE for red...gotta LOVE that! These 5x6 1/2 inch Valentine Playing Cards for my family were so FUN to make, and although I didn't place my die for the Dimensional Cutting Pad in the center, it still worked as you can see, and I LOVE that!!! These just might be my favorites of the Valentines I made this year!
 |
| I adhered the uber cool Postale Tissue Wrap onto a 12x12 piece of Kraft Cardstock with Ranger's Collage Glue Stick. |
 |
| I misted the sheet with water and then misted Vintage Photo and Tarnished Brass Distress Spray Stain onto it. Then I gave it a good dry with a heat tool. |
 |
| I stamped the lower case alphabet stamp (I cannot have enough alphabet stamps I tell you!!!) from Tim's Typography Set with Wendy's Geranium Archival Ink randomly over the paper. Then I cut them into four 4 1/2x6 inch pieces. |
 |
| I cut out some peeps from the Found Relatives Card Set, inked them with Gathered Twigs Distress Ink, and gave them hand cut hats and die cut wings from the Sizzix Heart Wings Die, using pieces from the Thriftshop and Expedition Ephemera and Vellum sets. All the pieces were inked with Festive Berries Distress Ink. NOTE: The hats for the two Jacks have the word 'dog' on them, and I love that as my boys always say, "What's up dawg?" to each other. Strange I know, but very appropriate I think. |
 |
| I added Merriment Tissue Tape and another from my stash that I don't know where it came from...yikes... and I also added a border strip from the backside of the Found Relative Cards. I love the designs on them. |
 |
| I die cut the letters I would use on the cards for the corners, circle punched circles to back the letters, as well as die cut the hearts from the Mini Hearts Movers and Shapers. I did the technique as per Tim's instructions for the Dimensional Cutting Pad using the hearts. I LOVE the effect so much! I added dictionary paper to the back so that you can see that behind the hearts. I rounded the corners of the cards as well, and inked them with Gathered Twigs. |
 |
| I added some white spots to the cards with the Marker Spritzer and a Picket Fence Distress Marker, and coated some heart brads from my stash with Poppyfield Alcohol Ink. I attached the brads, then adhered the cards to a manila base card, and added some decorative dots to the hats and wings with Liquid Pearls, as well as some Game Pieces and old keys from the stash. |
 |
| For Hubby the King |


 |
| For My Daughter the Queen |

 |
| For the Oldest Son, the Prince or Jack |


 |
| For the Youngest Son, the Jack with the Dog of Course |


I hope you play along with this challenge...you can do it! AND...how many times did I say LOVE in this post??? ;0)
 |  |  |  |  |
 |  |  |  |  |
 |  |  |  |  |
 |  |  |  |  |
 |  |  |  |  |
 |  |  |  |  |
 |  |

I hope your hands get creatively dirty soon!


