Saturday, October 07, 2023

Tim Holtz Stamper's Anonymous Christmas 2023 - So Says the Cat Watercolored Festive Art Christmas Cartoon Cards

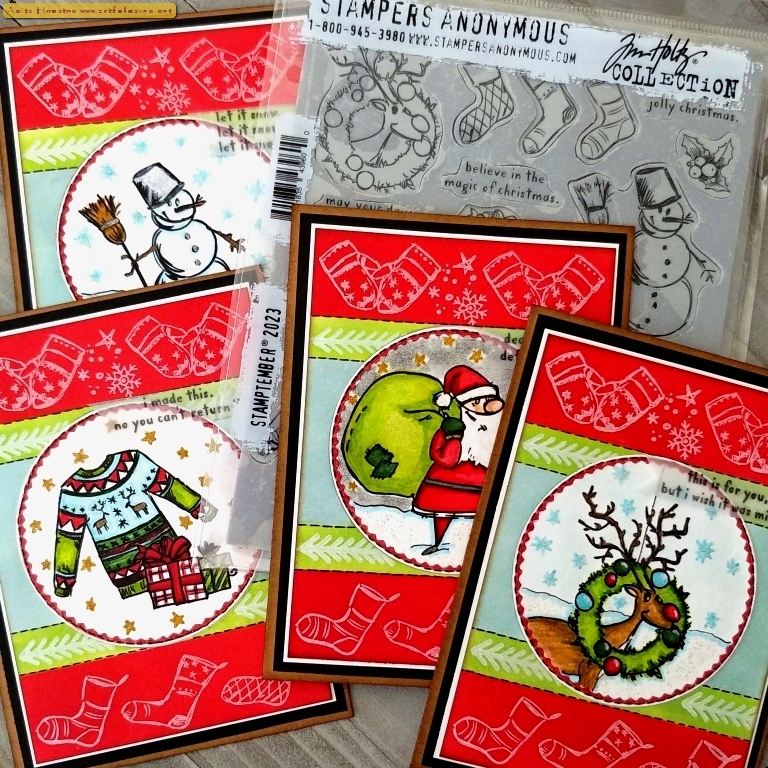
Hello Everyone! I'm back with the other make seen on the Tim Holtz Stamper's Anonymous Christmas Live from a few weeks ago. This set of fun cards were made with the Christmas Cartoons Stamp Set, all but one of the Festive Art Element Stencils, and with the trio of Set 57 Mini Layering Stencils. With all those stencils you can add so so much to the cute images on the set. This set brings back memories to me of always reading the Sunday comics in the big newspaper, especially the Family Circus, so that is what gave me inspiration, and I decided to voice the poor old cat. Hope you enjoy!

 
Cut Watercolor Cardstock from Ranger to 4.25 x 4.25" squares for as many card fronts as you want to make (I made 6 different designs). Place into the stamp platform and arrange the Christmas Cartoon images on, and close the lid to adhere the stamps. Stamp the images with Black Soot Archival a few times to make sure the images are nice and crisp since you are stamping on Watercolor paper...it helps to reink your ink pad beforehand. On the ones that will be layered, stamp onto sticky note for masking. Take the sentiments from the Snarky Cats sets and stamp those at the bottom close to where the cat will be. I also cut the egg nog stamp in two for easier stamping, and masked off the parts on the couple with sticky note so those parts would not be stamped. I rounded the corners of all.
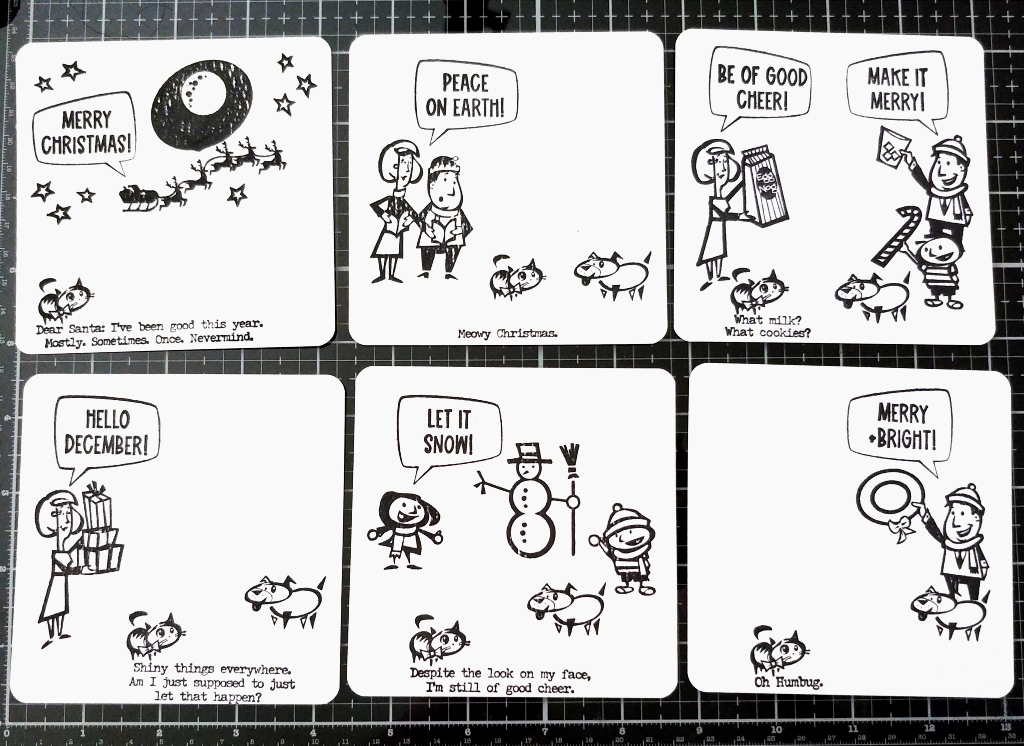
 
Here are all six of the card fronts with all the stamping, and the space I left for the stenciling.
 
 
Using a permanent fine point pen, I traced around the images on all the stencils from the Festive Art Elements (The only one I didn't use was the candy cane one.) and the Mini Set 57. I free-handed the borders, the floor planks, the movement marks, the bow on the mistletoe, trim on windows, and table cloth.

 
Here are all six of the card fronts with all the stenciling and pen work.
 
 
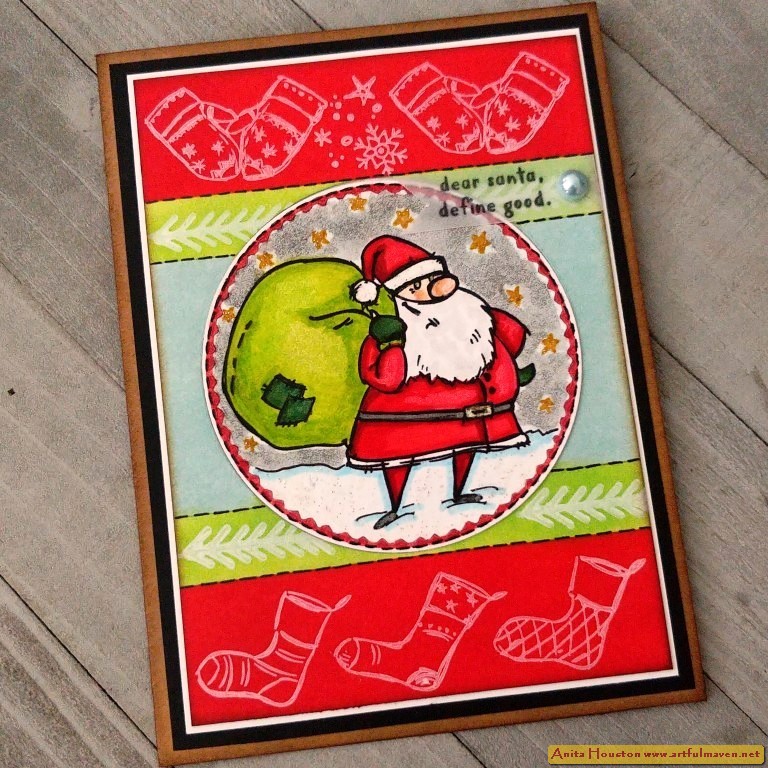
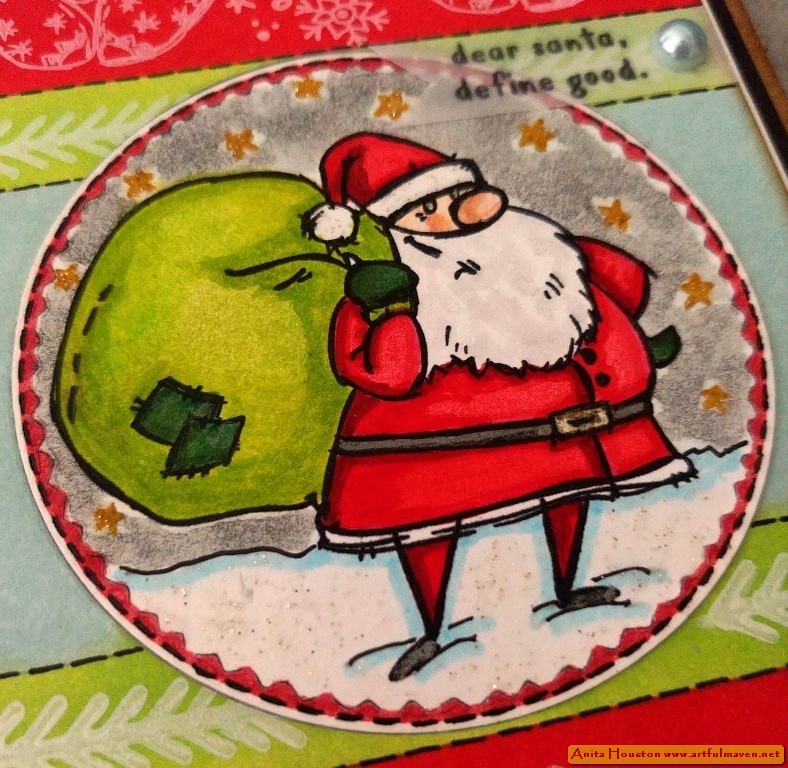
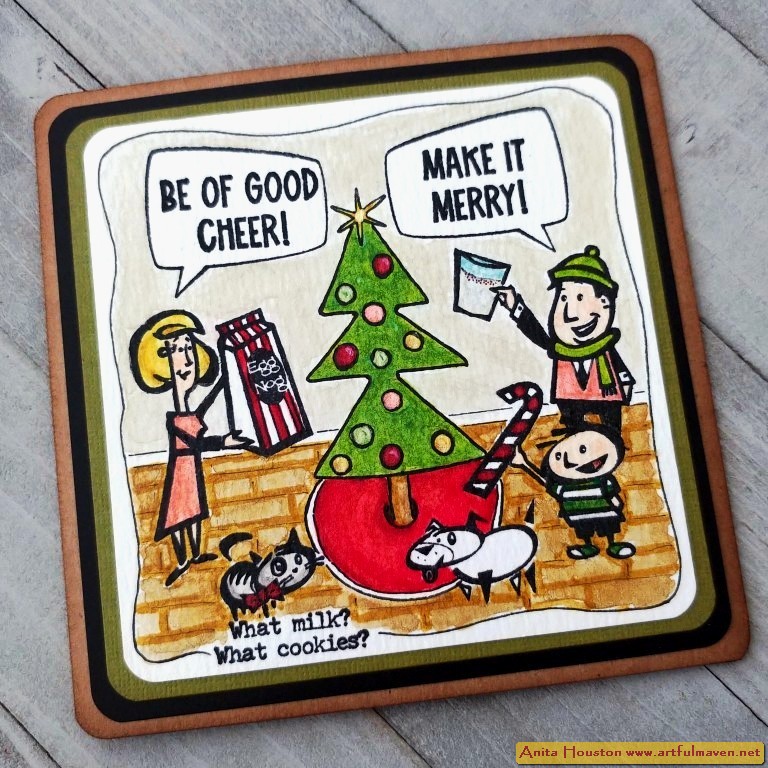
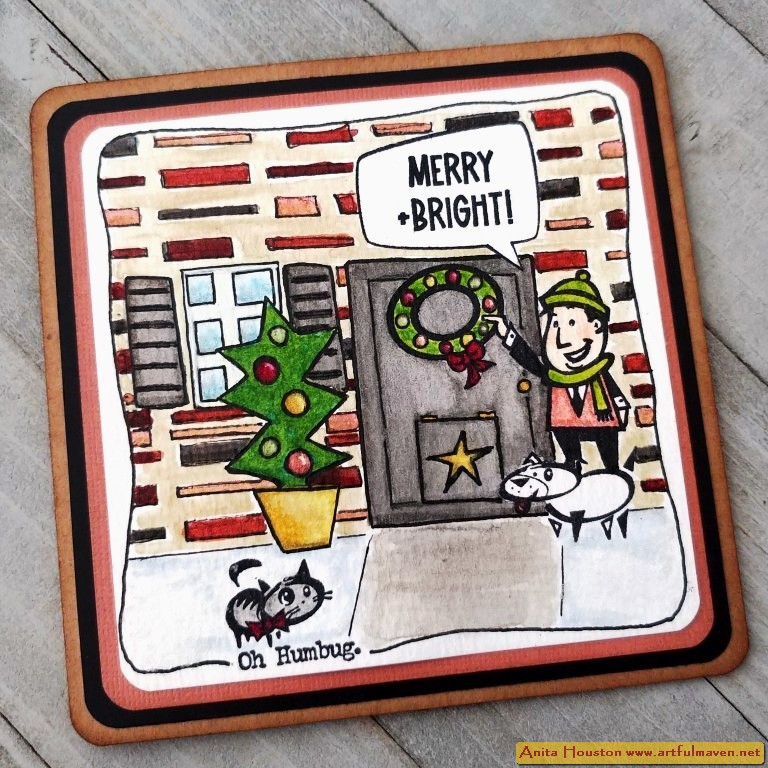
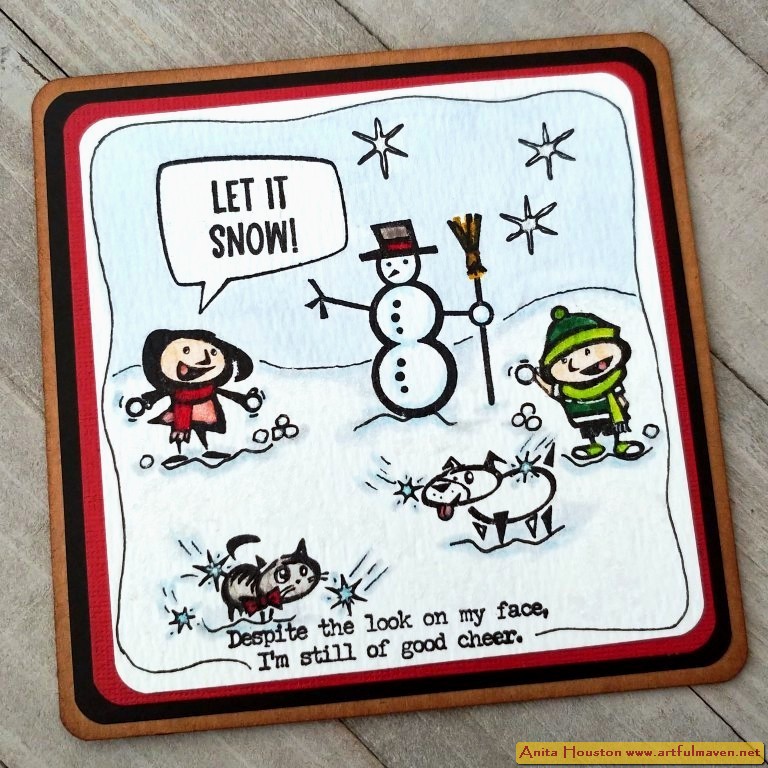
I colored in all the images with Distress Watercolor Pencils and a Detail Water Brush, as well as a Broad Water Brush on the backgrounds.

 
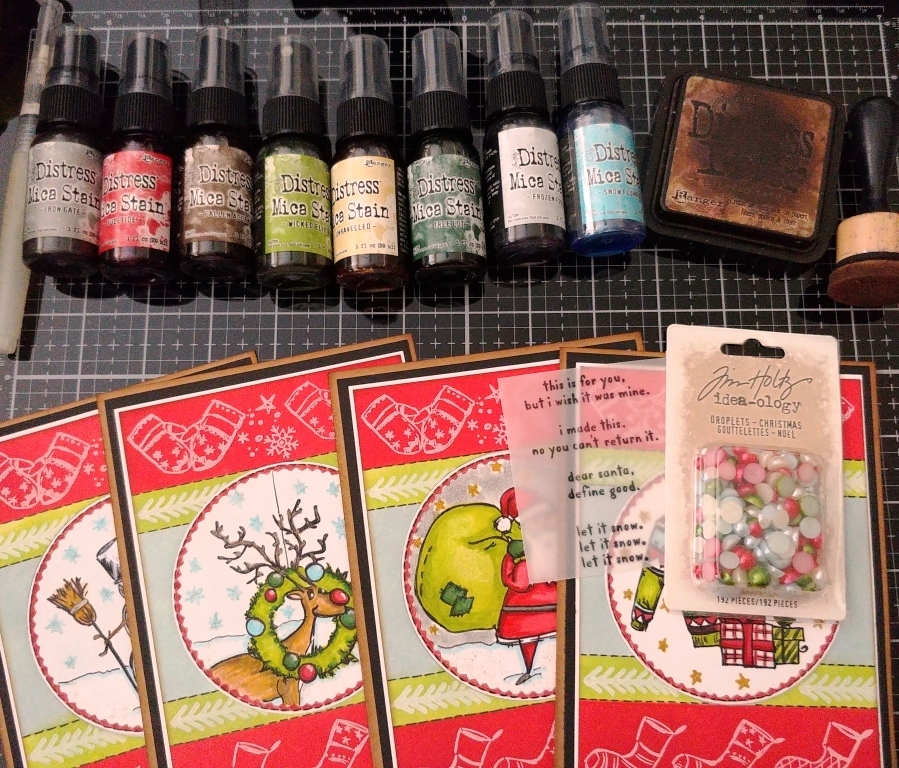
One the three outside cards I applied Snowfall Distress Grit Paste to the snowy areas using a palette knife. I used Frozen Fog, Wonderland, Sugary Gumdrop, Yuletide, Wicked Elixir, and Harvest Moon Distress Mica Stains on all the ornaments, bows, tree skirts, and some of the clothing, applying with the Detail Water Brush. I mounted all the card fronts onto colored Kraftstock cut 4.5 x 4.5", then onto Black Cardstock cut 4.75 x 4.75", and then onto Kraft card bases cut and folded to 5", all with rounded corners.


Supplies:
(Paper Trimmer, Stamp Platform, Sticky Note, Scissors, Corner Rounder, Detail Water Brush, Broad Water Brush, Palette Knife, Two Sided Tape, Ink Blending Tool)
-Ranger Tim Holtz Distress Watercolor Cardstock
-Stamper's Anonymous Tim Holtz Stamp Set: Christmas Cartoons 
-Ranger Tim Holtz Distress Archival Ink: Black Soot
-Stamper's Anonymous Tim Holtz Stamp Set: Snarky Cat Christmas, Stamptember 2020
-Stamper's Anonymous Tim Holtz Element Stencils: Festive Art
-Stamper's Anonymous Tim Holtz Layering Mini Stencil: Set 57
-Ranger Tim Holtz Watercolor Pencils
-Ranger Tim Holtz Distress Grit Paste: Snowfall
-Ranger Tim Holtz Distress Mica Stain: Frozen Fog, Wonderland, Sugary Gumdrop, Yuletide, Wicked Elixir, Harvest Moon
-Ranger Surfaces: Kraft Cardstock, Black Cardstock
-Tim Holtz Idea-ology: Classic Kraftstock
-Ranger Tim Holtz Distress Ink: Gathered Twigs
-Faber-Castell Pitt Pen: Black
-Sakura Gelly Roll Pen: White
 
Thank for stopping by, and for all the wonderful comments on IG and FB. I so appreciate you all. I hope your hands get creatively dirty soon!

Saturday, September 30, 2023

Tim Holtz Stamptember 2023 - Christmas Card Set

Hello All! Today was the release of the Simon Says Stamp Stamptember Tim Holtz Stamper's Anonymous Stamp Collection, which this year included two stencils, and small jars of the new Glow Distress Grit Paste and Sparkle Distress Texture Paste from Ranger. I was so honored to be asked to make a project for the release, and I had such making these whimsical Christmas cards.  The images on the set are so so FUN, and I love the addition of a few snarky sentiments. Enjoy!
 
Cut Distress White Heavystock from Ranger to 4 x 6" for as many card fronts as you want to make (I made 4 different designs). Take the second to largest circle from the Sizzix Stitched Circles Framelits and place it in the very center of the one of the papers, and die cut. You can use a pencil to mark where the center is and the edges of the circle to help. Do all the card fronts with the die, and set the circles aside for now. Take the new stamp set and using the mittens, all three stockings, and snow flurries images, place them onto one of the card fronts so the mittens are on the top left side and snow next to it in the center all at the top (you will be stamping another mitten on the right) and all three stockings are at the bottom equally centered. Take the arrow looking pine tree from the Festive Print Stamp Set, and place it below the mittens about 1/2 inch down (you will be stamping another directly across, and then two more above the stockings later). Use a ruler and pencil to mark where to make a line under the mittens and snow, then under the arrow tree, then above the stockings, then above where the other row of arrow trees will be. Go ahead and place the paper into the stamp platform and close the lid to secure those stamps. Remove the paper and lightly draw the lines with the pencil and ruler. Using a scrap paper for a straight edge mask, color in the top and bottom lines with Festive Berries Distress Ink and an Ink Blending Tool, then the lines under those with Twisted Citron, and the middle part with Speckled Egg Distress for a colorblocked look. Repeat doing all the rest of the papers.

 
Place one of the papers into the platform and stamp the images with Glacier White Pigment Ink (It's a good idea to reink the pad beforehand so it is nice and saturated. Stamp the images a few times so they are nice and white. Repeat with the other papers keeping them separated for the ink to dry as it stays wetter longer. Remove the snow flurries and all the stockings as you are finished with those, and then move the mittens over to the right, as well as the arrow tree. Stamp those now on all the papers. Remove the mittens as you are finished with those, and move the arrow tree down to the other row, and stamp this on all the papers, then repeat again stamping it on the opposite side doing all the papers. Set those aside to dry.
 
 
Taking the die cut circles now, place one into the platform and then place one of the main stamp images on the circle centering it. Close the lid to adhere the stamp. Stamp the image with Black Soot Archival a few times to make sure the images are nice and crisp. Remove and do the next one on another circle. When you do the presents and sweater, stamp the presents first, then onto a sticky note, cut that out, and place over the presents to mask then stamp the sweater over.

 
Take a black fine tip permanent pen and draw a wavy line across for the Santa and snowman that will divide snowy land and sky. Add a few lines under the snowman and Santa's feet for snowy build up. Finish drawing the rest of the reindeers body on the other side of the wreath, and then a dividing line for land and sky, and a line straight up from the wreath like it's hanging from it. Color in the sky on the reindeer and snowman with a Speckled Egg Distress Watercolor Pencil and a Broad Water Brush, as well as the area around the sweater and presents, but don't extend the color over the cut and embossed stitching around the circles. Take the star stencil and a yellow pencil with Detail Water Brush and add stars around the sweater and around Santa. Take the flurries stencil and a light blue pencil and brush and add flurries around the snowman and reindeer. Color in the rest of the images with the pencils and water brush. For the snow areas only add light blue lines tracings around the black lines leaving the snow white. For Santa's sky, use the Black Soot Pencil and color around the stars. Take the stencils again and a small paint brush and brush the Sparkle Distress Texture Paste through the stencil over all the stars and flurries. Then add more Sparkle to the snow areas, Santa's hat and the snowman's body. Using a red crayon and brush color in the triangle parts of the border stitching leaving the very outer border white. Let dry. 
 
 
Cut and fold a Kraft Cardstock base card to 4.75 x 6.75 inches, and ink the edges with Gathered Twigs Distress Ink. Cut a black cardstock mat to 4.5 x 6.5 and mount to center of card base with two sided tape. Cut a white cardstock mat to 4.25 x 6.25 inches and mount to black. Take the colorblock piece, and ink the edges with Gathered Twigs and then mount onto the white. Mount the circle to the middle. Use the black pen to draw in lines between the colorblocking to look like stitching, and do the same over the cut lines on the circle. Shake up colors of Distress Mica Stain and pour a tiny bit out and use the Detail Water Brush to color in some parts of each image, like the bows on the presents, Santa's boots, belt and buckle, the snowman's hat, the ornaments on the wreath. Stamp the sentiments onto Vellum with Black Soot, and cut apart leaving space on each side. Fish tail cut the left side and add a tiny piece of two sided tape to the right side and adhere to the right side of the card front. Add two sided tape to the bottom of a light blue drop, and place that over the tape part under the sentiment.

Supplies:
(Paper Trimmer, Pencil, Ruler, Scrap Paper, Ink Blending Tool, Stamp Platform, Sticky Note, Scissors, Detail Water Brush, Broad Water Brush, Two Sided Tape, Small Paint Brush)
-Ranger Tim Holtz Distress Heavystock: White
-Sizzix Tim Holtz Framelits: Stitched Circles (second to largest)
-Ranger Tim Holtz Distress Ink: Speckled Egg, Twisted Citron, Festive Berries, Gathered Twigs
-Stamper's Anonymous Tim Holtz Stamptember 2023 Set 
-Stamper's Anonymous Tim Holtz Stamp Set: Festive Print
-Ranger Pigment Ink: Glacier White
-Ranger Tim Holtz Distress Archival Ink: Black Soot
-Ranger Tim Holtz Watercolor Pencils
-Ranger Tim Holtz Distress Texture Paste: Sparkle
-Ranger Tim Holtz Distress Mica Stain: Frozen Fog, Unravelled, Snow Flurries, Tree Lot, Yuletide, Wicked Elixir, Fallen Acorn, Iron Gate
-Ranger Surfaces: Kraft Cardstock, Black Cardstock
-Tim Holtz Idea-ology: Christmas Droplets
-Permanent Fine Black Pen, White Pen, Vellum
 
Thanks so much for stopping by! I will be back next week with the other Stamper's Anonymous Christmas make. Until then, I hope your hands get creatively dirty soon!