Showing posts with label Valentines. Show all posts

Saturday, February 10, 2024

Love Notes Distress Mixed Media Valentine Cards

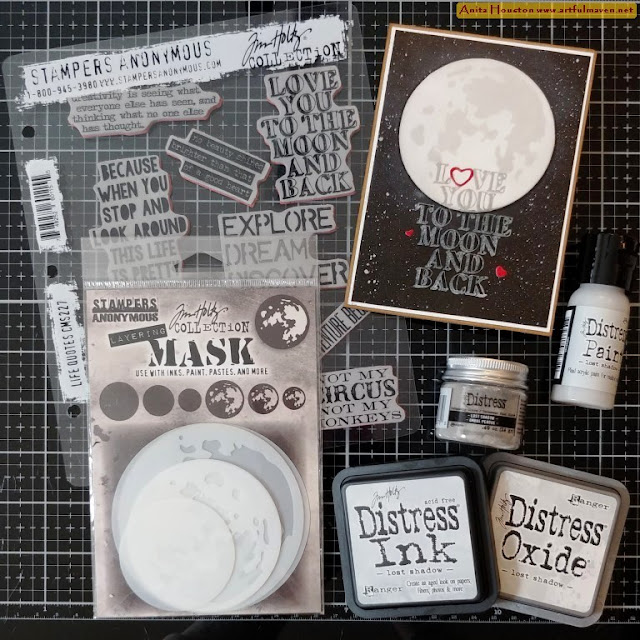
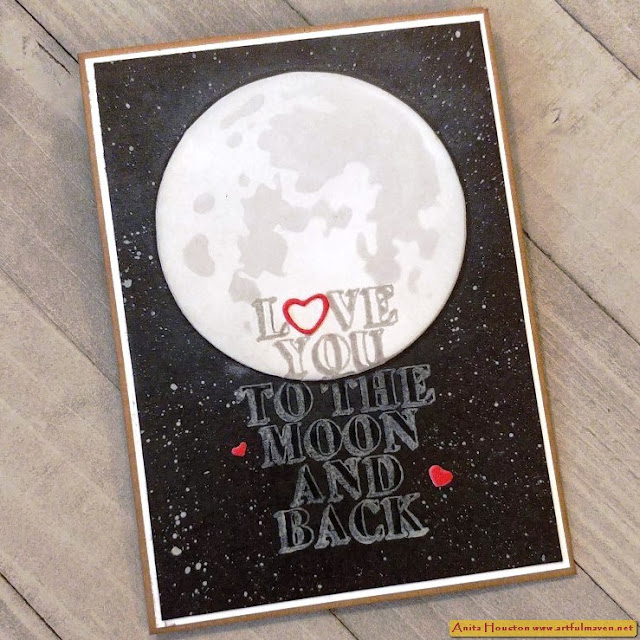
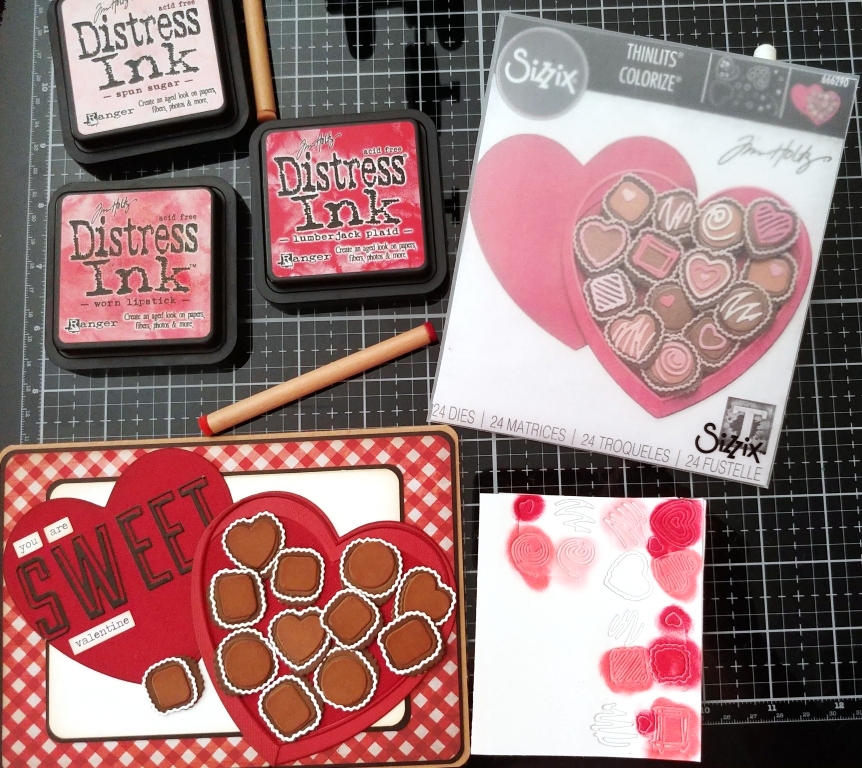
Hello Everyone! Are you watching the Tim Holtz Distress Watercolor Pencil LIVE right now?!! I am, and will surely watch the replay. I always learn so much more from watching the demo. I decided to make some Valentine Cards using the new stamp set Love Notes from Tim and Stamper's Anonymous in all Mixed Media style with a bunch of Ranger Tim Distress goodies, and finished them off with the ever important new Distress Watercolor Pencils as the icing on the Love Cake! Despite all the mediums used, without the Pencils these Valentine's would just be blah...you'll see what I mean below in the step outs. AND...I discovered how good the Pencils are with my favorite substrate Specialty Stamping Paper. Enjoy, and Happy Love Day to all of you! 

I intended to make a 12 x 12" masterboard at first, but I figured I could only make twelve 3 x 4" cards, so I opted for two sheets of 8.5 x 11" Specialty Stamping Paper to yield 18 cards (six of which are smaller in size due to me using all that I could). It can handle all the wet and heat you can pretty much give it and the stamping always looks so nice on it. I began by lightly misting both sheets with water and then alternating colors of Distress Spray Stain in Tattered Rose and Saltwater Taffy. Then I splatter on Lumberjack Plaid. I let this all dry naturally for a bit. 

I cut the two sheets into twelve 3 x 4" pieces and six 3 x 3". Placing the largest solid heart from the Love Notes set first into the middle of a card, I stamped with the new Scorched Timber Distress Ink on a stamp platform, and added half hearts on the sides, doing two cards at a time so that one half of a heart stamped on one and the other heart on the another to save time. (NOTE: Kept in mind that ink stays wet on SSP for a while, so let these dry overnight or hit them with a heat tool, and be careful touching them before.) Then I stamped the two little solid hearts using Picked Raspberry and Dusty Concord Distress Archival Ink. I also stamped the little XO in the Scorched Timber.

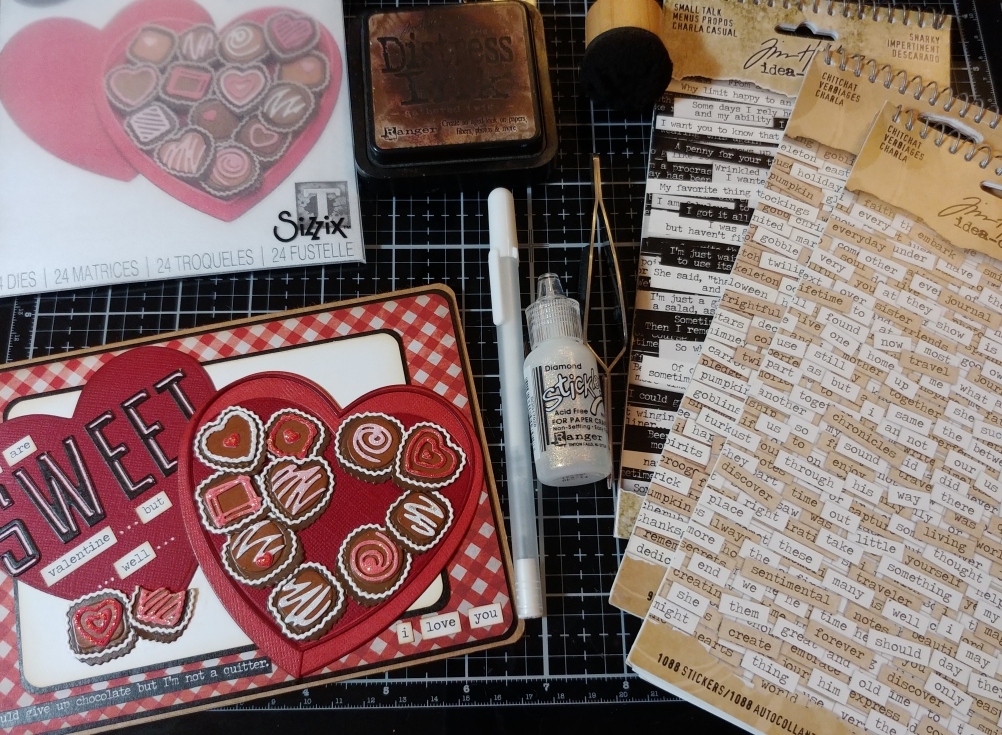
(I pounced over all the cards with an Anti-Static Pouch before embossing so that none of the powder would stick where I didn't want it. ) I stamped the large heart outline image in the Scorched Timber and poured Gold Embossing Powder over and heat embossed. Then I did the sentiment the same. 

The card bases I used precut and folded red cards and envelopes from the craft store that I had on hand in 4 x 5.5" size. I mounted Red Kraftstock to the front, inked with Scorched Timber. Then I cut Gold Kraftstock to go on next, but since the two card sizes are obviously different I tried to bridge the gap with Dina Wakley Washi Tape. I added one strip to the bottom of the gold for the long cards of the multi color dotted one, and two strips of the same for the 6 shorter ones. Then on the 6 shorter I cut a heart from the another design and added those. I cut brown Kraftstock that each card front will be mounted to. I inked the edges of everything in Scorched Timber as well. Using a Marvy Liquid Gold Fine Tip Marker, I outlined all the other hearts as well. 

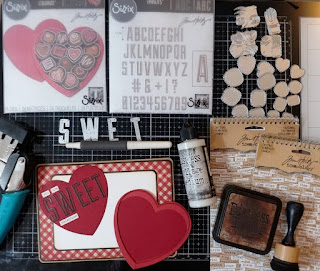
Here is where the Distress Watercolor Pencils come into the mix. If you look at the left side of this picture, the two cards along the left side do not have colored in hearts. Although nice, they are boring and really needed color. I used Festive Berries and Lumberjack Plaid Distress Watercolor Pencils only to color in the hearts as well as shade around the large heart using a Detail Waterbrush. Then I flicked some of the wet red color over for some dots of color. See close ups below to see the difference the Pencils made. Also, I discovered that the Pencils just glide over the SSP and absorb so well. You get a gorgeous soft suede matte look and I love that. I cannot think of any other Distress medium that would have worked as well as these Pencils to color in the hearts and over the Distress Ink on the middle large heart.

Left side no Distress Watercolor Pencils and the right side colored and flicked on. So much better, right?!!

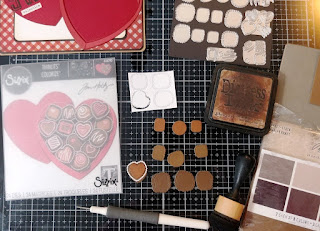
And just to show you more....the left side large heart does not have the filled in red color or flicks of color and the right side does. A tremendous difference in appearance to me, with just two colors of Pencils!

Supplies:
(Water Mister, Splatter Brush, Stamping Platform, Paper Trimmer, Anti-Static Pouch, Heat Tool, Ink Blending Tool, Scissors, Two Sided Tape, Detail Water Brush)
 -Ranger Specialty Stamping Paper
 -Ranger Tim Holtz Distress Spray Stain: Tattered Rose, Lumberjack Plaid, Saltwater Taffy
 -Stamper's Anonymous Tim Holtz Stamp Set: Love Notes
 -Ranger Tim Holtz Distress Ink:  Scorched Timber
 -Ranger Tim Holtz Distress Archival Ink: Picked Raspberry, Dusty Concord
 -Ranger Embossing Powder: Gold
 -Tim Holtz Idea-ology: Gold Kraftstock, Classic Kraftstock
 -Ranger Dina Wakley Media: Washi Tape Set 1, Set 1
 -Ranger Tim Holtz Distress Watercolor Pencils: Festive Berries (Set 6), Lumberjack Plaid (Set 4)
 -Red Cards and Envelopes (3.5 x 5")
 -Marvy Uchida Deco Color Liquid Gold Extra Fine Marker 
 
Thank you so much for stopping by today, and for all the comments! I wish you all a wonderful Love filled day! Until next time, I hope your hands get creatively dirty soon!

Friday, February 02, 2024

Tim Holtz Sizzix Vault Series 1 2024 - Industrial Lovebirds Valentines in Pillow Boxes

Hello Everyone and Happy February! Time is flying by! Today, I have  two Valentine makes, made with the new Tim Holtz Sizzix Vault Series of Dies, the Pillow Box & Bag, Rosettes, Hippity Hop, and Lovebirds, all in a steamy industrial style. Enjoy!
 
Using Red Metallic Kraftstock I die cut two of the Faceted Hearts first and folded and attached them using two sided tape, then set them aside. I also die cut two medium flat hearts and four of the small flat hearts, then set them aside. I die cut the perching bird from Gold Kraftstock, and the other perching bird from Silver Kraftstock, and set those aside. Using more Red Kraftstock, I die cut four of the Pillow Box pieces but turned the red to the inside so that the Kraft would be showing on the outside of the boxes. Using the card die from the Pillow Box set, I centered it on the front of a Pillow Box and die cut it to make a window, and did the same with the another box. I saved the the two red/kraft pieces for another project. Then taking a piece of Gold and Silver Kraftstock about 3 x 4 inches, I die cut the centers of each with the same card die, and this time saved the outer frame parts for the next part.

I cut a piece of Red Kraftstock and die cut just one Pillow Box from it, and trimmed off the folded parts to create just the center shape, times two.  I lightly misted with water, and placed this into the larger Mechanics 3D Texture Fade and embossed, and repeated with the other.  I used the smaller Mechanics Fade to emboss both birds and both frames. I used the small Foundry 3D Texture Fade to emboss both card pieces. Then I took all the flat hearts, faceted hearts, birds, frames, card pieces, and center Pillow Box pieces, and coated all these with Black Soot Distress Paint, waited about a minute, and then rubbed the paint off with a paper towel, leaving the paint in the recessed areas and borders to really reveal the embossed images. I let all these pieces dry.

Once all the pieces were dry, I inked the edges of everything with Vintage Photo Archival Ink. Using Collage Medium I adhered the small hearts to the corners of each card to look like a playing card, then punch tiny holes in the center of each, and placed a Tiny Fastener in each and secured them in place. I mounted the cards on slightly bigger Metallic Kraftstock (gold for the silver and silver for the gold), rounded the corners, and mounted these on Black Kraftstock, rounding those corners. I adhered the faceted hearts on with Collage Medium, and then the birds with foam tape. I selected Metallic Stickers for the sayings and added those. Then I set the cards aside.

I adhered the red gear pillow box backs to the back of the back side of the pillow box pieces. I inked the edges of all four of the pillow boxes with Gathered Twigs Distress Ink, and lightly misted them with water for a more distressed look. I cut two pieces of clear packaging (from a stamp set) just a little bigger than the window openings. I flipped the pieces with the openings over and added very then skor tape around the border of the opening, removed the backing and adhered the packaging piece to create the window. I flipped the front piece over, and secured the frame in place around the opening with more skor tape. I die cut the letters from more Metallic Kraftstock with skor tape already behind and secure those in place (one going horizontal and one vertical). I punched a tiny hole in the middle of the medium heart and added the gear to it with a Tiny Fastener and then secured it in place with the Collage Medium. Then using wider skor tape, I affixed the two pillow box pieces together, and propped them open to make the gentle folds on the opening pieces, and placed the cards inside. 


Supplies:
(Paper Trimmer, Die Cut Machine, Die Pick, Ink Blending Tool, Scissors, Two Sided Tape, Corner Rounder, Water Mister, Mini Hole Punch, Foam Tape)
-Tim Holtz Idea-ology: Metallic Colors Kraftstock, Metallic Classics Kraftstock, Black Kraftstock, Tiny Fasteners, Mini Gears, Metallic Sticker Book
-Sizzix Tim Holtz Thinlits (Vault Series 2024): Vault Pillow Box & Bag, Vault Rosettes, Vault Lovebirds, Vault Hippity Hop
-Sizzix Tim Holtz 3D Texture Fade: Mechanics, Mini Mechanics, Mini Foundry
-Ranger Tim Holtz Distress Paint: Black Soot
-Ranger Tim Holtz Distress Ink:  Gathered Twigs
-Ranger Tim Holtz Distress Archival Ink: Vintage Photo
-Ranger Tim Holtz Distress Collage Medium: Matte
-Clear Plastic Packaging
 
I'll be back again soonish, as I'm in full Valentine mode. Thank you so much for stopping by. Until next time, I hope your hands get creatively dirty soon!

Friday, February 03, 2023

Lost Shadow Distress To The Moon Valentine Card

How about that new Distress color?!! Talk about the most versatile neutral ever! Lost Shadow from Tim Holtz and Ranger is really unique as it's not too dark, not too light, goes with every single color in the line, AND can hold it's own all by itself. I never thought I could love a gray shade so much, but I do. Here on this very simple Valentine, which took me about 20 minutes to make from start to finish, I used Lost Shadow not only as a gray (for the moon) but also in place of my usual white that I would normally do on a night sky card. There is no other color I could do that with. Typically when I create a moon, I use a combination of Pumice Stone, Hickory Smoke, and Antique Linen to achieve the look I like, but with Lost Shadow it was all I needed. Just perfect! And then it's light enough to create stars with. Seriously, just perfect. Enjoy this simple simple tut and card...that can really be an all occasion card and not just a Valentine.
  
For this 4x5.5 inch card, I cut and folded a Kraft Cardstock base, inked the edges in Gathered Twigs Distress Ink, and then added a White Heavystock mat. I used the medium Sized Circles Movers and Shapers from Sizzix, to cut a White Heavystock piece for the moon. The medium Moon Mask from Stamper's Anonymous is a great match for this size of circle. I also cut the Black Kraftstock as a front for the card just slightly smaller than the white mat.

First, I inked over the whole circle with Lost Shadow Distress Ink and an Ink Blending Tool. Then I laid the open mask over the circle and inked in the parts with Lost Shadow Distress Oxide. Taking the Black Kraftstock, I placed the solid mask in the center upper portion of the black, and inked around it with the Oxide. Yes, it shows up wonderfully. Then I lightly misted both pieces with water to get some mottling going.

I adhered the moon in place, and then added the sentiment to the platform, covering the 'o' from the 'love' with a sticky note so it wouldn't get stamped. I inked it up and removed the sticky note, and stamped the sentiment from the Life Quotes Stamp Set over it and the bottom of the card front with the Lost Shadow Oxide and immediately poured the matching Embossing Glaze over. I heat set the glaze. Look how wonderfully it shows up on the black. No need for white. 

 I placed the solid moon mask over the moon to cover it up and added sticky note over the sentiment to cover it up, and mixed a tiny bit of water with a tiny bit of Lost Shadow Distress Paint, and then used the Splatter Brush to add drops of paint over the rest of the black card for a starry look. Again, no need for white. 

I die cut a piece of White Heavystock using one of the icing die pieces from the Colorize True Love Thinlits and die cut the part I wanted. I inked over the hearts I needed with Lumberjack Plaid Distress Ink and a Detail Blending Tool, and added the open heart to the place where the 'o' would go, and added a few more tiny hearts to the card. Then I added the card front onto the base card. This card was so super simple and so so fast to put together, and has a big impact I think.

Supplies:  
(Paper Trimmer, Two Sided Tape, Scissors, Die Cut Machine, Die Pick, Ink Blending Tool, Water Mister, Sticky Note, Anti-Static Pouch, Heat Tool, Detail Ink Tool, Spatter Brush) 
-Ranger Surfaces: Kraft Cardstock 
-Ranger Tim Holtz Distress Heavystock: White 
-Tim Holtz Idea-ology: Black Kraftstock 
-Sizzix Tim Holtz Movers and Shapers Die: Sized Circles (Medium) 
-Stamper's Anonymous Tim Holtz Layering Mask: Moon Mask 
-Ranger Tim Holtz Distress Ink:  Lost Shadow, Gathered Twigs, Lumberjack Plaid 
-Ranger Tim Holtz Distress Oxide Ink: Lost Shadow 
-Stamper's Anonymous Tim Holtz Stamp Set: Life Quotes 
-Ranger Tim Holtz Distress Embossing Glaze: Lost Shadow 
-Ranger Tim Holtz Distress Paint: Lost Shadow 
-Sizzix Tim Holtz Thinlits (Everyday 2023): Colorize True Love
 
Thank you so much for stopping by today! The new color rocks, and I can't wait for the last one...I hope soon. See you next time, and until then, I hope your hands get creatively dirty soon!

Wednesday, February 01, 2023

Tim Holtz Sizzix Everyday 2023 - Alphanumeric Emporium and True Love Colorize Chocolate Truffles Box Valentine Card

Welcome to February all you crafty people! Time is already flying by this year! Today, I have the third project shown in the Tim Holtz Sizzix Everyday Live, which is a Valentine Card made with the new True Love Colorize and Emporium Alphanumeric Thinlits. This card was really simple to make, and surprisingly fast considering all the pieces of chocolate, but they go together really fast when assembly line making and everything is laid out and ready to go. Speaking of chocolate, I am a self confessed chocoholic, so I loved making this card with the new dies, and they looked so good I couldn't help but take a bit ;0)! Enjoy!
 
 
This is a 5x7 inch card. To begin with I cut and folded a Kraft Cardstock base card to 5x7, rounded the corners and ink with Gathered Twigs. Then I cut Black Kraftstock a little smaller, rounded the corners and mounted that on. Then I cut the patterned Christmas Stash paper a little smaller, rounded corners, and inked it and mounted. Then I cut the White Heavystock to 4x5.5 inches, rounded the corners, mounted it on black, rounded those corners, and then mounted it on to the card front. I die cut the chocolate box from the True Love set with three different shades of red and assembled it, inked the edges and mounted the top part of the box to the upper left hand corner, and the lower part of the box overlapping in the right lower corner. I die cut the 'SWEET' from the Emporium Alphanumeric Thinlits and and mounted those to the top box, and choose sentiments from the Chit Chat sets. 

I assembly lined all the chocolate pieces, doing 12 all together using papers from the Neutral Kraftstock, and I assembled all the pieces except the decorating parts.
 
 For the decorative parts, I die cut those using White Heavystock, and used Distress Ink to color them, and then added them on the chocolates where they go. 

 I added more sentiments and cut one of the chocolate pieces to look like it had a bite out of it. I used a white pen for the dots and I colored in the lines in open areas of the 'SWEET' word. Then I finished off using Diamond Stickles over all the decorative parts on the chocolates. 

Supplies: 
(Paper Trimmer, Two Sided Tape, Corner Rounder, Die Cut Machine, Die Pick, Ink Blending Tool, Scissors, Craft Tweezers, Detail Ink Tool) 
-Ranger Surfaces: Kraft Cardstock 
-Ranger Tim Holtz Distress Heavystock: White 
-Tim Holtz Idea-ology: Black Kraftstock , Christmas Paperstash, Classic Kraftstock, Neutral Kraftstock, Seasonal Chit Chat, Chit Chat, Snarky Small Talk
-Sizzix Tim Holtz Thinlits (Everyday 2023): Colorize True Love, Alphanumeric Emporium 
-Ranger Tim Holtz Distress Ink:  Gathered Twigs, Worn Lipstick, Spun Sugar, Lumberjack Plaid 
-Ranger Tim Holtz Distress Collage Medium: Matte 
-Ranger Stickles: Diamond 
-White Pen
 
Thank you for coming by here and especially for commenting. I hope to be back later on this month, so until then, I hope your hands get creatively dirty soon!