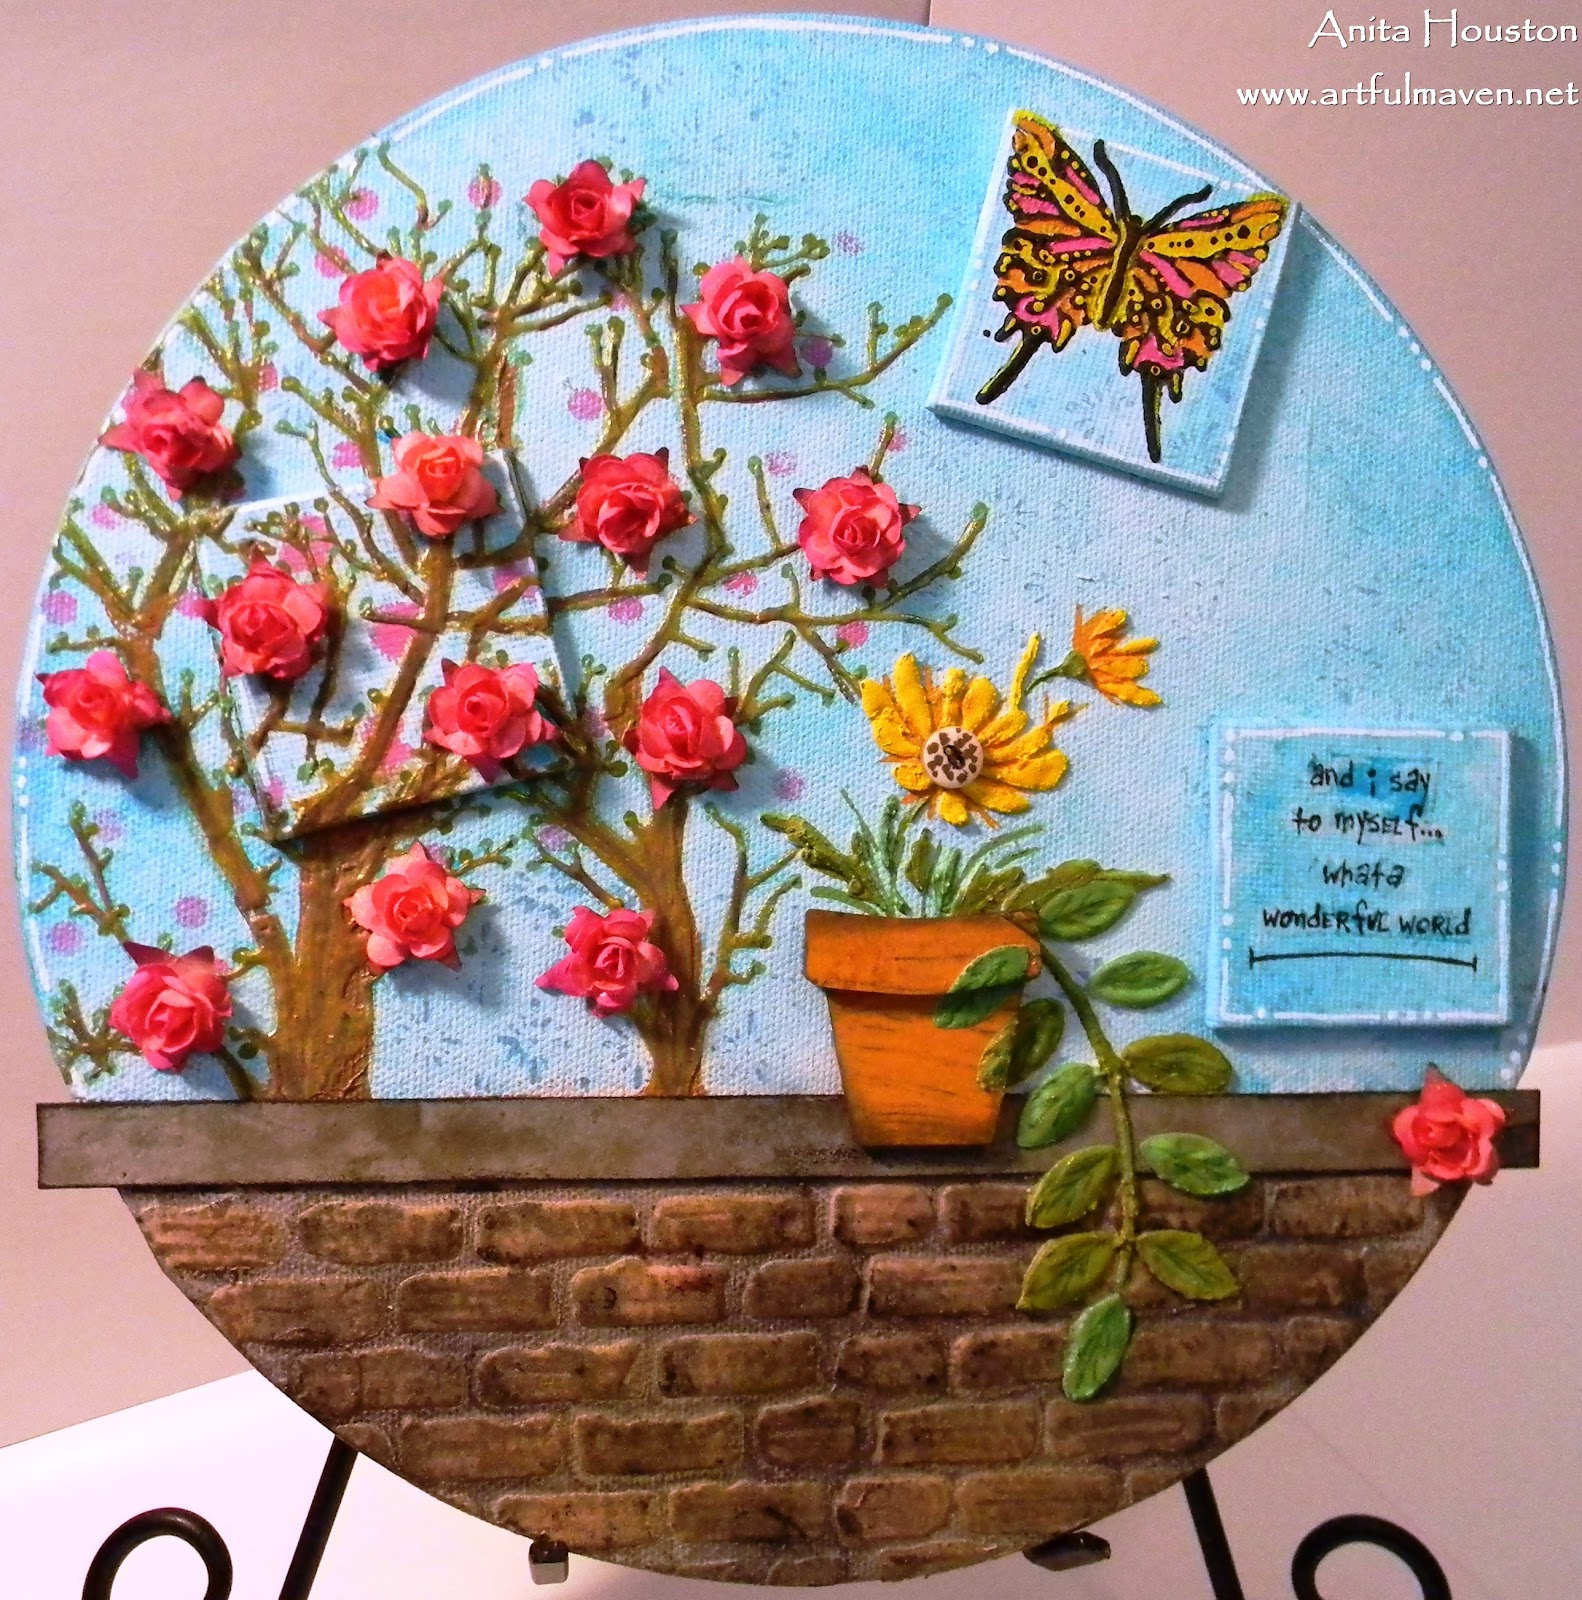
It's Monday the 22nd of April! It's Earth Day! It's also my birthday too, and I'm just hours home from across the globe where I had the most amazing trip to Europe. The Earth is truly a magnificent place, full of wonderful people and awesome sights...Happy Birthday to me...I'm truly so blessed! Thank you hubby for making it happen! More on my trip later, but I'd like to thank those of you who commented and tweeted on my snippit shots of the places I visited, as well as birthday wishes. They mean so much to me...and I say to myself, what a wonderful world!!!
Being Monday, it's also time for a new challenge at Simon Says Stamp & Show. From colored pencils to Copic Markers, Distress Paints to Alcohol Inks, all color mediums have one thing in common: they allow you to truly customize your creations. This week we celebrate all things "Color", and share tips and tutorials with you on our blogs as well! Your challenge this week is simple...use any color medium (ink, pen, mist, paint, stain, etc) on your project this week and then share it with us.
I choose to do a canvas and not only show you through photos the technique I've been raving about for months now, but also through video, however, my disc that housed the video was destroyed and talking about it disturbs me greatly, so there are only a few photos now. Anyway, that technique is making a resist for
Dyan's Dylusions using
Wendy's Embossing Paste and
Tim's Distress Paints together. I don't know if there is a technical name for it yet, but it's all I've been doing while working with these three mediums together. My other Art mediums are probably feeling pretty neglected lately, but I just can't help it...these are a match made in my creative haven!
 |
| I prepped first before started the video to save some time. I did not coat my canvas with Gesso before starting as I usually do on canvas work. Doing so would not allow the Dylusions to sink in the way I would like. So first, I positioned my Crafter's Workshop Mini Branches stencil, and I penciled in where I wanted this tree image by drawing in a few of the pertinent lines of the main branches so I knew where it would go later. I also did this on the mini canvas that would go on top of it. |
 |
| Although very difficult to see unless turned as certain angles, I stamped wording from Wendy's Evidence of Art Set in Picket Fence Acrylic Paint Dabber from Ranger all over the top of the canvas, and on the three mini canvas pieces as well. I also used her Heirloom Flowers and hand roll stamped them using Broken China Distress Paint on the upper portion and on the minis. I painted the bottom portion in Pebble Acrylic Paint Dabber to act as the mortar between the bricks. |
 |
| I stamped my sentiment from Wendy's Evidence of Art several times to make sure I got a few good impressions. I cut the words apart and used Glue N Seal to apply it to one of the mini canvas pieces. The tissue paper disappears leaving the wording only. I love that! I also prepared the branches on the other mini canvas with the tree stencil and the gold embossing paste and circle stencil to have it ready. |
 |
| I stenciled the ART-C Butterfly using Wendy's Black Embossing Paste on another mini canvas, and then painted in the open areas with Distress Paints. I misted the paints with water and used a tag to clean them up. It made for a beautiful background on this jumbo #10 sized tag to use on a later project. This is where the video starts, but alas there is no video, so I will have to write about it. |
I placed Wendy's Stripes & Dots Border Stencil on top of the penciled in tree and sponged on Picked Raspberries Distress Paint through the Dots to mimic blooms in the distance. I then taped the tree stencil on where it was supposed to go. I used Wendy's Gold Embossing Paste and applied it on to the stencil. I removed it and dried it with a heat tool. It puffs a bit, and turns golden and metallic rather than the butterscotch color you see in the jar. It's a gorgeous color. I added about a tablespoon of the White Embossing Paste into a cup and added about 3 drop of Tea Dye Distress ReInker to the Paste. I stirred it up a bit and applied it through a taped down Brick Stencil on the bottom portion of the canvas. You can color Wendy's Paste with any ReInkers, Alcohol Inks, and even Paints! After I dried the bricks, I stamped some of them with the Normandy Lace Stamp from Wendy's Believe In Art Set using Frayed Burlap Distress Paint. I did the same using Black Soot. This makes the bricks look more real, and the images don't have to be crisp. I used Vintage Photo and Walnut Stain Distress Paint on the tree and on the bricks in a few spots for detail and contrast. I covered the sky and tree portion with paper to protect it, and then misted the bricks with Black Marble and Melted Chocolate Dylusions. The parts of the brick painted with Distress Paint resisted the Spray...so cool. I dried this, and then covered it up. I sprayed the sky and tree portion with Calypso Teal Dylusions. The tree resisted the Dylusions...oh how I wish you could see this via video!!! Don't worry though, I will do another.
 |
| After I misted and dried, I adhered the branches and butterfly mini canvases. I cut a strip of Grunge Paper and painted it with Pebble, scratched it up a bit, and gave it a little Dylusions. It will be the top of the wall. Next, I painted a Wendy Pot Art Part with Spiced Marmalade Distress Paint, and misted it with Melted Chocolate. Then I stenciled Wendy leaves and an ART-C Flower with White Embossing Paste, dried that, and painted them with Distress Paints. I also stenciled on the Pot as well, and added a button for the center of the flower. I added on the sentiment canvas. |
 |
| I added some Picked Raspberry Distress Stain to a Mini Mister and gave these mini roses a pink color, and then added a little more with the same color Distress Paint. I adhered these to the tree, and one lone bloom to the wall. A little free hand doodling finished this canvas off. |
I don't even have to ask, because I know you all love COLOR probably like I do, but do you have a favorites technique to show your love of color? Maybe you just want to show your favorite medium or even favorite color. Whatever the case may be, create some type of Art using a color medium some how, and enter it into our challenge. You just might be the lucky winner of a $50 voucher to Simon Says Stamp. You can also be named as one of the "Top Three Picks" for this challenge. Good luck, and visit the other DT member's blogs to behold the colors of the rainbow!
Supplies:
I hope your hands get creatively dirty soon!